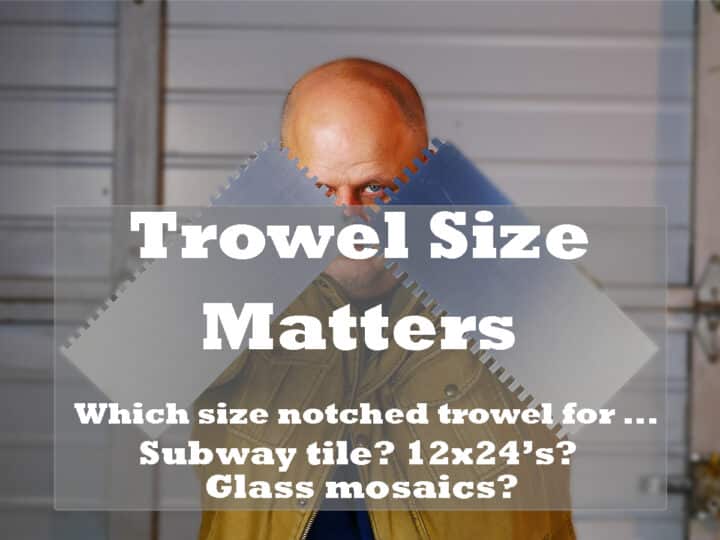
• Skip to primary navigation
  • Skip to main content
  • Skip to primary sidebar
  • Skip to footer
  • Home
  • Blog
  • About
  • Contact Me

www.diytileguy.com

Tile installation blog for the Do It Yourselfer

  • Waterproofing
  • Products
  • Tips & Tricks
  • Tutorial
  • Tool review
  • Video
You are here: Home / Products / Trowel Size Matters: Which trowel size do I use for …?

Trowel Size Matters: Which trowel size do I use for …?

February 13, 2021 by DIYTileGuy 163 Comments

Share this post!

84shares
  • Share
  • Tweet
  • Reddit
  • Email

I get asked about tile trowel size a lot and it makes sense. The boxes of tile that you buy usually don’t tell you which trowel to use with them.

Finding the instructions on the trowels or the bags of thinset is a hopeless endeavor. It seems as though it’s a big secret.

man holding w tile notched trowels

Estimated reading time: 10 minutes

Table of contents

  • Why does trowel size matter?
    • Asking which tile trowel size to use is the wrong question
      • It’s all about the coverage
      • What’s the proper amount of mortar to have underneath my tile?
        • Bottom line 
  • Notched Trowel Size Guide
    • ⅛ inch x ⅛ inch square notch trowel
      • Kerdi Trowel
    • ¼ inch x 3/16 inch V-notch trowel
    • 3/16th x 3/16th square notch trowel
      • Ditra Trowel
    • ¼ inch x ¼ inch square notch trowel
      • Ditra-Heat Trowel
    • ¼ inch x ⅜ inch square notch trowel
    • ½ inch x ½ inch square notch trowel
    • Specialty trowels
      • Euro Notch trowel
      • Slant notched trowel
      • Margin Trowel
  • Best Practices when Troweling mortar
    • Directional Troweling
    • Back Buttering Tile
  • FAQ about tile notch trowels

Why does trowel size matter?

The notches are important on trowels. They leave an even and consistent amount of mortar down to set your tiles into.

Furthermore, the purpose of the notches is to give the mortar a place to “collapse into” once the tile is installed and compressed down.

But here’s the problem:

Asking which tile trowel size to use is the wrong question

I know this seems ridiculous. You’re asking a very simple question and would like a simple answer.

However, because there are so many variations in tile, even in tiles that look similar, it’s not as straightforward of an answer as you would think.

Consequently, what you should be asking is: “Am I getting the proper mortar coverage underneath my tiles?”

It’s all about the coverage

For example, let’s say that you have a ¼ inch x ¼ inch square notched trowel that works great for Home Depot Restore 3×6 subway tile. Additionally, you’ve found this trowel to place the perfect amount of mortar for these tiles.

So, you decide to use this notch trowel again for your new 3×6 extra-thick and wavy handmade tiles from the local specialty store that all the designers rave about. 

But this time you find that there just isn’t enough mortar underneath. It’s not transferring over to the back of the tile. 

Well then, what happened? It’s still the same size tile, isn’t it?

To summarize, this is why it’s important to check your mortar coverage no matter which size trowel someone says to use.

What’s the proper amount of mortar to have underneath my tile?

The proper amount of mortar underneath a tile will allow the tile to be fully supported by the mortar without uncontrollably oozing out of the grout joints. More on this below.

Watch full length Trowel video on the DIYTileGuy Youtube Channel

For a more exact definition, the American National Standard Specifications for the Installation of Ceramic Tile (ANSI, for short) came up with the following guidelines:

  • dry areas need a minimum of 80% coverage
  • wet areas (inside a shower, for example) need a minimum of 95% coverage
  • Natural stone tiles need a minimum of 95% coverage
Bottom line 

You’ll need to pick the tiles back up from time-to-time to make sure you’re getting good coverage.


Notched Trowel Size Guide

This post contains affiliate links. The site owner may earn a commission should you click on an affiliate link and make a purchase. Read more

⅛ inch x ⅛ inch square notch trowel

This is about the smallest notch size trowel that we use in the tile world. Anything smaller is typically for glue applications.

The ⅛ inch square notch trowel is used for some thin waterproof membranes. Which ones? You’ll have to read the instructions for the brand and product that you are installing.

This trowel is also used, occasionally, for very thin glass mosaic tiles with flat backs.

See trowel at Amazon

Kerdi Trowel

Schluter Systems has their own branded Kerdi Trowel for installing their Kerdi Shower System. The Kerdi Trowel is simply a ⅛ x ⅛ inch square notch trowel. 


¼ inch x 3/16 inch V-notch trowel

This trowel is used for some thin waterproof membranes. Additionally, certain uncoupling membranes are installed with this size trowel. Again, you’ll need to check what the manufacturer requires for the particular membrane that you are using.

Small mosaic tiles like small, thin hex or penny round tiles are examples that would likely require this trowel size. 

See trowel at Amazon

3/16th x 3/16th square notch trowel

This trowel size didn’t use to be common until recently. I use this trowel wherever I would use the ¼ x 3/16 inch V-notch trowel. They apply similar amounts of mortar.

Ditra Trowel

The Ditra Trowel is simply a 3/16 x 3/16 square notch trowel. Technically, they say that it’s 5/64 x 5/64. This trowel size is what you would use to install the ⅛ inch thick Ditra Membrane.

See trowel at Amazon

¼ inch x ¼ inch square notch trowel

This is, quite likely, the most common size of trowel that tile setters own. We use this trowel size for:

  • Cement board
  • Certain uncoupling membranes
  • Some of the thicker uncoupling membranes like the uncoupling heat membranes
  • Some mosaic tiles typically in the 2-3 inch range
  • Certain glass mosaic tiles such as the mixed linear glass mosaic tiles that you see in the video
  • Subway tile and other ceramic tiles up to 6×6 inches square
  • Pebble tile
  • As well as other applications
See trowel at Amazon

Ditra-Heat Trowel

The Ditra-Heat Trowel is a ¼ inch x ¼ inch square notch trowel. You would use this size with Ditra-Heat, Ditra-Heat Duo, and Ditra XL.


¼ inch x ⅜ inch square notch trowel

This trowel would be used for some of the thicker uncoupling heat membranes (check with the manufacturer).

This sized notch trowel is also a great size for installing 12x12s, 13×13’s, and 16×16’s.

Additionally, I like to use this size trowel for the bigger “subway” tiles such as the 4×12’s and 4×16’s. 

See trowel at Amazon

½ inch x ½ inch square notch trowel

The big ½ inch square notch trowel is used for big tiles. You want to use this for most tiles that are 16-inches and larger. So, this is a good trowel size for 12×24’s, 16×16’s, 6×24’s, 8×36’s, wood-look plank tiles, etc.

Additionally, it’s a good choice for natural stone tiles 12×12 and larger like marble, granite, and travertine.

See trowel at Amazon

Specialty trowels

Euro Notch trowel

The Euro notched trowel is an innovation that is designed to collapse the ridges in the mortar in a more efficient way.

This type of trowel will often be specified when installing the really large thin porcelain tile panels that are becoming more popular today.

See trowel at Amazon

Slant notched trowel

Slant notched trowels are also designed to collapse the ridges in the mortar more easily. These trowels are a little harder to come by, though.


Margin Trowel

The margin trowel has nothing to do with combing mortar. Rather, it’s a tool that every tile setter owns and uses in a variety of ways.

From scooping mortar out of the bucket, to lifting tiles, to cleaning the mortar from around the edge of the tile, it really is an essential tool.

Margin trowels come in two different sizes but the 5-6 inch is the most popular.

See trowel at Amazon

Best Practices when Troweling mortar

Yes, there are even best practices when troweling mortar on a wall or floor. Please keep in mind these are not rules but simply recommendations.

The bottom line is always to get the required amount of mortar coverage on the back of the tile. These two tips will help you achieve this goal.

Directional Troweling

When troweling thinset mortar, the best way to do it is to comb the notches in one direction. You then install the tile and wiggle it back and forth against the notches. This is the best way of collapsing the ridges into one another.

Additionally, when installing a rectangular, or oblong tile, you want to comb the notches so that they are perpendicular to the long direction of the tile. The reason being that this is the shortest path for air to escape.

Back Buttering Tile

Back buttering is another practice that helps you achieve maximum mortar coverage on your tile. What the heck is back buttering?

It’s when you “key in” the mortar to the back of the tile. In other words, you’ve spread the mortar notches in one direction on the floor or wall, you then spread mortar on the back of the tile using the flat side of your notch trowel and scrape it off. 

What this does is:

  • Force the mortar into the back of the tile
  • Fills in the uneven backing so that it’s a flat surface

Back buttering should be done on any tile that is 12×12 and larger, in my opinion.

Doing these two things, directional troweling and back buttering your tile, will help you to achieve the minimum amount of mortar required for your project.


FAQ about tile notch trowels

What size trowel for subway tile?

Typically, a ¼ inch x ¼ inch square notch trowel is perfect for the average subway tile

What size trowel for 12×24 inch tile?

A ½ inch x ½ inch square notch trowel or a ¼ inch x ½ inch square notch is a good size for this tile. 

Don’t forget to trowel your notches the short way and back butter the tile

What size trowel for mosaic tile?

A ¼ inch x ¼ inch square notch trowel is typically the right choice for 2×2 and 3×3 mosaic tiles that come in sheets.

What size trowel for 6×24 tile?

A ½ x ½ inch square notch trowel is my preferred trowel for this size tile. You could also use a ¼ inch x ⅜ inch square notch trowel. 

Make sure to fill the hump in the center of the tile with mortar.

What size trowel for 6×36 tile?

A ½ x ½ inch square notch trowel is a good choice for this size of tile.

What size trowel for 12×12 wall tile?

A ¼ inch x ⅜ inch square notch trowel works well for most 12 x 12 tiles (30cm x 30cm).

What size trowel for penny tile floor?

¼ inch x 3/16 inch V-notch trowel works well for most penny round tiles. A 3/16 inch x 3/16 inch square notch trowel (Ditra trowel) works just as well.

Square notch vs U notch tile trowels

This is when the end of the channel on a notched trowel is rounded instead of square.

It’s my understanding that the U-notch is supposed to perform better but I don’t know the reason why. I think the idea is that is would compress into the back of the tile in a better way. 

In my opinion, there really isn’t a compelling reason to choose a U-notch over its similar-sized square notch counterpart. It will spread slightly less mortar than the square notch as the measurement is taken at the top of the arch.

How much mortar is left under the tile once it’s compressed?

Let me start by saying that this isn’t a straightforward calculation. It’s usually the engineers that are trying to precisely determine how thick the whole tile assembly is going to be.

Take a ¼ x ¼ inch square notch trowel, for example. One might think that since the notch is ¼ inch tall and ¼ inch wide that compressing the tile simply fills in the empty space. Therefore, half of the ¼ inch high notch fills in the empty space leaving it ⅛ inch high.

I’ve even seen another blog use this very calculation but it isn’t correct. What they don’t factor in is that you are holding the trowel at an angle and not straight up & down. Therefore the mortar that is combed onto the floor isn’t ¼ inch high.

So in the case of the ¼ x ¼ inch square notched trowel, the actual amount of mortar might be closer to 3/32. 

But, again, the variables are the angle of the trowel, the consistency of the mortar, how well the notches are collapsed, and whether the tile was back buttered, or not.

What’s reassuring is that even if your calculations are slightly off you can still make small adjustments to make up for variations.

Share this post!

84shares
  • Share
  • Tweet
  • Reddit
  • Email

Related Posts

  • subway tile layout lines
    Subway Tile Installation: Three Basic Tips

    Subway Tile Installation: Three Basic Tips Subway tile- what's not to like? It's classic and…

  • direction wood plank tiles
    More tips for installing wood look tile flooring

    Installing wood look tile Wood plank tile floors have gained a good amount of popularity…

  • Improved thinset coverage
    The trick for getting better thinset coverage under your tiles

        The trick for getting better thinset coverage under your tiles   I've worked…

Powered By Related Posts for WordPress

Filed Under: DIY, Products, Video Tagged With: ditra, ditra heat, kerdi, large format, membrane, Sheet Membranes, stratamat, thinset, uncoupling membrane, wood plank tile

Reader Interactions

Comments

  1. Evelyn says

    April 20, 2016 at 12:08 pm

    Hi Jim!
    I was wondering if a 1/4 x 1/4 square notch trowel would be suitable for 7×20 tiles that I am laying down in my kitchen? I went to a tile shop and they told me it’d be okay. I am seeing many posts on 1/4 x 3/8 but no one really mentions the 7×20 tile I will be using. Appreciate the help!

    Reply
    • DIYTileGuy says

      April 20, 2016 at 12:45 pm

      My post is simply a guideline. It’s up to the installer to determine the Trowel size that will give the best coverage.

      However for most tiles that size I would probably use a 1/4×1/2 of even a 1/2×1/2. You could probably use a 1/4×1/4 and use the notched side on both the floor and the back of the tile. This would kind of like be using a 1/4×1/2.

      Reply
      • Evelyn says

        April 21, 2016 at 6:48 am

        I appreciate the input, I will take that into consideration as well. Great site, it has definitely helped me with my kitchen project. Keep up the great work, Thank you!

        Reply
      • William says

        February 12, 2018 at 11:33 am

        Is it ok to use a 1/2 x1/2 trowel for a 8×48 tile. That’s what I read before.

        Reply
        • DIYTileGuy says

          February 13, 2018 at 7:11 am

          I hate to say it but- it depends. The key is to get enough mortar under the tile. Will a 1/2 x 1/2 inch trowel do that? Possibly. But this is where floor flatness, mortar consistency, and tile warpage come into play.

          So I think the question to ask is: Am I getting enough mortar under my tile?

          I would check this frequently by picking up the tile and looking underneath it. You may find, for example, that the center’s aren’t getting enough mortar. You may find that you have to notch both the floor and the back of the tile. This may require two different size notch trowels. You may find that you have to notch the center of the tile and back butter (flat trowel) the ends. The trowel is just a tool to gauge the mortar.

          But I typically start with a 1/2 x 1/2 notch trowel and adjust from there.

          Reply
        • David says

          October 6, 2019 at 11:06 am

          I would reccomend 1/2 by 1/2

          Reply
      • Rick says

        April 23, 2020 at 6:22 pm

        I have an 800 square-foot install of 12“ x 24“ plank tiles. The homeowner wants no grout lines. After the install it looks like crap because of all the crowning and not even joints. Now I understand why. This has been very informative and I thank you. Rick at qualified maintenance

        Reply
    • Sean says

      December 29, 2019 at 3:20 pm

      No, use 3×8 square trowel unless their is super uneven laying then move up to 1/2 by 1/2

      Reply
    • Lydia says

      March 7, 2020 at 5:36 am

      I was wondering what trowel size you recommend for installing 3/4 penny mosaics? Thanks

      Reply
      • DIYTileGuy says

        March 8, 2020 at 1:03 pm

        If they are thin, maybe 1/8 to 1/4 inch, then you’ll want a 1/8×1/8 or a 3/16 v-notch trowel. If they are thicker then a 1/4 inch square notch trowel would be more appropriate.

        Reply
  2. art geis says

    October 5, 2016 at 3:24 pm

    Hello, putting down large profile trav in a french pattern. I need very exact measurement at transition to the
    new hardwood floor…..
    I have to build up the subfloor of this tile entryway 2 1/4″. I will use a combo of plywood and hardie board. 1/2″ trowel thinset……should I estimate the thinset at 1/2″ or 1/4″.
    So in your estimation how much is the thinset compressed?
    Appr your thoughts

    Reply
    • DIYTileGuy says

      October 6, 2016 at 9:05 pm

      I just ran into this situation and chose to bring the floor up with mud (drypack) rather than plywood/hardi. However, to answer the question I would say that a 1/2″x1/2″ notch trowel would leave less than 1/4 inch of adhesive. Probably more like 1/8-3/16. But you can always bring things up rather take away material. Your probably best leaving yourself about 1/4 inch and adding a bit more adhesive at the entry if necessary.

      Reply
      • Brian says

        September 17, 2018 at 11:43 am

        People often forget to calculate based on the angle of the trowel. For example, a 1/2″ square notch is usually said to leave a 1/4″ bed once the half inch notches are all flattened out. However, since you comb the trowel at a 45 degree angle, you are effectively reducing the height of the notches to SIN(45)=.707, or 71% of their actual height. The 1/2″ square notch then leaves a .25*.707=.176″ bed; or just under 3/16″.

        Reply
        • DIYTileGuy says

          September 19, 2018 at 8:22 pm

          Correct! Also, the metal teeth wear down in a non-uniform way. It’s basically impossible to come up with an exact measurement for mortar thickness for several reasons. But your measurements are probably the best answer so far.

          Reply
          • Confused... says

            June 6, 2020 at 4:39 pm

            I’m confused about this formula

            “ The 1/2″ square notch then leaves a .25*.707=.176″ bed; or just under 3/16″.

            Where did the .25 come from? Should that be .50*707, or does this include some sort of flattening rule?

            I’m trying to replace some 1/2” thick tile with 5/16” thick tile, and need to match the overall thickness. The existing tile appears to have only 1/16” Mortar, for total thickness I need match of 9/16”. To leave the needed 1/4” mortar thickness, how deep should the notches be?

          • DIYTileGuy says

            June 7, 2020 at 10:20 am

            I’m not sure about the formula. It might be cut in half because of the teeth of the trowel.

            The main thing is to get them as flat as you can. I think you’ll probably have to notch both the substrate (floor or wall) and the tile to build up 1/4 inch. If it’s too low- add more. If it’s too high- take some away. It’s probably less science and math than you would think.

          • Confused says

            June 6, 2020 at 4:41 pm

            I forgot to mention in my prior post…I’m replacing the edge trim bullnose. Tiles are 3×12 bullnose

          • Jake says

            August 6, 2020 at 10:39 am

            The smaller size (from the equation) is because you don’t hold the trowel at a 90degree angle when you apply the mortar. The trowel is at more like 45degrees, so the 1/2” notch doesn’t actually leave 1/2” tall mortar.

          • Steve says

            November 25, 2020 at 9:48 pm

            For “Confused”, I believe the .25 vs .50 is a “six of one, half a dozen of the other” idea. Normally a 1/2 x 1/2 would be expected to result in 1/4” (half that 1/2” height) mortar thickness once the notches of mud are flattened. But because of the angle of trowel, as was nicely explained, the result will be roughly 0.71 of what you’d expect (ie: .71 x .25). Or… you could start out saying the ridges would only be 0.71 x 1/2” high (about 0.35) and then your mortar thickness is half that (about 0.175), and you end up at the same place.

          • DIYTileGuy says

            November 26, 2020 at 6:24 am

            Thank you!

  3. Gary L says

    October 8, 2016 at 2:55 pm

    Hi, and thanks for your service to us all!…..installing 48″x8″ planks……slab on grade floor, i tore out previous 12″x12″ ceramic..of course, previous thinset still VERY firmly on floor…but pretty darn level!…..do you reccomend a leveler type product to cover previous trowel lines?, or as long as its flat, im ok to go over?….. ive done tons of ceramic, but these are my 1st planks…(using in my kitchen)

    Reply
    • DIYTileGuy says

      October 8, 2016 at 3:20 pm

      The proper way to do it would be to grind down the old thinset. Probably using dust-free grinding equipment (shop vac, dust shroud, etc). But if the thinset is down good then you can probably go right over it and have the tile bond to it. Obviously your floor height will be higher than before.

      Reply
  4. Jay Son says

    October 11, 2016 at 4:35 am

    Nice article. I’m getting ready to start my first tile job in my small shower. Using 10×13 tiles. I plan to use a 1/4 x 3/8 trowel, or would a 1/4 x 1/2 work better? Also, what trowel can I use to apply thinset in the niche? Would it be ok to back butter the tiles instead of spreading it on the back/sides in the niche?

    Thank you for the help and great site!

    Reply
    • DIYTileGuy says

      October 12, 2016 at 9:44 am

      I would start with the 3/8 trowel and see how that works. I would think that would be the one to use. And it’s OK to back trowel the tile. A best practice would be to flat trowel the surface also. In this case that would be the niche.

      Reply
  5. william hunter says

    November 14, 2016 at 11:32 am

    Great article, I cant find a good answer to this though. I am about to start 3 tile projects all of which are on a slab. The first is Wood look tile (LFT) in my kitchen so i plan to use LFT Thinset and a 1/2 x 1/2 trowel. The Second and third are just a little out of my “norm” meaning i just have never laid Mosaic tiles on a floor application. My master bath we have 12×12 sheets of white marble mosiac tile each tile on the sheet is roughly 2″x2″, I was planning to use white thinset and a 1/4 x 1/4 Square notch. I am not sure that it will make a huge difference, but i was thinking to maybe use the 1/4 x 3/16 V notch instead? These tiles are roughly 1/4″ thick if that matters, Any input?
    Also, my quest bath we are using a 12×12 ceramic tile mosaic (the small circles that are about 3/4 to 1” each). these tiles are thinner, like 1/8” thickness. Originally i was going to go with the 1/4 x 1/4 square notch but there are too many options. Do you think ones better than another for these tiles on a floor application?

    Reply
    • DIYTileGuy says

      November 14, 2016 at 7:11 pm

      The 1/4 inch square notch might work for the 2×2’s or it may be too much. If so, I would step down to the 1/4 inch V-notch. The same V-notch will probably work for the smaller round tiles.

      But you always have to make your own assessment.

      Reply
  6. peter sooklal says

    November 20, 2016 at 3:59 pm

    thanks for all the info very informative and to the point

    Reply
  7. vince says

    December 30, 2016 at 6:23 pm

    installing 6 by 6 cheap Home Depot tile on shower wall, what size grout lines do you recommend? also, what size trowel would you use?

    Reply
    • DIYTileGuy says

      December 30, 2016 at 8:15 pm

      The 6×6 tile have built in spacing lugs on the sides. So you can set them tightly together if you like but you’ll need to use an unsanded grout. You can space them further apart if you like also.

      A 1/4 x 1/4 square notch trowel would be the best for those.

      Reply
  8. Kristin says

    January 10, 2017 at 10:46 am

    When it comes to level systems using straps, caps and a plier, what is the best way to determine how many of each are needed with 6×48 tile? It’s a large job- 2400sqft
    The manufacturer didn’t list this size in the formula.

    Reply
    • DIYTileGuy says

      January 10, 2017 at 6:44 pm

      I just looked at the download page for MLT systems and it looks like they figure 5/per tile (1 side only) for 16cm x 120cm plank tiles (6×48). That’s if I’m reading and converting things correctly. It’s Italian and in metric. Here’s a link to their download page and I downloaded the layout chart.

      The only wedges (or caps) that you will need are enough to keep busy for a day. They can be reused the next day after removal.

      mlt system layout calculator

      Reply
      • Kristin says

        January 11, 2017 at 8:07 am

        Thank you very much for your quick response. This is helpful.

        Reply
        • John says

          June 27, 2019 at 9:57 pm

          Starting my first tile job. And using 12 inch as well as 18in tiles. To save costs can I use a 1/2 U trowel for 12in tile? Also can you use med nonsag mix mortar on a 12in tile?

          Reply
          • DIYTileGuy says

            June 30, 2019 at 9:55 am

            Yes, and yes.

  9. Vladi says

    March 1, 2017 at 11:44 am

    I have 24″x24″ tiles and what better trowel size for my tile work?

    Reply
    • DIYTileGuy says

      March 1, 2017 at 5:17 pm

      1/2 x 1/2 or 3/4 x 3/4

      Reply
  10. Brooke says

    June 28, 2017 at 7:17 am

    I am applying a custom mosaic floor tile in my 1920’s home. The individual tiles are 3/8″ square and I am also using 1″ hexagon mosaic. What trowel notch size would you recommend for such a small tile size?

    Reply
    • DIYTileGuy says

      June 28, 2017 at 9:25 am

      It’s hard to give a definitive size but a 1/4 x 5/16 V notch towel would be a good one to try. Also a 1/8 x 1/8 square notch may work for the smaller tile.

      You want as much thinset as possible under the tiles without the mortar coming up through the grout joints.

      Reply
  11. Will Marzolf says

    August 10, 2017 at 12:46 pm

    I will be installing 7″ x 71″ ceramic plank tile on walls and a ceiling in a commercial setting. Trowel size is detrimental to the safety and quality of the finished product. I do not want too much thinset as it could keep the product from firmly staying in place while curing. Would love your recommendation for an appropriate trowel for this task.

    Thank you

    Reply
    • DIYTileGuy says

      August 10, 2017 at 5:32 pm

      I understand what you are asking but understand that trowel size isn’t a detriment- the trowel is simply a gauge of how much mortar goes underneath the tile. The bottom line is that you want to achieve is 80% minimum mortar coverage underneath your tiles. How you get there is open for debate. I would be absolutely shocked if a 1/2″ x 1/2″ trowel will get you 80% coverage. I don’t think it will get close. So that means that you are going to be putting a lot of mortar under those tiles.

      Too much thinset isn’t your enemy. Too little is. I’ve installed plenty of tile on ceilings before. If you want to skimp on mortar then make sure that you wear a hard hat because too little will cause them too fall off and crash. A generous amount of mortar will allow them to suction onto the ceiling. The suction is what you want.

      Reply
  12. Nate says

    August 28, 2017 at 10:07 am

    From what I understand the only advantage of using a U notch instead of a square notch is when you push your tile into the thinset, the U notch spreads from the bottom out and the square notch has a greater chance of folding over and trapping air. I still prefer square notch over U notch though.

    Reply
    • Nate says

      August 28, 2017 at 10:11 am

      Also a U notch lays down less thinset than the same size square notch.

      Reply
    • DIYTileGuy says

      August 28, 2017 at 8:24 pm

      Good feedback and makes sense. Thanks!

      Reply
  13. Colleen says

    November 12, 2017 at 11:36 am

    Though enthusiastic, I have minimal previous tile experience, but plan to do quite a bit of it in a small house under construction right now. First up is a pad under a freestanding woodstove. It’s about 31″ x 40″. We’ve got concrete there now. The tile I’m planning to use is sandstone 12 x 12, 3/8″ thick, smooth on both sides, with a border of 1 inch mosaic tile. I watched a very credible YouTube video (he’s a pro!) that said natural stone tile should be buttered smoothly on the back, in addition to the notched application of thinset on the floor, and coverage should be at least 95%. Does that sound reasonable to you? It sounds like you would recommend a 1/2″ square notched trowel?

    Reply
    • DIYTileGuy says

      November 12, 2017 at 3:44 pm

      Yes. What the installer is referring to is called “back buttering” and it is a best practice.

      For a trial size, a 1/4×1/2 notch trowel would probably be perfect. You’ll run into some issues with the mosaic border, though.

      You might check out my post on shower accent strips for a way to install those. But do the big tiles first and save the border for last.

      Reply
      • Brian says

        September 17, 2018 at 11:51 am

        It is either the best practice, or it isn’t. It can’t be “a” best practice, because that would suggest it is one of many best things. Only one thing can be best. Stop letting marketing folks mess with you.

        Other than that… 🙂

        Thanks for the tips on the accent strips. Good idea, there.

        Reply
        • DIYTileGuy says

          September 19, 2018 at 8:17 pm

          “A best practice is a method or technique that has been generally accepted as superior to any alternatives because it produces results that are superior to those achieved by other means or because it has become a standard way of doing things, e.g., a standard way of complying with legal or ethical requirements.” ~Wikipedia [emphasis mine] https://en.wikipedia.org/wiki/Best_practice

          Reply
  14. Bill D says

    November 22, 2017 at 7:47 pm

    I’m laying down Marazzi 8×24 plank tile what size notch trowel would you suggest…

    Reply
    • DIYTileGuy says

      November 22, 2017 at 9:10 pm

      If it were me I’d use a ½ x ½ square notch but a ¼ x ½ notch may work ok also.

      Reply
  15. Billie Jo Boughter says

    January 17, 2018 at 3:06 pm

    Hi, I saw a similar comment and response to a guy installing 7×71” plank tile. I will be installing something similar in size, that being 8×68”. I didn’t quite understand your answer. You didn’t think he would achieve 80% coverage with the 1/2”x1/2”. For my application on a wall, would you recommend the 3/4”x 3/4”? How do you know when you have good coverage? Your tile will stay on it’s own while drying?

    Reply
    • DIYTileGuy says

      January 17, 2018 at 9:17 pm

      The 80% coverage guideline is for dry areas but if it’s a wet area, like a shower wall, then the guideline moves up to 95%.

      So to achieve that would require at the very least a 1/2 inch notch trowel and probably more like a 3/4 inch and you still may not get there.

      You may have to notch the back of the tile in the middle in addition to the wall. The tile may not require a 1/2 inch notch- you may only need a 1/4 x 1/4 inch square notch. But the middle of the tile is where you’ll see the lightest amount of thinset.

      To check for coverage, simply pull the tile back up after installing it. You’ll have to guess the amount of coverage that is there but if you see thinset notch lines then you don’t have enough mortar under the tile.

      Reply
  16. paul says

    January 27, 2018 at 2:33 pm

    What size trowel would you recommend for a 6″x36″ plank tile? Can’t tell if this one falls under the “larger than 15” for 1/2 square trowel or the “bigger than listed” 3/4.

    Reply
    • DIYTileGuy says

      January 27, 2018 at 2:44 pm

      1/2 or 3/4. Probably bigger is better for those tiles.

      Reply
      • paul says

        January 28, 2018 at 10:27 am

        Thank you. What are the consequences of using too much mortar because the notch size is too large other than going through the stuff faster and paying more? Is it more important to not use too much with thinset like CBP flexbond vs medium-bed mortar like the large format tile stuff like CBP ProLite?

        Reply
        • DIYTileGuy says

          January 28, 2018 at 10:56 am

          Besides what you’ve mentioned, the consequences are that:

          1.you can exceed the limits of the mortar by it being too thick of an application. This is more of a danger with thin bed mortars than it is with medium (LFT) mortars.

          2. It makes for a messy installation as the mortar will come up through the grout joints.

          To much is probably preferable to too thin assuming you’re within the thickness limits.

          Reply
  17. paul says

    February 18, 2018 at 2:31 pm

    If I get a trowel that’s a bit too big, like 3/4×3/4 instead of 1/2×1/2, can I compensate by holding it at a flatter angle as I cut the notches? I mean something like 30 degrees or less instad of 45 degrees.

    Reply
    • DIYTileGuy says

      February 20, 2018 at 7:31 am

      Yes, you can. You can also mix your mortar thinner/thicker.

      Reply
      • paul says

        February 20, 2018 at 10:06 am

        Could you please explain how the mix thickness would help? Seems like if I mixed it thinner I would get the same bead and the same coverage but there would be less actual mortar material behind the tile once it dried and the bond would be weaker.

        Reply
        • DIYTileGuy says

          February 22, 2018 at 7:09 am

          So one of the issues with having too much mortar is that it will come up through the grout joints and make a big mess. Also, it can work to not keep the tile high enough.

          By mixing the mortar thicker you can probably negate this result.

          On the other hand, if you find that your mortar thickness is plenty high you could mix the mortar thinner and maybe that helps counteract this issue. You may choose to do this if you are coming up on a higher section of a floor or if you need to meet up with a lower neighboring flooring such as hardwood.

          But, for the most part, you should just keep the mix consistent. A 3/4 inch notch trowel should do just fine for 12×24’s and larger.

          Reply
          • Mark says

            January 13, 2020 at 5:12 pm

            How about 12 x 24 in a shower….1/2 x 1/2 on walls and back butter 1/4 V ?

            Thanks,
            Mark

          • DIYTileGuy says

            January 14, 2020 at 11:43 am

            Typically, you’ll be OK if you simply flat trowel the back. Sometimes it makes sense to leave a little extra in the middle to compensate for the curvature of the tile.

    • paul says

      April 24, 2019 at 9:14 am

      Crossposting from the john bridge forum, sorry.

      I finally got to setting that floor and used a half-ellipse notch trowel that falls between 1/2×1/2 and 3/4×3/4. My problem was that tiles were floating on a thick layer of mortar, I had to press them into level and I think they ended up pitching and rolling on me. Since I’m not very good and under the gun from the mortar skinning over, it did not come out especially flat. Lots of oozing out of the joints but that’s less of a problem. Clips didn’t help much if at all. Sad thing is the floor was flat enough that when I laid the tile out without mortar they were flatter than the finished product. If that’s my starting point, would it be beneficial to use a smaller notch trowel so there’s less room for error? I’m considering ripping it all up and redoing everything (except it’s over ditra so it’s angle grinder then hammer and chisel a few inches at a time…).

      Reply
      • DIYTileGuy says

        April 27, 2019 at 12:35 pm

        Sorry to hear about your experience but I would need to know what size the tile is that you are working with and if there’s a pattern then that’s relevant also. It’s unusual that they would go in worse than the dry-lay but it could be too much mortar or it could be the mortar consistency.

        Let me know the tile size and I’ll check back in later today.

        Reply
        • paul says

          April 27, 2019 at 2:55 pm

          I may be exaggerating about the dry layout having been better, I didn’t examine it as closely as the set tile, but it was pretty flat. Flat enough that I thought it’d be just a matter of tweaking. It’s 36″x6″ tile laid with 33% overlap. Tile is rectified so the planks aren’t detectably bowed. The mortar thickness is around 3/16 or a bit more which is about what I expected but there’s a few spots where it may have built up to near a quarter inch. There were a few tiles that were way out of whack that I tore out but the rest are within a credit card’s thickness or just a bit over.

          Reply
          • DIYTileGuy says

            April 28, 2019 at 8:29 am

            With plank tiles, especially 36-inch, they are going to be tough to get flat. Even if you think the floor is flat you’ll find out that it isn’t flat enough.

            The best thing is to do one row at a time and place a level, or straight edge, across the top of each row. Any gaps between the tile and straight edge will need to be fixed prior to moving onto the next row. When you do move onto the next row you may find that the first row still wasn’t as flat as you thought. It can be tough. I still recommend using a leveling system even though they aren’t miracle devices.

            I have a hunch that using less mortar isn’t the answer. You may try to thicken the mortar slightly. It’s hard to describe but “peanut-buttery” probably is too thick although I guess it depends on the brand. Yogurt would definitely be too thin for large tiles. Milkshake-like?

            Pretty scientific terms, huh? 😉

  18. paul says

    March 26, 2018 at 5:50 am

    How do you estimate how thick a layer of mortar will be based on what trowel you’ll be using? I need to build the floor up to a specific level, the bottom of a cast iron toilet flange, and I know the thicknesses of all the materials except of course the mortar. I was thinking figure out the cross-section of the notches in the trowel per inch then multiply by sin(30 deg)=1/2 to account for the angle I’ll be holding it at. (so for a 1/4×1/4×1/4 square notch, it’s (0.25*0.25/(0.25+0.25))*1/2=1/16″) Sounds over-precise but I know it’s an estimate. Is there a better way?

    Reply
    • DIYTileGuy says

      March 26, 2018 at 7:17 am

      There really isn’t a reliable way of doing it. What further complicates the issue is the flatness of the floor, what size the tile is, and what the pattern is.

      For example, you may have a hump in the floor 2 feet away from the toilet flange. If you measure the area right near the flange you may calculate one thickness. However, because of the hump in the floor you may have to build the tile up higher than you anticipated.

      But I think your calculations would be extremely close for an ideal installation. You can always make adjustments as you go such as double notching (the floor and the tile) or holding the trowel at an even more extreme angle.

      But if it needs to be exactly precise, I think buying the trowel and field testing is going to be most accurate.

      Reply
  19. Russell Gibbs says

    March 31, 2018 at 9:51 am

    I am about to install ceramic wall.They are 3/8 thick subway tile 3 inches wide by 12 inches long.Would love to know which size trowel would be best. It is a kitchen backlash on drywall.Thanks

    Reply
    • DIYTileGuy says

      April 1, 2018 at 10:11 am

      Probably a 1/4x 3/8 inch notch trowel will work for those.

      Reply
  20. Pam says

    April 12, 2018 at 5:38 pm

    Hi! I have a 2.5 x 8″ tile for a backsplash. Do you think the 1/4 x 1/4 square notch will work, or should I move up to the 1/4 x 3/8″? Thank you!

    Reply
    • DIYTileGuy says

      April 13, 2018 at 12:51 pm

      It depends on the tile but a 1/4 x 1/4 square notch would probably work. If not, the 1/4 x 3/8 would be what I would suggest.

      Reply
  21. Randy says

    May 14, 2018 at 8:03 am

    We are installing 12″x12″ blocks of penny tile for our kitchen backsplash. Will a 3/16″ v notch trowel be ok or should we go with the 1/4″?

    Reply
    • DIYTileGuy says

      May 14, 2018 at 7:31 pm

      The V-notch will probably be ok for those. If you’re getting thinset in the joints then I would down grade to an 1/8 x 1/8. But the V-notch is what I would guess would be best.

      Reply
  22. Bill Albertsen says

    May 30, 2018 at 7:28 pm

    I am installing 1×2 inch split face carrara tiles in 1×1 sheets on a wall.no grout. Will 1/4 square ntvh trowel work best?

    Reply
    • DIYTileGuy says

      May 30, 2018 at 8:18 pm

      That will probably do ok. It’s best to pull a sheet back off and see how well it’s covered. If it’s not covering well then it’s best to step up to a 1/4 x 3/8.

      Reply
  23. Paul says

    June 6, 2018 at 6:33 am

    I’m going to install 8″x48″ plank tile. I also want to back butter the tile. What trial size should I use for the floor and what size for the tile?

    Reply
    • DIYTileGuy says

      June 6, 2018 at 7:08 am

      Well, it always depends. But if you are going to notch tried both sides then you might try a 1/4×3/8 notch tried on both and see how that works.

      Reply
  24. Jon says

    June 25, 2018 at 11:08 am

    For a shower wall with hardibacker covered in Kerdi, and installing 12×24 porcelain tile, would you recommend 1/2 x 1/2 trowel, or 1/4 x 3/8 trowel with back butter? I think 1/2 x 1/2 with backbutter may be overkill?

    Reply
    • DIYTileGuy says

      June 27, 2018 at 7:00 am

      I would use either a 1/2×1/2 or a 1/4 x 1/2 inch notch trowel

      Reply
  25. Gary says

    July 31, 2018 at 5:23 am

    What size trowel should I use for installing a 6″ x 30-40″ x 5/8″ thick marble shower curb sill?

    Reply
    • DIYTileGuy says

      July 31, 2018 at 7:36 am

      A 1/2 x 1/2 or 1/4 x 1/2 notch trowel should be fine. 1/4 x 3/8 trowel would probably work, as well.

      No matter what trowel you use you want to make sure that the thinset coverage is good under the sill.

      Reply
  26. Cristian says

    September 13, 2018 at 8:07 am

    I’m about to install a mosaic marble backsplash in my kitchen. The wall is painted and the Flexbond rep told me I can just sand it to get good adhesion. So I bought flexbond, but now I am not sure what trowel size to use. In the Home Depot video using flexbond to install backsplash, they use a 1/4″ square notch for small marble mosaics. I thought it should be 3/16 V-Notch. The largest tile in the mosaic is 1.5″ by 7″.. I bought a 3/16 V notch but I can return it if it’s the wrong one.
    What towel size would you recommend?
    Their video also shows mixing grout powder and then it becomes a huge mess over the marble. Would the pre-mixed grout be a lot easier to apply than the mix yourself?
    The video is here:
    https://www.youtube.com/watch?time_continue=207&v=2lRBvYsono4
    The grouting looks terrible.. and marble is easily discolored I heard. Your advise would be appreciated! My stone is similar to what they’re installing, but with wider pieces.

    Reply
    • DIYTileGuy says

      September 16, 2018 at 3:33 pm

      I think a 1/4 inch square notch trowel would probably be the correct size but it always depends.

      White thinset mortar is what you are going to want to use. Yes, the kind that’s a powder and you add water to it. Premixed adhesives aren’t what you want for marble.

      For grouting, you’ll want to read the instructions for all products involved- including the marble. But presealing might be a good idea. Either with a natural stone sealer or with a grout release.

      Reply
  27. Imran says

    November 9, 2018 at 3:56 pm

    Sir i am installing 32″×32″ porcelain tile what is the recommended notch if i have very flat stucco and i also want to backbutter tile

    Reply
    • DIYTileGuy says

      November 12, 2018 at 7:40 am

      No less than 1/2 inch notch would be my opinion

      Reply
  28. susan says

    November 30, 2018 at 1:22 pm

    hello,
    what is your trowel recommendation for an 8″x8″ ceramic floor tile?
    thanks much

    Reply
    • DIYTileGuy says

      December 10, 2018 at 7:48 pm

      Depends on how thick and what the back of it looks like. Maybe 1/4 x 3/8?

      Reply
  29. Dan says

    December 20, 2018 at 6:22 am

    Installing 18”x18” x 3/8 porcelain tile on a flat smooth concreat floor . Would A 1/4” x 1/2” notch trowel , be sufishent , and would you recommend back buttering as well ?

    Reply
    • DIYTileGuy says

      December 21, 2018 at 7:27 am

      That trowel would be a good one but I always recommend back buttering no matter what size trowel. 🙂

      Reply
  30. Jerry Billington says

    December 23, 2018 at 11:40 pm

    Hi Jim ,
    I have porcelain tile that is 4×24 and I was told by a tile guy a 1/4×1/4 trowel was ok . I am half way thru my house and read on another place should have been 1/2 x 1/2 trowel . This is my first time doing this so I’m confused and will what I laid so far be ok ?

    Reply
    • DIYTileGuy says

      December 26, 2018 at 4:02 pm

      Trowel sizes are only guidelines. The only thing that truly matters is how well the mortar is covering the back of the tile. You want to aim for 100% coverage. So I would check the coverage on the backs and let that tell you if the size of trowel is ok, or not. My guess is that you will need to step it up to the next size. You might also try back buttering the back of the tile if you aren’t already doing so.

      Reply
  31. Bob says

    January 9, 2019 at 2:03 pm

    i’m installing 12.01 x 12.01 x 10mm mosaic stone tile on a mesh backing for a kitchen back splash. the individual stones ar 9/16″ x 1-7/8″. what size notch trowel would you advise?

    Reply
    • DIYTileGuy says

      January 13, 2019 at 8:32 pm

      Try a 1/4 inch square notch trowel. If you find that mortar is coming through the joints when you are installing then try a 1/4 inch V-notch.

      Reply
  32. Larry says

    February 20, 2019 at 12:22 pm

    I bought some Purple Stained Natural Seashell Backsplash, 1″ x 1″ Square Shell Bathroom Wall Tiles (BK011) in 12 x12 sheets and am going to put a 16″ back splash around the kitchen above the counters. What size Trowel should I use?

    Reply
    • DIYTileGuy says

      February 22, 2019 at 7:23 am

      Looks like I missed this one. You’ll have to experiment a bit and see which one is right for you. I would guess a 1/4×1/4 v-notch trowel but you may find otherwise once you get to installing the tile.

      Reply
  33. Rick Backous says

    February 20, 2019 at 6:08 pm

    Hello, I am installing 3×6 subway tile as a backsplash and am wondering which trowel to use. I was told by the employee at Home depot that the 3/16 x 5/32 V trowel is what I need but since the longest dimension of the tile is 6″ the adhesive states to use a 1/4×1/4 square notch. Who is right?

    Reply
    • DIYTileGuy says

      February 22, 2019 at 7:31 am

      Manufacturer’s instructions are always better than the store associate. In my personal experience, the 1/4 inch square notch is the way to go when installing the average 3×6 tile as well.

      Reply
  34. Nate says

    March 5, 2019 at 10:54 am

    I’m installing 12 x 24 tiles next to hardwood floors, over Detra Heat 1/4″ membrane. Would a 1/4″ trowel be okay for the tile to make sure they are flush with the hardwoods? The hardwoods measure 3/4″, but with 1/4″ membrane, plus the tile, I only have about 1/8″ to the top of the hardwoods when I dry stacked them.

    Reply
    • DIYTileGuy says

      March 6, 2019 at 7:47 am

      The size of the trowel determines the amount of mortar underneath the tile to support it.

      No matter how thick the hardwood is you still need proper coverage underneath the tile and I don’t think a 1/4 inch trowel will get you there.

      Reply
  35. paul says

    May 11, 2019 at 9:02 pm

    I’m using a 1/4×1/2×1/4 U-notch trowel with ProLite mortar. The combed notches are coming out too thin unless I clean and wet the trowel with a sponge before combing the mortar. I think the prolite is sticking to the trowel. Is this normal or am I mixing the mortar too thick?

    Reply
    • DIYTileGuy says

      May 12, 2019 at 10:12 am

      If you mean that they aren’t tall enough then that probably has to do with the angle of the trowel. But I think you are talking about width. This can be from having too little thinset that you are troweling but it’s also usually a sign of thin mortar- not thick. If it’s thicker mortar then you usually have no trouble getting the notches to take shape.

      Reply
      • paul says

        May 12, 2019 at 6:26 pm

        I do mean width. Too much space between ridges and the ridges look like tall narrow v-notch ridges. That it’s too thin is surprising. It’s thick enough that if I pick up a gob with the margin trowel, hold it upside-down and shake it a bit, the stuff doesn’t really slump or wobble. The ridges I do get stay up on the wall very well. The light-weight stuff is tricky, I”ll have to play with it more.

        Reply
        • DIYTileGuy says

          May 15, 2019 at 5:59 am

          It’s hard to say. Measuring the water and dry mortar prior to mixing will tell you if you are in the right recommended range. If you are in that range then it should be OK.

          Reply
          • paul says

            May 18, 2019 at 7:30 am

            Mixing it according to instructions made for a better notch but thicker, wetter, stickier mortar and it’s harder to press a tile into it. Is it a bad idea to mix the mortar with a bit more water than the instructions specify so it’s easier to adjust a tile on the wall?

          • DIYTileGuy says

            May 18, 2019 at 8:43 am

            There’s a water range that can be used. So, yes, you could try adding a little bit more water if that’s preferable. But thinset is sticky by design. You might try wiggling the tile across the notches also to collapse the ridges of the mortar.

            Additionally, the mortar manufacturer will have instructions for how to mix. Usually, this is a certain amount of time (2 minutes?) and involves letting the mortar stand for maybe 5 minutes and then remixing. Each product can be different but following those instructions will help with the consistency of it also.

  36. Brian says

    September 16, 2019 at 3:49 pm

    Thank you for the information! I’m not sure which trowel size to use. We’ve got 3×12 inch tile for the shower so we’ll need 95% or more coverage, and I’m not sure if I should go 1/4 x 3/8 or 1/4 x 1/4. Your help would be appreciated!

    Thank you

    Reply
    • DIYTileGuy says

      September 19, 2019 at 7:45 am

      Those would be the two that I recommend. You might try one of each and see which one works better. It’s not possible to say which of those two will work better without taking in more factors

      Reply
  37. Margaret Boulanger says

    September 22, 2019 at 7:38 am

    Our handyman contractor installed a niche on outside wall. He did not put form board behind it. Do I need to remove durarock and reinstall with foam board and re install durarock. I am concerned as it is a outside wall. Or what other options could I do?

    Reply
    • DIYTileGuy says

      September 23, 2019 at 7:42 am

      A shower niche in an exterior wall isn’t something that is ideal. But if one of installed then it’s a good idea to insulate it. I would give serious consideration to removing what’s there and doing what you can to add some insulation.

      Reply
  38. Bob Z says

    September 22, 2019 at 5:05 pm

    What would recommended trowel size be for a backsplash using ceramic tile 3″ x 12″ ?

    Reply
    • DIYTileGuy says

      September 23, 2019 at 7:44 am

      Probably a 1/4 inch square notch

      Reply
      • Bob Z says

        September 24, 2019 at 8:47 am

        Thank you–appreciate the prompt reply.

        Reply
  39. Chris says

    October 1, 2019 at 7:10 pm

    I am getting ready to purchase a trowel where the Notch, Depth, and Space in between is 3/8. Would this be ideal for 12×12 inch wall tile in the bathroom over Hardi Board?
    Or will a 1/4 x 3/8 inch trowel work?
    Thanks

    Reply
    • DIYTileGuy says

      October 5, 2019 at 10:57 am

      It should be fine. My preference would be for the 1/4 x 3/8 but it really is a personal preference thing.

      Reply
      • Chris says

        October 5, 2019 at 12:35 pm

        Thanks, have a great weekend!

        Reply
  40. Scott says

    October 28, 2019 at 6:15 am

    Just wanted to drop a hearty THANKS to you and your site. You give excellent advise without the “I’m the only one who’s right” attitude. I’ve been installing tile for decades and happened upon your site for some info on a tile I hadn’t laid before. Found my answer quickly and it was simply your basic comment: more thinset is better than less. Thanks again for common sense approach to problems and God bless you and your endeavors.

    Reply
    • DIYTileGuy says

      October 28, 2019 at 3:02 pm

      Thank you!

      Reply
  41. Andrew W. Hasco says

    November 27, 2019 at 10:09 am

    I’m making a “tile picture” to hang on the wall above our gas stove (the space between the range hood and the range). I purchased 4″ x 4″ tumbled marble tile (irregular surfaces on all sides, about 20 pcs total). All pcs. have a in bedded ink picture and when combined in the correct order – make the finished puzzle picture. I will be using a custom building product (tile lab surface guard) on each individual surface face of the tile before tile placement. I’ll be using 1/4″ hardibacker board to put the tile on. Custom building products recommended their FlexBond thinset for bonding the tile to the hardibacker (moisten the hardibacker before spreading their thinset). After reading your article on trowel size, I’m not sure I selected the right trowel. I purchase the 3/16 x 5/32″” v-notch and thought of using that for the hardibacker and also backbutter each tile and use a 1/16″ spacer (really thin thickness wise) and inbed at each corner into the cement while placing the tile to keep everything lined up because of the tile being irregular from being tumbled. Custom recommends using their polyblend unsanded grout to finish. The grout line is going to be so thin, should I be using a grout bag to directly insert the grout into the tile joint? I guess I’ve laid out the process I feel I can use but anything you have to offer by way of experience would make me feel better/more confident in tackling this. I probably have $300.00 wrapped up in this 16″x24″ picture already not counting the framing that needs done yet. Help?

    Reply
    • DIYTileGuy says

      November 30, 2019 at 11:15 am

      My guess is that you will want to use a 1/4 x 1/4 inch square notch trowel and still back butter each piece prior to installation. You’ll want to make sure to use a white mortar to install the tiles with.

      I question the use of an unsanded grout. The tumbled marble tile that I’ve used before are too irregular to use an unsanded grout with. Unsanded grout should only be used with tight grout joints. I would recommend a grout like Custom’s Prism grout which is better quality and has more flexibility in the grout joint width. However, it is fast-setting and you’ll have to be careful not to let it sit on the surface too long.

      I’d also like to see you use a better quality sealer. Custom also owns the Aquamix line of sealers and I like both their Sealer’s Choice Gold (water-based) and Ultrasolv (solvent-based) sealers.

      Reply
  42. Aaron says

    February 7, 2020 at 12:33 pm

    I want to install 4 1/2 × 12 bath wall tiles. Using 1/2″ durock as backer but it seems too flexible. Will installing more studs eliminate that? Also installing new valve body. How much of the plaster ground should be protruding from durock before I start tiling. I’m afraid it’ll be to much or too little otherwise the escutcheon won’t line up correctly. Also what size spacers between tiles would look best. There aren’t any grout bumps on tile. I assume a 1/4 x 3/8 notch should be used? Does thickness of mortar play a large part of overall depth. Thanks.

    Reply
    • DIYTileGuy says

      February 9, 2020 at 12:52 pm

      If your framing meets code, which is 16 inches on center, then the backer board should be fine. You can always add more supports if you want.

      For the plumbing valve, the depth varies from manufacturer to manufacturer so you’ll have to follow their guidelines. Most plumbers will set them to the minimum expected depth. For example, you have 1/2 inch backer + say- 3/8 inch tile. So you’ll want to set the minimum to 7/8 inch past the framing. You can always exceed the minimum and maybe you end up at 1 1/8 inch. That’s OK.

      Minimum spacer size is 1/16. If you have a glazed ceramic tile then that’s probably a good spacing. It’s OK to go more.

      Reply
  43. Bryan says

    March 26, 2020 at 2:39 pm

    I am using 20 inch X 20 inch polished natural stone tile on my shower walls.
    Would you recommend a 1/2 trowel?
    Would 1/8 inch joints be acceptable?
    For showers, is there a thin-set at the big lot stores you recommend?

    Reply
    • DIYTileGuy says

      March 29, 2020 at 9:30 am

      Yes to the 1/2 inch trowel and 1/8 inch joints are acceptable. I would use a white LFT mortar from the big box store. Marble & granite mix, large format tile mortar, or something along those lines.

      Reply
  44. Suzy says

    March 31, 2020 at 9:08 am

    I’m hanging “thin” brick as a backsplash. The manufacturers website says use a 3/8 x 1/4 trowel. I see a lot of them are listed as 1/4 x 3/8 x 1/4. Is this the same thing? Thanks

    Reply
    • DIYTileGuy says

      April 2, 2020 at 10:32 am

      Yep! That’s the one

      Reply
  45. Randy says

    April 8, 2020 at 8:17 pm

    Hey Tile guy,

    Putting 6×24” plank on a shower wall and floor with Kerdi on wall and deitra on floor Should I use 1/4×3/8 or 1/2×1/2 square notch.

    I need to come up 3/4” to hardwood. So 1/4×1/4” to set 1/4” ditra. Than what trowel to get me up with 5/16” thick tile? Thanks

    Reply
    • DIYTileGuy says

      April 9, 2020 at 9:21 am

      I’d probably use the 1/2 inch notch trowel for doing 6×24 tile. Assuming your using normal Ditra which is 1/8 inch thick then you might have to build up a bit to get things to flush out.

      Reply
    • keith says

      June 11, 2020 at 11:29 am

      Use Schluter sheine as your transition. It looks 100 times better than butting tile up to hardwood and a small difference in height will not be noticed.

      A more professional look overall.

      https://www.schluter.com/schluter-us/en_US/Profiles/For-Floors/Same-height-Transitions/Schluter®-SCHIENE/p/SCHIENE

      Reply
      • DIYTileGuy says

        June 11, 2020 at 2:53 pm

        I wish there was a mechanism to “like” comments, but there isn’t.

        Reply
  46. Jeff says

    April 11, 2020 at 7:52 pm

    First – great site. Thank you for putting this together. We’ll certainly be using affiliate links where possible.

    We have a question regarding Tile Leveling Systems. As part of them permanently remains under the tile, can some of them require a slightly thicker notch?

    Here is our project and application materials. We have not yet selected a tile level system but will want one that has a tool, rather than just clips and wedges.

    SHOWER
    – Wall and Ceiling Tile (horizontal off-set brick pattern):
    https://www.flooranddecor.com/porcelain-ceramic-decoratives/esenzia-note-ceramic-tile-100410984.html#prefn1=color&prefv1=Blue&start=6

    – Floor Tile (herringbone pattern)
    https://www.flooranddecor.com/porcelain-tile/new-york-soho-brick-look-porcelain-tile-100086917.html#prefn1=shape&prefv1=Rectangle&prefn2=size&prefv2=4+x+8&start=1

    Thanks very much!

    Reply
    • DIYTileGuy says

      April 13, 2020 at 8:05 am

      Yes, some of the bases are thicker than others and could require more mortar. I don’t know the ins-and-outs of all the different systems but I use the MLT system with the one-piece (T2) straps and have never had an issue with the base strap bottoming out. However, I tend to only use leveling systems with large tiles.

      Reply
  47. Adelita lira says

    April 22, 2020 at 3:09 am

    Hi,what size of notched trowel should I use for a travertine pavers 16”X24”.

    Reply
    • DIYTileGuy says

      April 24, 2020 at 8:33 am

      1/2 x 1/2 or 3/4 x 3/4

      Reply
  48. vincent scavone says

    May 3, 2020 at 5:59 pm

    what size trowel would be used to install glass tile accent sheet
    that is 12×12 on mesh and is 1/8″ thinner then the wall tile after it was set??

    Reply
    • DIYTileGuy says

      May 4, 2020 at 6:57 am

      You need this post: How to install tile of different thicknesses flush, flat, and even with each other

      Reply
  49. keith says

    June 11, 2020 at 11:35 am

    The difference between a u-notched trowel and a square notch:

    1. the U-notch allows the thinset to spread out easier

    2. the finished thickness of the thinset for a square notch trowel is 1/2 the height. So a 1/2 x 1/2 inch square notch leaves 1/4″ of thinset. For a U-notched trowel use 1/3 the height, so a 3/8″ u-notched trowel leave 1/8″ bed of thinset

    Reply
    • DIYTileGuy says

      June 11, 2020 at 2:55 pm

      I’ve heard different theories on it and each one favors the U-notch as being slightly better.

      Reply
  50. Jaz says

    July 4, 2020 at 4:26 am

    Hi DIYTileGuy.

    I am installing ceramic tiles 600mm x 300mm x 100mm onto a kithen wall. What size trowel would you recommend ? I would guess 1/4 by 3/8 U notched trowel ?

    Reply
    • DIYTileGuy says

      July 5, 2020 at 7:10 am

      Either that one or one that’s 1/2 inch deep

      Reply
  51. Jim says

    July 15, 2020 at 1:59 pm

    Hi DIYTileGuy,
    I am installing 130x800mm (5″x32″) porcelain rectified tile in several rooms (bath, exercise and front hall). It is 3/8″ thick. I was going to use a 1/4″ x 3/8″ x 1/4″ sq trowel until I came across your post here. I’ve read thru most of the replies and am still unsure which size to use. Should I be using a 1/2″ x1/2″ sq notch trowel for this tile?

    Reply
    • DIYTileGuy says

      July 18, 2020 at 8:41 am

      I think you are going to want a 1/2 inch deep trowel. Either 1/2 x 1/2 or 1/2 x 1/4

      Reply
  52. Roger says

    July 15, 2020 at 5:29 pm

    Hey TileGuy,

    This website is amazing. Thank you for responding to all these comments!

    I am installing 4 x 6 subway tile, can I use a 1/4 x 3/16 v-notch trowel, with a pre-mixed tile adhesive & grout (for adhesive only), and a polymer-modified non-sanded grout (I’d be using 1/8th inch spacers)?

    This information just isn’t readily available, so thank you for your help! Will be using your affiliate links!

    Reply
    • DIYTileGuy says

      July 18, 2020 at 8:45 am

      I think you’re going to want a 1/4 x 1/4 square notch trowel at a minimum.

      Additionally, premixed adhesive is only for use over drywall in non wet areas. So if this is a shower you’ll need to use a thinset mortar.

      Reply
  53. P.P says

    August 1, 2020 at 7:29 am

    What’s the minimum thickness the trowel notch can be for a 10mm thick tile. I’m trying to level it with pre-existing tiles that are a lot thinner (5mm) with 6mm thinset projection for a total of an 11mm projection. Not sure if it’ll hold if I butter it too thin. It’s a tumbled marble mosaic 10mm thick.

    Reply
    • DIYTileGuy says

      August 2, 2020 at 8:28 pm

      The minimum thickness is whatever gives you full coverage under the tile. If you have a tumbled mosaic then that is a good thing as you won’t need a lot of mortar underneath the tile. I would try a 1/4 inch square notch trowel and see if that puts enough mortar underneath your tiles without too much coming through the tops.

      Reply
  54. Mike says

    September 6, 2020 at 1:55 pm

    Just checking. Should I use a 1/4 x 1/4 square notch trowel to lay 2″ x 2″ square porcelain mosaic (in 12″x12″ sheets) on my shower floor, or can I get away with a 1/4″ x 1/4″ (3/16) v-notched trowel? Thx!

    Reply
    • DIYTileGuy says

      September 6, 2020 at 8:20 pm

      You’re not going to like this answer but it depends. It depends on how thick the mosaics are, what the underside depressions are like, and how thick the mortar is but I would try for the square notch and see how that goes. If you get a little mortar between the joints you can use a brush with water and a sponge to get it off.

      Reply
      • Mike says

        September 8, 2020 at 6:27 am

        The tiles are 5/16″ thick. Sorry I neglected to include that important piece of info. Thx

        Reply
        • DIYTileGuy says

          September 8, 2020 at 8:22 pm

          The square notch is probably going to be the way to go with those.

          Reply
  55. Al says

    September 14, 2020 at 6:25 am

    What would you say is a good trowel size for an 8×80 wood plank tile? 3/4″ U notch? 1/2″ square?

    Reply
    • DIYTileGuy says

      September 14, 2020 at 9:07 pm

      Those are big tiles! You’ll probably need to notch trowel both the substrate and the back of the tile. So, I would look into a 1/2 inch deep notch trowel and figure on doing both. Also, you’ll need flat floors, LFT mortar, and a leveling system.

      Reply
  56. Taylor says

    October 16, 2020 at 3:00 pm

    I’m installing 6″ by 39″ tile as stair risers over plywood. I’m cutting them down from a 24×48. would you recommend a 1/2 by 1/2 square notch?

    Reply
    • DIYTileGuy says

      October 17, 2020 at 2:30 pm

      Yes, I think that would be a good one to use.

      Reply
  57. Dale says

    November 1, 2020 at 4:03 am

    Good day,

    I am installing 2×2 Mosiac tile on 12×12 sheet in my shower over a Kerdi shower pan.

    What trowel is best to secure the tiles to this Kerdi Pan?

    Reply
    • DIYTileGuy says

      November 1, 2020 at 10:24 am

      Typically, a 1/4 x 1/4 square notch trowel. If the tile is unusually thin then you might think about smaller but the trowel that I mentioned would probably be the best trowel for 80-90% of 2×2’s.

      Best practice is always to “burn” the mortar into the Kerdi with the flat side of the trowel then flip it over and use the notched side.

      Reply
  58. Fred says

    November 9, 2020 at 8:07 am

    Hi, I am installing 8x 16 ceramic tile on the wall. What size trowel should I use? Can I use a 1/4 x 3/8?
    I would appreciate your help, thx

    Reply
    • DIYTileGuy says

      November 10, 2020 at 6:54 am

      1/4 x 3/8 sounds like a good one

      Reply
      • Fred says

        November 10, 2020 at 8:53 am

        Thx much!

        Reply
  59. D james says

    December 23, 2020 at 9:35 pm

    Hi, enjoying all the information on your site, thanks for taking the time to help us. My tub lip is sticking out in one corner 1/4 inch because couldnt get tun in perfect so tile will not bypass this, unfortunately I didn’t notice this until I nailed in the go board, would’ve been an easy fix shimming wall out. At this point I think my options are to use a bigger trowel like 1/2 to take up the space, but not sure if that would cause problems being so thick on my 3×12 subway tiles. Another alternative is to shave tile down some and put at angle, but I’m guessing that might look wonky in the corner. Finally the last option would be to install another layer of go board over existing board to take up the space. What would you suggest, thanks.

    Reply
    • DIYTileGuy says

      December 25, 2020 at 12:06 pm

      You definitely want the GoBoard sticking out past the flange because the surface of the board is the waterproofing. The waterproofing has to be past the flange. So, remove the board and shim it out or, I suppose, you could add another layer of board over the surface.

      Reply
      • D james says

        December 25, 2020 at 9:48 pm

        Ok, I figured it was a shot in the dark to use a thicker layer of thinset. The two side walls were out of plumb over an inch and i spent the time to get them right, i want to make sure my time isnt wasted leaving it as is then. I’ll remove the old board and shim it out, I used nails so that future demos would be easier, but next time I’ll stick to screws to ensure I can remove the boards in case I miss something again, I’m sure those nails will tear that board into Swiss cheese when I pull them. Thanks for your help have a great new year

        Reply
  60. Scott Martin says

    January 13, 2021 at 6:04 am

    Hi,
    I’m soon going to be installing a 10×14 wall tile, will my 3/16 x 5/32 V notch work or should I use a 1/4 x 1/4?
    Thanks

    Reply
    • DIYTileGuy says

      January 13, 2021 at 6:25 am

      If it’s thin and ceramic then you might get away with a 1/4 inch square notch. Your best bet is to go with a 1/4 x 3/8 square notch.

      Reply

Leave a Reply Cancel reply

Your email address will not be published. Required fields are marked *

Primary Sidebar

Recent Comments

  • DIYTileGuy on How to Install GoBoard Tile Backer Board | Video
  • G_Davis on Shower Waterproofing Crash Course
  • Patrick Truby on How to Install GoBoard Tile Backer Board | Video
  • DIYTileGuy on Ceramic Subway Tile: 3 Pro Installation Secrets
  • DIYTileGuy on How to Install GoBoard Tile Backer Board | Video

Top Shared Posts

custom shower niche

Building a Custom Shower Niche from Scratch

The Ultimate Guide to Building a Preformed Custom Recessed Shower Niche Part 4:  Building a Custom Shower Niche from Scratch This post covers: Cement board, foam board, and Hardibacker Cutting

Shares: 792

subway tile layout lines

Subway Tile Installation: Three Basic Tips

Subway Tile Installation: Three Basic Tips Subway tile- what's not to like? It's classic and timeless. A fairly easy tile to work with and install. And the white subway tile

Shares: 950

recessed shampoo niches in an exterior wall

Installing a Recessed Shampoo Niche in an Exterior Wall of a Shower.

Here's the dilemma. The customer wants a recessed shampoo niche. But once the walls were opened up there's no good place to put one. There are either wires and pipes

Shares: 3232

direction wood plank tiles

More tips for installing wood look tile flooring

Installing wood look tile Wood plank tile floors have gained a good amount of popularity in the last couple of years. For good reason: they don't have ugly wear patterns

Shares: 2916

improper tile liner corner

5 signs your new tile shower will leak

What to look for in proper tile shower construction You've hired someone to build your tile shower in your bathroom, but how do you know he or she's doing it

Shares: 674

Footer

  • Waterproofing
  • Products
  • Tips & Tricks
  • Tutorial
  • Tool review
  • Video

Privacy Policy

Search

Follow me!

Copyright © 2021 · News Pro on Genesis Framework · WordPress · Log in

84shares
  • 9