This post contains 7 real-world tips for installing Ditra. I’m a 25+ year tile installer and I use all of these tips when I install uncoupling membranes.
First, let’s clear up a couple of things:
- Yes, these tips work for all uncoupling membranes. So, they’re relevant even if you’ve bought an alternative to Ditra. This includes installing Ditra-Heat, Ditra-Heat-Duo, and other heated uncoupling membranes.
- This post does not cover why Ditra is a great product or if it’s a good choice for your project. Instead, I’ve written another post on what Ditra is and how it works.
- Down in the FAQ at the bottom of this post, I’ve listed some common problems Ditra installers have and how to fix them.
Estimated reading time: 9 minutes
Table of Contents (Click to Expand)
Table of contents
- Ditra Installation Tip 1: Mix Your Thinset Loose Enough
- Ditra Installation Tip 2: Water Thy Floor
- Ditra Installation Tip 3: Dry-lay the Pieces Before Installing
- Ditra Installation Tip 4: Use the Proper Sized Notch Trowel
- Ditra Installation Tip 5: Trowel the Notches in the Short Direction
- Ditra Installation Tip 6: Install Small Sections at a Time
- Ditra Installation Tip 7: Apply Good Pressure to Embed the Membrane
- Frequently Asked Questions When Installing Schluter Ditra Uncoupling Membrane
Here are the 7 installation tips:
Ditra Installation Tip 1: Mix Your Thinset Loose
This might be the most common mistake: Not adding enough water. Remember, the mortar needs to be thinner than it would be if you were installing tiles.
How thin is thin?
If you are using Schluter mortar then they tell you right on the bag to add another 1-2 quarts of water per bag. [1]
But what if you don’t need to mix a full batch or thinset? Then you can take a look at my post on how to mix a small batch of mortar.
You want the mortar to be thin enough to bond to the fleece on the backside of Ditra. Additionally, loose thinset mortar won’t dry out as quickly when it’s spread over a large section of floor.
Which Thinset to Use
It’s 2023. I recommend that you use Schluter’s All-Set for anything Schluter-related. This includes:
- Installing Ditra over wood subfloors
- Installing Ditra over concrete
- Installing tile over Ditra
- Installing Kerdi to create a waterproof shower
- Installing tile over Kerdi or Kerdi-Board
- Installing Schluter’s Shower pans
Schluter All-Set meets ANSI 118.4, 118.11, 118.15. Additionally, you can use it for small tiles, subway tiles, and LFT tiles like 12x24s.
Plus, Schluter offers an extended warranty with this product. Plus, it’s just a really nice mortar to use (when mixed properly).
Yes, we could get into modified vs unmodified mortars but… why? Just use All-Set if you can get your hands on it. It can be used for 90% of your installations.
Ditra Installation Tip 2: Water Thy Floor
Here’s what you want to avoid: spreading mortar over the floor and having it skin over before you have a chance to lay Ditra over it.
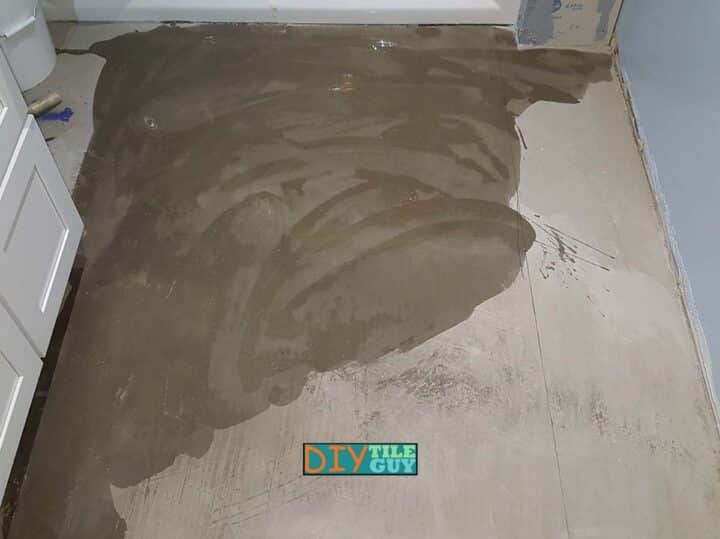
One of the ways that you can help your cause is by dampening the substrate (your floor) before spreading the mortar.
However, you don’t want standing pools of water over the floor. Rather, you want the substrate to be damp while the surface is dry.
There’s a technical term for this which is saturated surface dry (SSD). [2]
So, “give your floor a drink” as they say. Dampen the surface that’s to receive the membrane immediately before spreading mortar over the floor.
Ditra Installation Tip 3: Dry-lay the Pieces Before Installing
Another technique to speed up installation is to have your piece cut and in place before you trowel the mortar.
This way, you’re not monkeying around with cutting Ditra while mortar is spread and the top is drying and skinning over.
Have the piece cut and in place prior to picking it up and spreading thinset.
Ditra Installation Tip 4: Use the Proper Sized Notch Trowel
This tip is pretty self-explanatory. Too small of notches and the membrane won’t bond.
Too big of notches and you’ll get a lumpy installation and you’ll end up squeezing the mortar out when you work to embed it in the thinset mortar.
You can use a 1/4 x 3/16 V-notch trowel or get one of the 11/64-inch square notch trowels made especially for Ditra (aka the Ditra Trowel).
Tip: If using a product other than Ditra make sure to read the manufacturer’s instructions for which trowel size to use.
Some products like Ditra-Heat, Ditra-Heat-Duo, Ditra XL, and alternative uncoupling membranes such as Redgard want you to use a larger trowel size.
![Tile Notch Trowel sizes. Which trowel size do you need for ....? [Full vid]](https://www.diytileguy.com/wp-content/plugins/wp-youtube-lyte/lyteCache.php?origThumbUrl=https%3A%2F%2Fi.ytimg.com%2Fvi%2FFxkS87BGUfI%2F0.jpg)
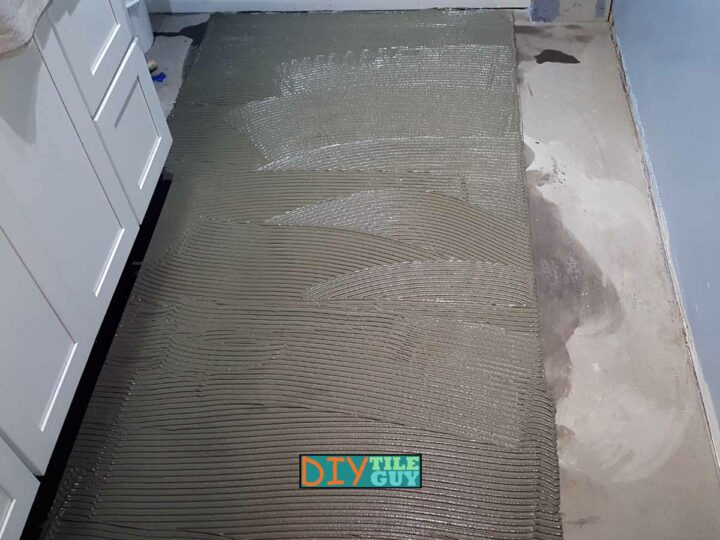
Ditra Installation Tip 5: Trowel the Notches in the Short Direction
If you watch the video above, you will also see that I am troweling the mortar notches all in the same direction.
This is called directional troweling and is important to do especially when installing uncoupling membranes.
It’s a good idea to trowel the notches in the short direction of the membrane.
Think about this: air will be in the low channels of the notched mortar. You want that air to take the shortest route possible to escape.
So, if you unroll the membrane then you want the trowel lines to be perpendicular to the way that you unroll it. This is just a good fundamental practice when troweling mortar.
Ditra Installation Tip 6: Install Small Sections at a Time
Along with tip number 2 about wetting the surface, you want to work with small sections at a time rather than taking the time to try to trowel mortar over a large section.
If you have a large section of Ditra that you’ve unrolled and cut into place you can fold half of the membrane over and install it in two different steps.
Fold the Ditra in half (don’t crease it). Then wet the surface of the exposed half, trowel the mortar, and embed half of the section.
Then peel the other half back and repeat.
This is a good technique to use when you have your pieces already cut in place and you don’t want to excessively move them out of place.
Turn Off the AC and Block Heat Registers
It’s not a bad idea to turn the thermostat off and block any heat registers so that air doesn’t blow across your exposed thinset notches before the membrane is installed.
By the way, you are putting in sleek-looking, tile-in heat registers, aren’t you?
Ditra Installation Tip 7: Apply Good Pressure to Embed the Membrane
Finally, you want to make sure the Ditra gets embedded really well into the fresh mortar. You can do this with a roller, a wood float, or even a chunk of 2×4.
Additionally, Schluter makes a roller for this purpose. [6]
The best technique is to start in the middle and work your way to the edges.
You want to collapse the thinset ridges and push the air out those short air channels that we talked about in tip 5.
Lastly, walk around and step over every bit of the Ditra surface to ensure it’s properly embedded.
Regularly pull the corner of the membrane back from time to time and inspect how well the thinset transfers to the membrane.
Review
Remember, the 7 steps are as follows:
- Mix your thinset loosely
- Give the floor a drink
- Dry fit the pieces in place first
- Use the right trowel
- Trowel the notches all in the same direction and hopefully air can escape
- Install small sections at a time
- Press down really well and embed Ditra into the mortar
Below are some answers to some common Ditra installation problems and questions:
Frequently Asked Questions When Installing Schluter Ditra Uncoupling Membrane
There are a variety of reasons that Ditra may not stick to the floor.
These include improper mortar, improper mixing of mortar, improper substrate to install Ditra over, troweling wasn’t directional, thinset skinned over, improper trowel size, or perhaps Ditra has too much ‘memory’ [see question below]
The edges curling up are caused by Ditra having too much ‘memory’. This refers to roll memory. It is still used to being rolled up.
This can be relieved by getting Ditra out of the cold and unrolling it in the room. It can be relieved by bending the membrane the opposite way of the roll before it’s installed.
You can also weigh the corners and edges down until the mortar has completely dried. Tile boxes work great for this.
While Schluter says that you can install tile immediately after installing Ditra, it’s not something that DIYTileGuy recommends.
I’d rather see you wait overnight, at a minimum, and let the mortar dry completely.
If you install a tile and then have to pull it back up, you risk pulling the membrane up and debonding it from the subfloor.
You can walk on Ditra immediately after installing it and this is a good way to continue to embed the membrane into the fresh mortar underneath.
You’ll want to avoid twisting your feet and, instead, apply pressure as straight up and down as can be reasonably expected.
As a rule of thumb, you want to do any leveling or flattening of the floor prior to Ditra being installed.
Your floor flatness requirements depend on what type of tile is being installed on top of it. I cover floor flatness requirements in my post on self-leveling.
Ditra is a tile underlayment. It adheres directly to the substrate. No additional underlayment is needed as long as your substrate meets the minimum requirements for tile installation.
You can go to the Schluter website and download their Ditra Handbook which will tell you what the minimum requirements your substrate needs to meet. [3]
Wood or concrete subfloors are not approved substrates for Kerdi membrane. [4,5]
References
- Schluter All-Set product page [download link from page]
- Wikipedia: Saturated Surface Dry
- Schluter Ditra product page
- Schluter Shower System Installation Handbook [download link from page]
- Schluter Kerdi, Kerdi DS technical data sheet [download link from page]
- Schluter Ditra Roller web page
