Cement board installation over floors is not incredibly difficult. But I see people make the same screw-ups over and over again.
The following are the most common mistakes I see when installing cement board over floors and what you should do instead.
Estimated reading time: 7 minutes
Cement board mistakes
Let me throw in one disclaimer here: These are general guidelines. Each manufacturer will have their own instructions for their own products, and they will vary a little bit from each other.
The moral of the story is to read the instructions and not simply this post.
Here are the 5 most common cement board installation mistakes I see:
1. No Thinset underneath the cement board
Just the other day, I saw a video featuring someone fastening Hardibacker directly to the subfloor with nothing underneath it. I scrolled down to look at the comments, and they did not disappoint. What were his replies, you ask?
“The thinset goes ON TOP of the cement board to stick the tiles!”
A simple perusal of the instructions would show otherwise. But most people don’t look at them- not even the pictures.
Also, I know some are wondering, but no, Liquid Nails does not count as a thinset alternative. We have to remember that this isn’t the same as installing plywood. Cement board is a different product, and it needs to be installed in its own way.
Additionally, screws don’t take the place of thinset either. I talk more about screws in #3.
Which type of thinset do I need for underneath the cement board installation?
Here’s a bit of good news: It doesn’t really matter which brand or type of thinset mortar you purchase. I know the manufacturers will want you to use their own brand and may even specify a type. If so, then you should purchase what they require.
However, the system works by having a bed of mortar underneath holding the board up and fasteners from above holding the board down.
You don’t need any fancy mortar to accomplish that task, and many will use an unmodified mortar in this situation along with a 1/4×1/4 inch square notch trowel.
Additionally, when mixing thinset for installing backer board, it doesn’t hurt to add a bit more water to make it a little looser.
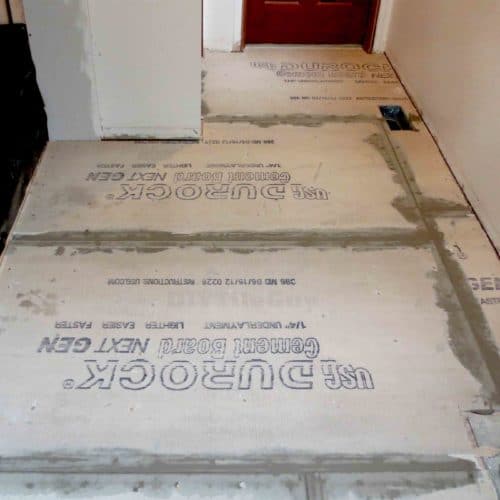
2. Not Staggering the Backer Board Seams
Now, this is an area that the plywood installers will be familiar with. You don’t want four cement board corners to all come together in one intersection.
You get around this by staggering the boards during installation. One nice thing about tile backer board is that it doesn’t matter which way you run the sheets.
You can run them lengthwise, widthwise, or both, and as long as the corners don’t all come together, it’s OK. Additionally, you don’t want the cement board seams to line up with the subfloor seams.
Those are the two things to watch out for when installing cement board.
3. Cement Board Fasteners
Most cement board manufacturers require galvanized roofing nails or cement board screws.
But this doesn’t stop people from trying to use ring shank nails, drywall screws, or who knows what else?
The problem is that those fasteners don’t have the holding power that cement board screws and roofing nails have.
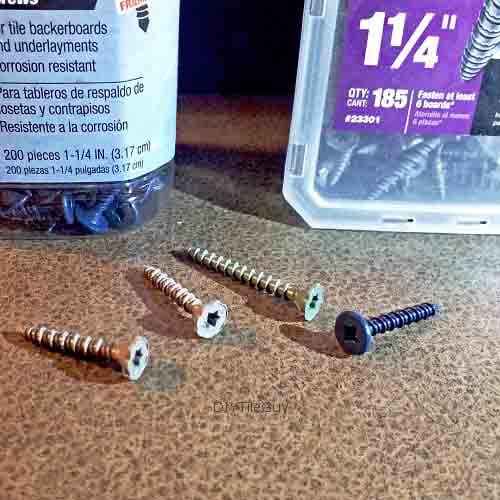
Additionally, people also mess up by not using enough fasteners or driving them too deep.
Typically, it’s every 8 inches throughout, but there is some variation between brands on that. Some backer boards will have the fastener locations printed on the board.
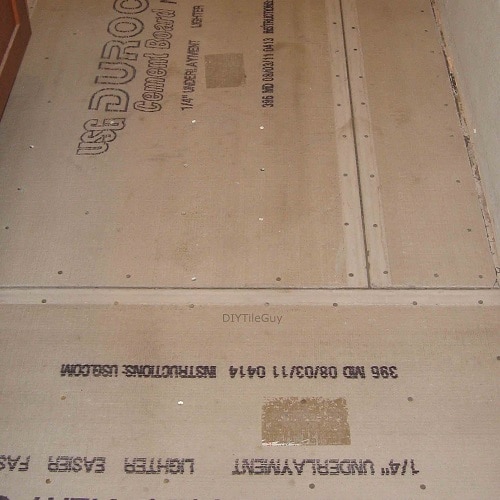
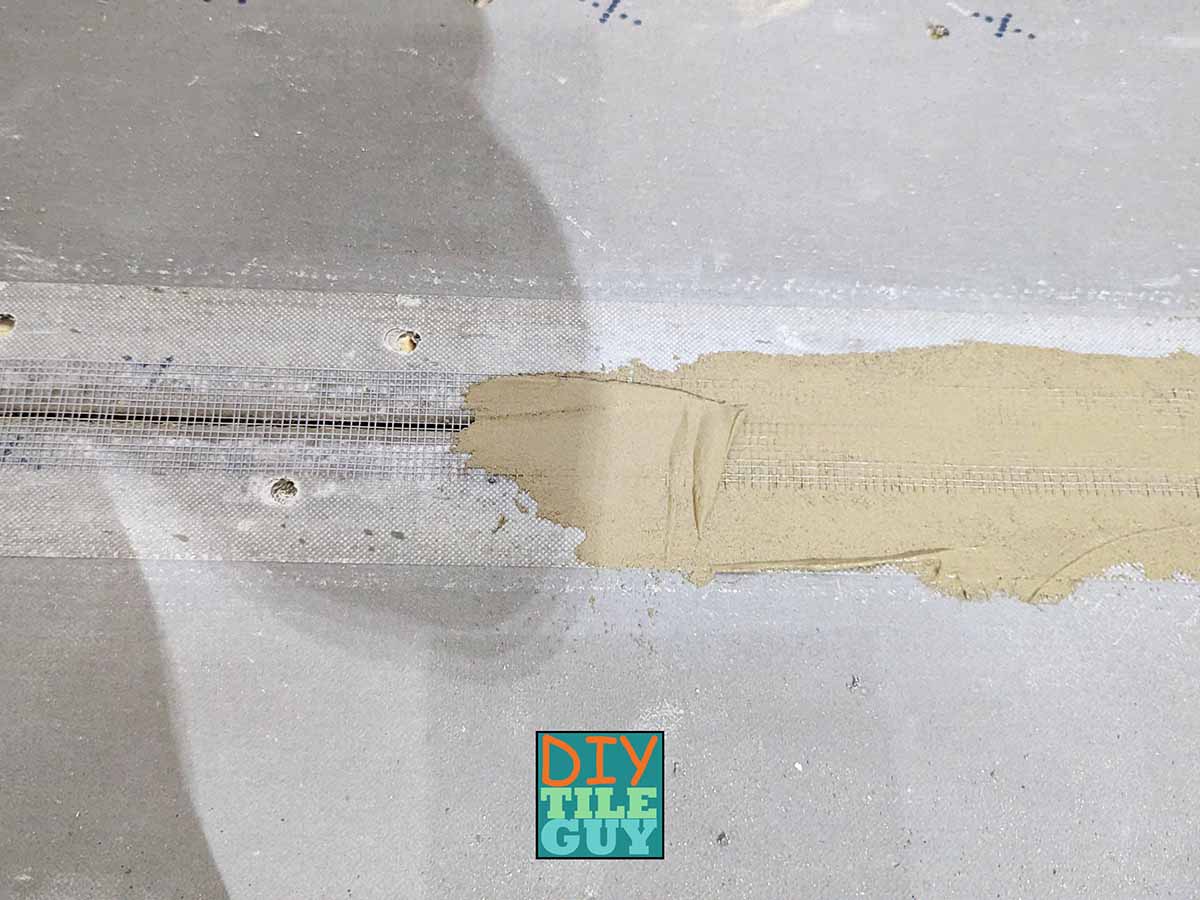
4. Not using Mesh Tape on the Seams of your Cement Board Installation
This is more of a little-known fact, but most cement board manufacturers want fiberglass alkaline-resistant mesh tape embedded in thinset mortar over the backer board seams.
I remember a time when this wasn’t a requirement, but it has been required for the last several years.
Mesh tape and mortar help turn the entire installation into a monolithic piece and remove any inherent weak points.
5. Installing cement board over a concrete subfloor
If you have a concrete subfloor, then you should not be installing cement board or Hardibacker over it.
It might seem like an easy solution to achieve a smooth surface over your concrete, but it’s not.
Not only is thinset a critical component underneath cement board, but the other critical component is the fasteners. You won’t have the fasteners if you are trying to install it over concrete.
On the bright side, there are some options for properly prepping subfloors, such as concrete for tile. Self-leveling underlayment is a great choice if you want to smooth and flatten large areas of a concrete subfloor. Trowelable floor patching products may be the solution for flattening smaller areas.
However, another solution is foam backer board, which is OK to install over concrete. This can also be beneficial if you want to insulate concrete for an electric floor heating system above it.
Finally, uncoupling membranes, like Ditra, can be installed over concrete. In fact, uncoupling membranes have become popular replacements for CBU in the cement board vs Ditra debate.
If your concrete has a crack, installing a crack-isolation membrane might be beneficial.
Honorable mention
I know, there are more ways to screw up cement board installation than just these five.
I could list wrong trowel size, mixing thinset too thick, thinset allowed to skin over, and others.
Not to mention that this is assuming your wood subfloor meets the minimum requirements for tile installation.
Hint: cement board should never be counted on to stiffen up your floor. The floor needs to meet minimum requirements for tile BEFORE any tile backer board is installed.
Finally, if cement backer board isn’t your thing, be sure to investigate other tile underlayment options.
You tell me in the comments: which ones am I missing? Which mistakes do you see?
FAQ about cement backer board underlayment
Cement backer comes in two sizes: 1/4 and 1/2 inch. While either size can be used on a floor, the 1/2 inch is the only size recommended for walls.
Further, 1/4 inch typically works best for most flooring transitions. In fact, the 1/4 inch thickness works particularly well when transitioning from hardwood to tile as well as tile to carpet transitions.
1/4 inch thick cement board is typically the thinnest size that you will find. However, foam backer boards can be found as thin as 1/8 inch in some brands.
You definitely do not want to install cement board over a concrete subfloor. However, there are alternative underlayments that you can use such as an uncoupling membrane or perhaps a foam backer board.
You don’t need to use a backer board to install tile on a floor but you definitely need to use a tile underlayment is you are installing tile over a wood subfloor.
Cement board is an appropriate underlayment for tile being installed over a structurally sound wood-framed subfloor.
You are not required to waterproof cement board installed over a floor unless it is considered a wet area. Bathroom floors outside of showers are not considered wet areas.
Hardiebacker, and other fiber cement boards, are appropriate underlayments for tile floors over wood subfloors.
