Update: Schluter has launched Ditra 2.0. More details are below.
You’re curious about installing Schluter Ditra underlayment. Why not? It’s quite a popular product on DIY television. Further, you can identify it instantly with its bright orange, waffled appearance.
You may have even wondered “Does this type of product really work?” In the world of tile underlayments, should I choose cement board or Ditra?
In my quest to keep up on tile installation products I took one of Schluter’s training courses some years back. I wanted to learn about Kerdi-Board and the Kerdi Shower System.
However, to my surprise, the product I came away most interested in was Ditra uncoupling membranes. Here’s why:
The theory behind Schluter Ditra uncoupling membrane
Estimated reading time: 5 minutes

Please note: This post has had several updates, as recently as 8/22. I try my best to keep the information up to date.
A (very) condensed history of the world
There are many ancient tile installations still around today and they were installed without the cement technology that we have.
How did they do it? According to Schluter, the old Europeans would have a layer of sand that separated the substrate (the ground) from the tile.
They (Schluter) claim that this sand layer acted to uncouple the tile from the ground.

Even today, in older homes, you may be familiar with the mud beds with chicken wire that are underneath tile floors. This again is a sand layer separating the tile from the substrate.
Nowadays, we have thinset that bonds the tile directly to a concrete floor.
Since concrete expands and contracts at a different rate than the tile this can result in stress on the tile installation and can lead to cracking.
Consequently, although today’s thinsets have more flexibility they still are no substitute for the uncoupling layers of old.
Enter modern-day uncoupling membranes
Uncoupling membranes, such as Ditra and competitors to Ditra work to let the tile layer move independently of the substrate. It’s much thinner than a two-inch mud bed.
Look at this Youtube video of Ditra in action:
Four interesting facts about Schluter Ditra Uncoupling Membrane
1. Thinset doesn’t adhere to Ditra:
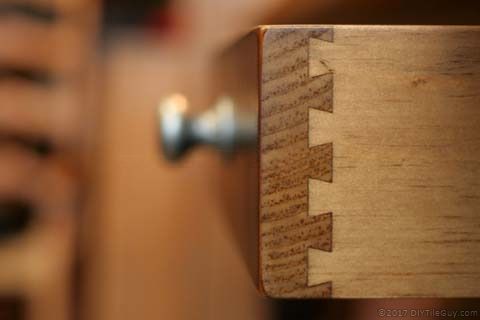
The waffles work like dovetails so when the thinset dries it’s stuck inside the cavity.
On the underneath side, there is a fleece that is bonded to the Ditra mat. As a result, thinset embeds itself into the fleece layer.
Therefore, Ditra doesn’t adhere to either the tile or the substrate but is mechanically fastened to both.
2. Waterproofing
When used with 5-inch Kerdi Band (KEBA 100/125), Ditra can be a waterproof installation.
3. Modified or unmodified mortar
Schluter wants unmodified thinsets used to bond the tile to the Ditra.
However, most tile manufacturers prefer that you stick their tiles down with a modified thinset.
As a result, Schluter has come out with their own line of thinset mortars to use with their products. The mortars are:
- Schluter Set which is unmodified (A118.1)
- Schluter All-Set which is modified (A118.4, A118.11, A118.15T)
- Schluter Fast-Set which is modified (A118.4; A118.11; A118.15TF)
Further, many companies now have their own uncoupling mats and typically modified mortars are preferred.
When installing uncoupling membranes, like Ditra or other brands, it’s a good idea to add additional water when mixing thinset so that it is a little looser than normal. Finally, Schluter recommends their own Ditra trowel for installing Ditra and a 1/4 x 1/4 inch square notch trowel for installing the thicker Ditra XL and Ditra-Heat.
4. Flattening the floor
Typically, you want Ditra to be on top of other floor products and directly under the tile layer.
This means that you would install other tile underlayments, like self-leveling cement or cement board, before installing Ditra.
Further, it used to be that if you were installing an electric floor heat system that it would also be installed first under Ditra or Ditra XL.
However, Ditra-Heat has now been invented and it, along with Ditra-Heat Duo, gets installed directly underneath the tile just like you would with Ditra.
Schluter Ditra 2.0
As of 2022, Schluter has launched Ditra 2.0. They claim the following improvements:
- Larger square dimples with air vents that are easier to fill and will trap less air in the thinset
- Cutting grooves that will make it easier to make straight cuts
- More flexibility which means it will sit flatter and be less inclined to roll back up
It’s not sold in stores yet but I look forward to trying it out once it’s available.
Conclusion
There is definitely no need to fear these newer tile underlayment products. There are many advantages and some disadvantages when comparing them to the more-familiar cement boards.
FAQ about Schluter Ditra uncoupling membrane
There are several Ditra alternative uncoupling membranes on the market that are manufactured by reputable companies. Further, cement backer boards or other appropriate tile underlayments may be installed instead of Ditra.
If you are installing over a wood subfloor then you definitely need an appropriate tile underlayment such as Ditra.
Ditra is an excellent choice for an underlayment underneath a tile floor.
For additional reference, please see this Schluter Ditra Installation Handbook pdf.
Frank Cannon says
very helpful to consumer.
MIKE MARTUSCELLO says
is this system acceptable for “green homes”?
thank you,
Mike
DIYTileGuy says
This is a good question. I looked on Schluter’s website where they have a Green statement and it explains the steps they take for environmental responsibility. If you are looking for LEED points you have to email the manufacturers. However, most manufacturers have information about this on their websites.
Philip Slawson says
Suntouch’s installation directions say to put their mat on top of the isolation mat.
Who to believe and who takes responsibility if there is a problem?
DIYTileGuy says
Short Answer: If you are talking about installing Schluter Ditra with a Suntouch floor heat system then the heat goes under the Ditra. Suntouch addresses this very question in their FAQ on their website.
Long Answer: The makers of uncoupling membranes (Schluter Ditra is in the category of uncoupling membranes) feel that their products perform better when they are as close to the tile as possible. So they want all floor prep and leveling, along with heat systems to be done first and the uncoupling membrane directly under the tile.
Crack isolation membranes are different altogether. Schluter Ditra or, at this point, any other uncoupling membrane do not fall under the category of crack isolation membranes as defined by ANSI A118.12. If you are asking about crack isolation membranes then Suntouch wants their product to be installed above the membrane as addressed in the FAQ section of their website.
For those that will find this comment later, always read the manufacturer’s instructions for the products that you will be using and don’t take anything off of the internet as the final word… not even this blog. :-)
RASD says
Great explanation, glad to have found it. A question: Can this type of waterproofing membrane be used on a vertical surface, specifically the rear wall of a tub surround? I normally use cement board but I have a tricky project where product thickness is an issue and I can’t remove existing wall surface to inset cement board. Thanks for any observations or advice!
DIYTileGuy says
No. They want you to use a different waterproof membrane and not an uncoupling membrane. Some products that may work would be Kerdi, ValueSeal, or USG Durock membrane. You could also go with a liquid membrane over the cement board. Something like Redgard, Hydroban, or Aquadefense. Also you might look into a foam board instead of cement board. Wedi board comes in different thicknesses and if you are going over a solid surface backing you could go with a thinner board. The foam boards are waterproof also.
Mac says
I have 6X36 and 6×24 (3/8″ thick) Florim Ecowood tiles which I am placing in a bathroom over OSB sub-floor. I am also installing a “Warm Tiles” heated floor. Due to plumbing changes for the new shower, I had to pull up sections of the OSB and replace them leaving me with old and new OSB thickness differences of roughly 1/8″ (I know). My question is what system would you opt for.
My thought was to use a feather finish to level the low spots on the OSB and then cover with 1/4″ hardibacker to attempt to obtain the flattest surface possible for the large format tiles… then the heat system and scratch coat (recommended by Warm Tiles), and tile.
Originally, I had planned to use (and purchased) Ditra before I realized floor flatness would/could be an issue. Would you opt for a “feather finish/heat/Ditra/tile” system or the “feather finish/Hardi/heat/tile” system? Or something different all together, or a combination? (The doorway tile/carpet transition will allow 3/4″ which I know I will exceed a bit, but I’m trying to maintain an inch or less).
DIYTileGuy says
I prefer Ditra Heat or Prodeso heat these days. Using the feather finish is a good way to go.
I think either the Hardibacker or Ditra would work. Going with 1/8 inch thick Ditra would probably work best for the transition height.
Chris says
I was curious about how ditra, if used as an underlayment for a waterproof installation in lets say a wetroom floor with a preslope and the seams are sealed using kerdi band, how does it drain when moisture falls into each cavity? Versus having used kerdi instead which theroretically would be able to send any moisture towards teh drain. Wouldnt you risck having stagnant moisture sitting in the low end of each individual cavity of the ditra?
DIYTileGuy says
Ditra isn’t supposed to be used in flooded areas. It’s waterproof but to a point. Schluter wants their Kerdi product to be installed for the shower pan floor and sloped to the drain- not Ditra. But Ditra can handle water and is a great product for outside of a shower on a bathroom floor. Moisture will migrate out over time.
Susan says
Can you put Ditra over Hardiebacker 1/2″ which has been fastened with screws and mortar?
DIYTileGuy says
Absolutely!
Ben Warren says
Hello TileGuy!
I’m about to tile my small 20 sq bathroom from entry door to tub, with a cut-out for the toilet. I am first going to remove the linoleum which is on OSB. I was planning on using Ditra, but then found a person in Canada selling a variety of products – and can cut them to the specific square footage you need. I wondering if you have ever used “Prova-Mat.” It is less expensive, but not an uncoupling membrane. For a 20 sqft. bathroom with 6×24 tiles I’d like to install – would it be sufficient? Recommendations please.
DIYTileGuy says
Prova has an uncoupling membrane called Prova Flex that I think they would rather you used for that. I’m not sure that the waterproofing membrane is an actual crack isolation membrane meant to be used over osb subfloors.
paul says
What kind of mortar would you use for 6×36 plank tiles over Ditra? Is there an unmodified medium-bed mortar available or is it safe to use regular unmodified thinset because of the decoupling effect of the membrane?
DIYTileGuy says
There’s a mortar called Ditra Set by Bostik that works well for your application. It’s unmodified and medium bed.
Additionally, Schluter has a modified mortar called AllSet that would work but I have no experience with.
If you can get Kerabond T from Mapei then that would be a good one.
Otherwise, I would use a medium bed modified but that does violate Schluter’s terms for their Ditra product.
paul says
Wow, that’s a new record for answer promptness. Thank you.
I’m interested in the Ditra to save some floor height. With the tile that will be replaced, there’s already a noticeable step up from the neighboring floor and the radiator cover is grouted in at the bottom. There may be too many layers underneath like old tile but I won’t know until I pull it up. How much height would using Ditra save compared to 1/4″ cement board and redgard?
DIYTileGuy says
Should be about 1/8 inch difference.
If you’re in an older home there’s a good chance that you have an old mud bed tile floor where the floor is recessed. This would mean that you’ll have the opposite problem of needing to fill space- assuming the different flooring layers are removed.
paul says
Schluter bases their recommendation for using unmodified mortar to set tile over Ditra on moisture impermeability of both the Ditra and the tile itself. I’m wondering why is it acceptable to use modified over other impermeable surfaces like something treated with RedGard for example? Wouldn’t that be the same situation? Even if it’s cement board with plastic sheeting behind it, doesn’t that still keep the moisture in?
DIYTileGuy says
Yes and this is a very much debated topic. Think about this: There’s a lot of companies that have impermeable membranes and Schluter is one of the few (maybe only) that require unmodified mortar.
I’m not saying that there’s nothing to their science. But I do think that this guideline is a little outdated. Mortar technologies have advanced to where they are self-drying now and, frankly, I don’t think this was ever a big enough deal for all the fuss. But that’s just my opinion and I’m not a scientist.
Furthermore, Schluter has their own modified mortars now that can be used for their products. What’s the secret to their mortars? Are they magic? Do they have special technology that other mortar manufacturers haven’t figured out?
Schluter claims their mortars are “specifically engineered” for their products. People may choose to believe this, or not.
Custom Building Products has manufactured mortars for years and they don’t require unmodified mortar for Redgard. Same with Laticrete. Same with Mapei. Same with others.
Modified mortars are where the technology is being applied. They are just better mortars that are able to grab a hold of hard and impervious surfaces like today’s porcelain and glass tiles.
If you want Schluter’s warranty you’ll have to abide by their rules and use either their modified or an unmodified. This is one of the big reasons why I typically choose other manufacturer’s products for my installs. I think modified mortars are better.
paul says
I got the impression that you were a fan of Ditra. I was considering going with it for a small bathroom floor install of 36″ plank tiles because it sounds like it would give additional safety from cracking (and a height reduction) but the comlexity is getting me worried. I don’t even know that I can get Schluter’s mortars around here.
DIYTileGuy says
I like Schluter and they make good products. But I like to use modified mortars so I end up using competitors products because of that. When I use Ditra I use Bostik Ditra set which is a good medium bed unmodified mortar. I don’t know how easy that is to get? I believe Ardex gives a warranty with their mortars for use with Schluter also.
paul says
I’ve seen Bostik Ditra Set on amazon but it looks like it’s almost the same price as the Schluter Set and All-Set mortars. Seemed like if all else equal, I’d just go with Schluter’s mortar, especially since it’s modified and I can use it both above and below the Ditra (going over plywood). A bit hesitant since I’m using 36″ plank tiles but Schluter says All-Set is good for it. I’m having trouble finding a good unmodified large format tile locally: Lowe’s doesn’t sell the Mapei one that you recommend any more. This will take some planning.
I only have a ~30 sq. ft. area to cover. Could you please tell me what your experience is of mortar coverage with laying Ditra and putting large format tiles over Ditra?
DIYTileGuy says
For installing Ditra, you’ll need at least one bag and maybe a bag and a half. That’s to install Ditra, fill the top side, and install large format tile. Usually, around 35-55 ft is what I get out of a bag for installing large tile. The waffles will eat some thinset up also. Installing Ditra itself usually doesn’t use a lot. It’s been a while but I would think that you would get 100+ sq. from a 50lb bag.
Nelson says
I like how you are straight to the point and provide your sage expertise. Now, I just removed old tiles (5 year old) that was laid over Ditra. I am left with the fleece… and this was over OSB floor. So, my question. Can I ditra over that or would it be best to use 1/4 wonderboard, hardiebacker or wedi, over that membrane that came out in some parts and others is just laughing at me. I also thought of removing the subfloor and putting new 3/4 plywood but… the subfloor is not only nailed it is glued… dangit!
so recap:
Removed ditra, left with membrane not easy to remove.
apply ditra over that? OR Wonderboard, Hardiebacker or Wedi? I am using wedi on the shower surround.
THANKS!
DIYTileGuy says
They say that demolition isn’t supposed to be easy but that’s not very helpful when you’re tearing out flooring that doesn’t want to come out.
The best way is to sand or grind off the fleece and thinset that’s on the floor. It’s not as bad as it sounds if you have a way to manage the dust.
Short of that I don’t know how well it will work to go over the existing. I’d probably try cement board or hardbacker as they don’t require a bond to the flooring to work properly (they still need to be thinset and nailed/screwed to the floor).
But loose and extra fleece could still cause problems with those backer boards.
Nelson says
Thanks! In the words of Charlton Heston… Damn (fleece) to hell, damn you fleece!!! :-) Thanks. I am going to have a busy weekend, and the box stores will love me. Hardbacker here I come!
DIYTileGuy says
Good luck!
Jon says
I’m about ready to redo the tile floor in my bathroom. The current tile is installed to a 1/2” plywood underlayment on top of the subfloor. The transition to carpet is almost level & I’d prefer to keep it level or carpet above tile, not vice versa. I’m not sure what I should do for underlayment. Remove the 1/2”plywood underlayment and install 1/4” Ditra to subfloor? or 1/4” backer board + 1/4” Ditra? Any advice would be appreciated.
DIYTileGuy says
It depends on why the 1/2 inch plywood underlayment was installed. If it was installed because your subfloor spacing is more than 16 inches on center then you will need to either keep the underlayment or replace it with the same.
However, in some parts of the US, it’s common to install 1/2 inch plywood underlayment and tile directly to it. This is simply the practice and there’s not a better reason than that.
If this is the case then you can remove the underlayment and replace it with either backer board and/or an uncoupling membrane such as Ditra.
Another thing to consider is the kind of tile that’s in there now and what will be installed in it’s place. It’s quite common nowadays to replace standard 12×12 tiles with 12×24 tiles which tend to sit a bit higher than their 12 inch counterparts.
What I have found is that 1/8 inch Ditra adhered directly to the subfloor and 12×24 tiles over the top will sit flush with the neighboring carpet. At least flush enough.
By the way, if you find that you need to keep the 1/2 inch plywood underlayment I recommend going over it with a thin membrane. A liquid membrane such as Redgard would be OK but I would rather see a sheet membrane such as Noble CIS or similar.
paul says
I have to apply all the waterproofing (walls and floor) before I do any of the tile because of the way it ties together: Redgard the walls, Ditra the floor then Kerdi the corners. It seems wise to tile the walls first so I’m not dropping mortar, tools, and potentially tile onto a finished floor but then I have to walk around on the bare Ditra while I’m working.
Do you know if Ditra is sturdy enough to stand up to foot traffic for an extended period of time without tile over it? Can I just protect it with cardboard? Is there a general floor-first/walls-first convention?
paul says
I’m getting lazy. A google search gives me a forum post with the answer (probably john bridge): don’t want to put point loads on it so you don’t crush the “waffle,” cover it with plywood to spread the load if you’re going to walk around on it. I don’t want to cut that much plywood so I’ll do the floor first and cover it with cheap, easy-to-cut cardboard and a tarp to protect it from debris, bad luck, and stupidity.
DIYTileGuy says
I wouldn’t want to work over it for an extended period of time. You could but some Masonite and put that over it which should be cheaper than plywood.
I like to get the floors done and protecting with cardboard usually works well enough.
Max says
I purchased Dural Backer-Lite from the Tile Shop for a porcelain tile on concrete installation and ended up calling Dural and talking to their technical guy with this same question. They recommended following the tile manufacturer’s recommendation for thinset. The tech guy specifically said to use modified because it grabs the porcelain better.
Do you as a standard practice wait for longer cure periods when you use modified with non-Ditra uncoupling? Or just follow the thinset manufacturers’ cure time?
Second question, unrelated but more important:
Can you thinset over concrete that flunked the water droplet test? I called the Tile Shop and they said yes, I can thinset over nonporous concrete if I prime the concrete and use modified thinset. What do you think?
Background: I’m doing my basement. 2/3 of it needed self-leveling, so I roughed up the floor for that. Since Tile Shop said no need to rough up the remaining 1/3, I didn’t. So I have a basement that is 2/3 porous and 1/3 nonporous. I have no idea what causes water penetration to fail. The slab was poured four years ago. I am beginning to think I need to go back and roughen, unfortunately.
DIYTileGuy says
I think if you have the opportunity to roughen up the concrete then that is the way to go.
In some situations, asbestos for example, grinding the floor isn’t practical nor advised.
In these types of cases some manufacturers make a bonding primer that will stick to the surface and allow tile or self levelers to go over them. Mapei’s Ecoprim grip of one example of this type of product.
It could be that the primer that goes with the self leveler will work with a nonporous floor but you’ll need to read the instructions for both and possibly contact the manufacturer.
It’s a good idea to always double check the retail employees advice.
Colleen says
“Even today, in older homes, you may be familiar with the mud beds with chicken wire that are underneath tile floors. This again is a sand layer separating the tile from the substrate.”
“Mud beds with chicken wire” count as an uncoupling sand layer? What was the mud made of?
I’m interested because I’m currently tiling over a poured adobe floor (clay, sand, and straw sealed with linseed oil).
DIYTileGuy says
The mud is a mixture of sand and cement. It provides an acceptable substrate for tile to be installed over.
I’m afraid I can’t be of much help with adobe though. :-(
Colleen says
I understand — every professional I talk to freaks out at the mention of “adobe”! I’m not exactly pioneering, because I have found one other local owner/builder who has done something similar (there is a lot of unconventional construction around here). My comment was not asking for help, I was just curious because intuitively it doesn’t seem like sand and cement would be an uncoupling layer—it sounds too solid.
If the old Europeans used sand, and more recent builders used sand and cement, well, adobe (sand and clay) would fall right in between.
The system I’ve worked out seems to be solid and working well. Knock on wood!
Your site has been invaluable for giving me the confidence to forge ahead. Especially when I eventually get around to the bathroom, which is all conventional construction materials. Thank you so much for the time you obviously spend on helping people.
DIYTileGuy says
Thank you. I’m glad this sure had been off since help. All the best with your project!
Patrick says
I’ve torn out the linoleum in my bathroom, approx a 30sq foot floor to tile. We are putting in 12X24″ slate stone tiles approx 3/8″ thick. The framing is 16″ o.c. with 1/2″ OSB on top and 1/2″ Plywood atop the OSB. The plywood sits flush with the particle board in the hallway which itself sits atop OSB and the same framing. I’m not really wanting to take out the plywood and replace with hardie backer. I’m thinking of using either Permat or Redguard becuase I would like to use modified thinset (Versabond LFT) and Ditra (should) requires unmodified unless you buy their thinset product. I am not familar with Noble CIS as I can get the Permat and Reguard readily locally. I’m looking to keep the elevation gain limited, even though in the hall a carpet with pad would meet pretty well with the finished bath floor, hardwood might be a little less but I am thinking I could also consider sanding down the transition edge of the slate if needed.
Knowing all this do you recommend one mat over the other?
I’m reading mixed reviews on the Redguard, peeling up, thinset not ever really curing and mainly Ditra fanboys disliking it. I’ve not seen many reviews on Permat. Both appear to be slightly thinner (on paper) than Strata Mat which is also available but in more than twice the sq footage than I need,
I’d love to hear your recommendation, Thank you
DIYTileGuy says
If both hall and bath floors are currently flush with each other and both will receive additional flooring then using Redgard uncoupling or Permat would be fine from this stage.
I haven’t tried the red version of Redgard uncoupling but it looks identical to the older green stuff. If so, I personally prefer it over Ditra. Permat is good too.
I would double check the subfloor. 1/2 inch OSB for a subfloor isn’t normal. Much more typically it’s 3/4.
Cheryl Schrom says
We are removing our glued down vinyl flooring to install the uncoupling membrane over sub-floor and then tile. The vinyl is off, but left behind are paper/glue fragments throughout. How clean do we need to get the sub-floor before laying the membrane? And what is the best material to use to level the plywood subfloor in the couple of spots it is off?
DIYTileGuy says
The subfloor should be as clean as you can get it. Water and a scraper is where I would start but a sander with rough sandpaper is often required. It’s not unusual for me to use a diamond grinding wheel on the subfloor to get it as clean as possible. Once your done with the removal the floor should be sponged with water to remove any dust.
For filling small depressions, I like Ardex Feather Finish but Mapei Planipatch is a good product as well. Oftentimes, Planipatch can be found at Lowes and other retail stores.
Patrick says
I’ve finally pulled the vanity and toilet, cleaned the plywood floor. While I’m at the big box store I run into one of their tile guys. First, he insists thinsetting the Permat in will require modified, and thin-coating over top and installing the 12X24 natural stone tile will require unmodified, but then he isn’t aware of Permat.
Then he says its more effort than required. He assures me I should just use 1/4″ Hardie-backer cement board, and says not to embed it with thinset, but to screw it down as marked and then tape and fill the seams . To follow then with using the modified thinset for the stone tile.
Well, online there’s a lot of criticism of not embedding hardie-backer cbu to those who ignore the manufacturer’s instructions. While those who defend it say its more a matter of how well its screwed down and where the seams meet.
I can only go by that I have the OSB board under the plywood as my sub-floor. So about 1″ to 1&1/8″ total thickness. If I bounce around on it, yeah, there’s deflection, its not bedrock.
But now I’m at a confusion crossroads. Initially I considered the Permat because I did not want too much rise, but if using hardie-cbu is a more correct format, I can deal with it.
So, can you steer a recommendation for 12X24″ natural stone (Montauk Slate) over 1″ to 1&1/8″ max thickness osb+plywood subfloor? Which would you choose?
1: Hardie-backer, modified in, screwed down, with modified on top.
2: Hardie-backer screwed the heck down every 6″ min or so, and then modified on top for the tile.
3: Permat, modified thinset in, then thincoat modified on top. (Let it set overnight possibly?) Then modified thinset for the tile?
4: or Something different or a variation of the above?
Sorry if I didn’t word it all correctly as I’m confused now by this guy. I’ve got my floor ready, and I’m at that point I just want to get it done.
Also, I’m not sure I care if using the manufacturer’s recommendations is 100% required either, since they tend to conflict. And if it doesn’t meet their warranty, what does that exactly mean? How many times do these companies warranty a problem without pointing at something else as an exclusion to them having to cover a claim? I’ve seen people talk about ripping something out, very little on the manufacturer covering the time and expense of fixing/repairing.
If you do it correctly, then it wont fail. Sometimes it doesn’t see to be using their recommendation but more with dealing with your prep or conditions.
Anyway, please let me know what you recommend. Thank you!!!!!!!
DIYTileGuy says
With natural stone, the industry recommendation is 1/2 inch plywood over minimum 5/8″ plywood (or 3/4″ OSB). From there you can use an underlayment. Hardibacker is fine and so is Permat.
Permat, I believe, says that you can use their product for natural stone so that you don’t have to install 1/2″ plywood underlayment. So you can install it right over 3/4 inch OSB (this should be verified- rules change all the time).
If you want to install Hardibacker, that’s OK. Industry recommendation is to install it over 1/2 inch plywood if you are installing natural stone. The Hardibacker should absolutely be thinset down and fastened to the floor with either screws or roofing nails.
So you’ll have to figure out which height that you want to hit and select the products that will get you there. I would use modified white LFT mortar to install natural stone. If the slate is black then gray would be OK.
Patrick says
I went with Permat amd the modified large format.. I couldnt find gray but I did get the expansion joints cleaned out well and had presealed the stone.
DIYTileGuy says
Sounds like a good course of action!
Davey says
We had a floor done in our bathroom using redgard uncoupling mat, but it was done terribly and there are hills and bumps and our tile is not flat at all. Basically, we have to redo it, have you ever tried to remove an uncoupling mat? Any idea what we are in for?
DIYTileGuy says
I’ve tried before and it’s not fun. But the experience made me a believer in the uncoupling systems. You’ll probably be best off trying to grind the mat off with a cup-style wheel. However, if things are installed not-so-well that could end up being a blessing in disguise when you go to remove things.
This is an example of the type of wheel that I’m talking about. Keep in mind, these are made for grinding cemetitious products and sometimes they don’t work well over glue and other substrates. So, I’m not 100% sure this would work over an uncoupling mat.
Grinding cup wheel (affiliate link)
Trish says
Question- new home build and the tile installation has been a nightmare. All tiles surfaces were installed over filthy dural some Ditra. There is massive lippage not to mention the grout easily washes out ( another topic). Tile guy is trying to tell me if the tiles haven’t popped or cracked yet, theres no issues. We havent even moved in yet. I would live to share pictures if anyone is interested or would like to give advice as to what they would do. He has not yet been paid in full. I have HUGE concerns.
DIYTileGuy says
In general, the lippage isn’t supposed to exceed a credit card in thickness. That’s the unevenness from tile-to-tile and it’s simply a guideline and not a rule. Obviously, the grout should stay in place also and not crumble out.
Dave Heyl says
Hello. I have to tile a bathroom and kitchette over concrete. I used GoBoard upstairs in the master bath and found it easy to work with. I was wondering what you thought of using GoBoard as an uncoupling membrane over the concrete. Instructions are provided for installing over concrete, without fasteners obviously. They don’t mention anything about it being used for uncoupling, but it seems to me the 1/4″ board would work great for this. What do you think?
DIYTileGuy says
GoBoard is a good choice for going over concrete because it can act as an insulator. At least to a minor extent. However, I’m not sure what the desirability of an uncoupling function would be?
If you are hoping it will keep cracks from transferring through I don’t think it’s been tested in that way. However, most uncoupling membranes don’t qualify as an A118.10 crack isolation membrane either. That’s not to say that they would have no abilities in that way but just that they aren’t tested in regard. Same with GoBoard.
There are exceptions, however. Redgard Uncoupling Mat is rated as an A118.10 Crack Isolation membrane. I’m sure there are others.
So, I’m not sure if I’m answering your question? But there’s no reason to not use GoBoard over concrete but I just want to make sure that it’s doing what you want it to do.
https://www.diytileguy.com/uncoupling-membranes-cracked-tile-floors/
Tim says
I am installing Ditra XL in a small bathroom that was previously linoleum over plywood over OSB. There is some black mold between the plywood and OSB at the toilet flange area. OSB is solid, no obvious damage. Do you think it’s OK to just clean up and apply thinset over this area?
DIYTileGuy says
Mold can be a serious issue and there this is a good place to start looking for information: https://www.epa.gov/mold
Even if it’s mild mildew I would try to treat it with bleach or another cleaner before going over it.
Maximus says
I’m installing 12 x 24 x 3/8″ marble tile in a 9×12 bathroom area. The current subfloor is 3/4″ OSB and sits on top of joists at 16″ OC. Schluter specifies that an extra layer of 3/4″ OSB needs to be added when using natural stone (regardless of whether using Ditra or Ditra XL); however, I can’t raise the height anymore, so I’ve decided not to add a second layer of OSB.
Will the flooring crack for sure, or is the manufacturer just covering their bases? I other words, will my installation absolutely fail or would it most likely be fine?
Sorry if this has been answered already, but I read all the comments and couldn’t see where this exact issue was discussed. Thx
DIYTileGuy says
It’s an industry standard to install an additional layer of 1/2 inch plywood over the subfloor for natural stone floors as natural stone can’t handle movement like porcelain and ceramic can. So, your options are probably: add the 1/2 inch, reselect your tile, take a chance.
There’s no guarantee that your floor will fail and there’s no guarantee that it won’t. I’ve seen marble floors do just fine over single-layer subfloors and I’ve also seen them crack and pop loose.
Max says
Thanks for the response! It’s the “confirmation bias” that I was looking for—haha! (i.e., I just wanted to hear someone say that it was in the realm of “could work”). I’m going with the “chance” option, but mostly because 1) I’ve walked through dozens of new homes that have natural stone and have never once seen doubled up flooring; 2) I’m using the thicker Schluter membrane, so hoping it gives me an extra buffer to reduce movement; and 3) the marble tile I’ve selected seems to be pretty solid when compared to other natural stone I’ve worked with [such as travertine or clay tiles].
Anyway, thanks again. The feedback is appreciated!