You’re asking a very simple question: “What size trowel do I need for my tile project?”
The reply should be very simple. However, the correct answer is “It depends.”
The problem is that it’s not the right question to ask. Here’s what you should be asking:
Estimated reading time: 6 minutes

First, a refresher on why notch trowels for tile come in different sizes to begin with.
Why There are Different Sizes of Notches on Tile Trowels
The notches on a tile trowel gauge the amount of mortar so it’s the same amount everywhere on the floor or wall.
The ridges of the mortar collapse into the void next to them once a tile is placed over them. The different size notches gauge different amounts of mortar.
Different amounts of mortar are necessary and depend on how large the tile is, where it is being installed, whether it’s been back-buttered, and what type of substrate the tile is being installed over.
ANSI Standards for Mortar Coverage
The tile industry uses ANSI standards to determine how much mortar is required underneath a tile. [1]
These standards don’t specify which trowel size to use. Rather, they specify mortar coverage. When you pick up a tile after it was placed into a bed of mortar, how much area did the mortar cover?
How much mortar coverage do you need?
Industry standards call for the following [1]:
- Wet areas: 95%
- Non-wet areas: 80%
- Natural Stone: 95%
Additionally, mortar coverage should be evenly distributed and support the edges and corners.
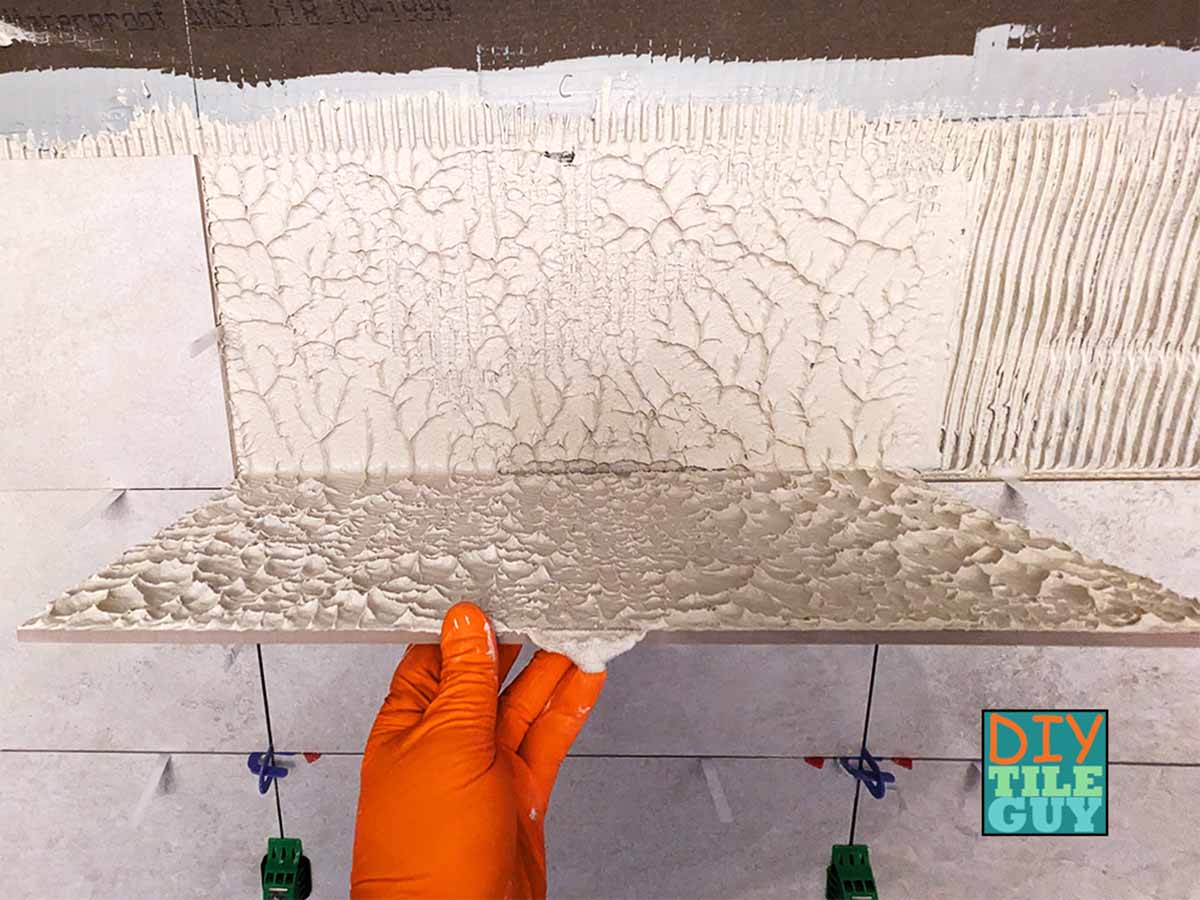
95% mortar coverage means 100%
You want to look to get 100% coverage on the back of every tile. In not-wet areas you have a little bit of wiggle room.
But in wet areas, you want 100%. The standard is 95% because 100% is difficult to prove. Any little pinhole or void could be considered coming up short.
So, think 100% for wet area installations. If it doesn’t look 100% then it isn’t 95%. Pull the tile up and fill the voids.
Yes, it’s easy to dictate how much mortar coverage you should have on the back of a tile How you accomplish that is another thing.
“How do I achieve good mortar coverage on the back of my tiles?”
Yes, this is the question that you should be asking. Trowel size plays a part. However, there are multiple factors to achieving good mortar coverage:
- Having a flat surface
- Thinset selection
- Thinset consistency
- Selecting the proper trowel size
- Directional Troweling
- Sometimes Back buttering the tile
Flat surface to tile over
Your walls and floors aren’t naturally flat. At least not flat enough for tile industry standards.
Flat surfaces happen because of good prep work and proper underlayment and backer board selections.
Thinset selection
In addition to proper notch trowel selection, it’s important to use the correct thinset for each situation. For example, Schluter products are famous for their unmodified mortar requirements. Also, glass tile is usually something that needs very careful mortar selection.
Thinset Consistency
Further, the consistency of the thinset matters too. Thinset that is mixed properly goes hand-in-hand with notched trowel selection. In fact, I have a whole post on the proper mixing ratios for small batches of thinset.
Tile notch trowel selection
The proper trowel size depends on what you are installing. See my post on the best trowel size for more information about tile notch trowels.
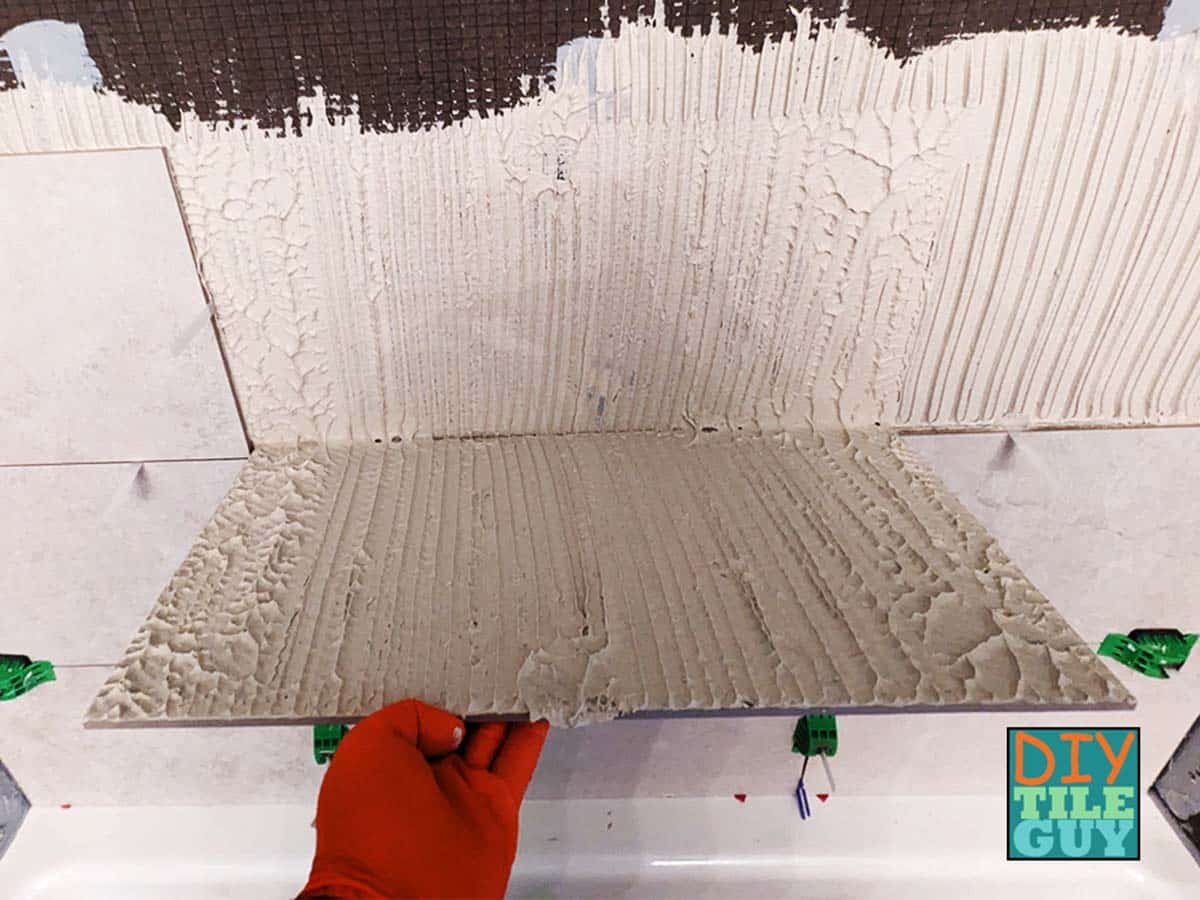
Directional Troweling
Once you’ve made your selections and progressed to this stage, it’s time to trowel mortar on the floor or wall.
You want to run the notches of the mortar all in the same direction. Then place the tile into the bed of mortar and move it back and forth across the mortar ridges to collapse them evenly.
Back buttering tile
Back buttering your tile isn’t necessary in every situation but it can help achieve better mortar coverage.
In fact, the new ‘proper’ term is “flat back-troweling”. Small tiles almost never need back troweling. But it’s a recommended practice with large format tiles like 12x24s.
How thick does mortar need to be under the tile?
According to industry standards, the minimum thickness of the mortar bond coat is 3/32 inch. [2]
This means that once the tile is installed and the mortar ridges are collapsed the mortar thickness in between the tile and substrate should be no less than 3/32 inch. This is approximately the thickness of a credit card.
When you run the 1/4 inch trowel calculation in the paragraph below you realize this trowel is very overused.
How thick is the thinset underneath the tile once it’s installed?
This question usually comes from people that haven’t installed tile before. They think there is some sort of straight-forward calculation. But it’s not that simple.
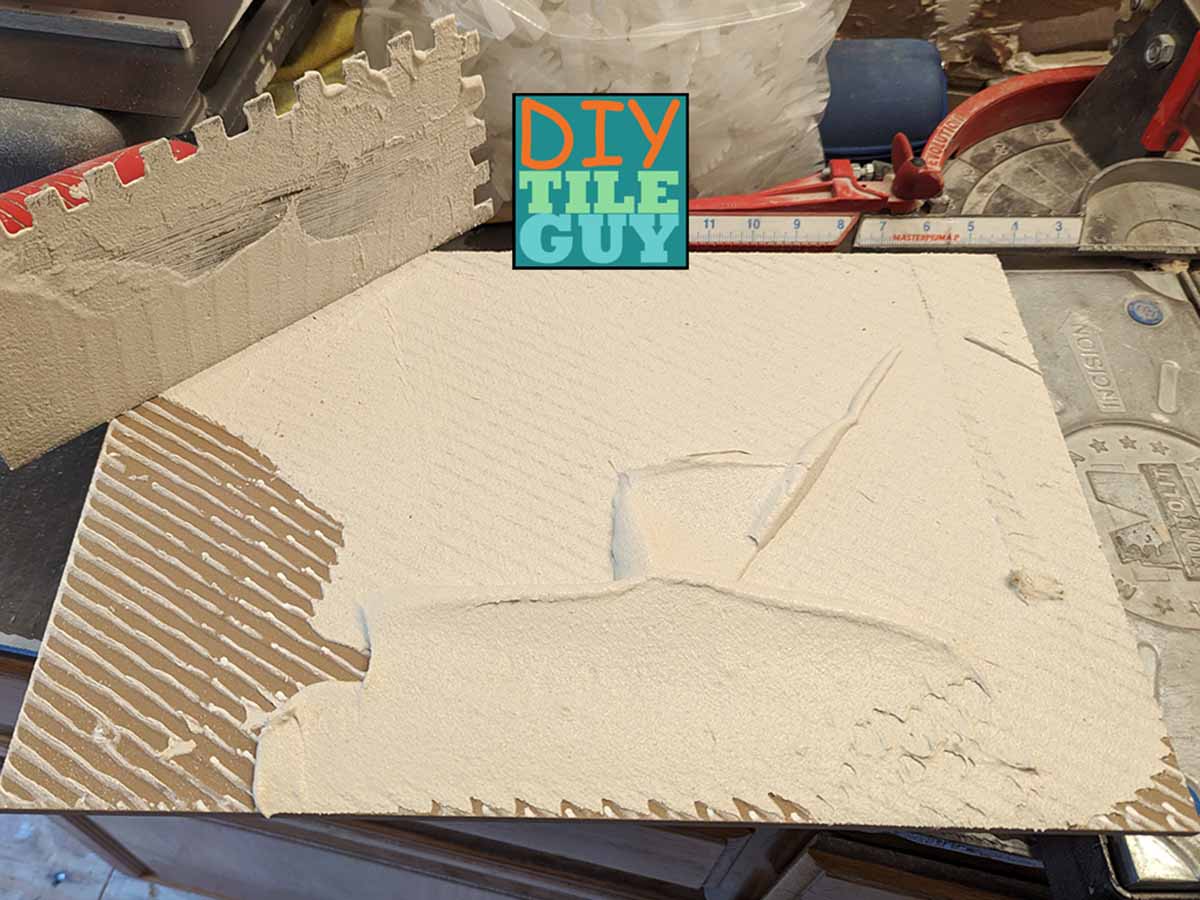
Example: 1/4 notch trowel
To answer your question, let’s use a 1/4 x 1/4 x 1/4 inch square notch trowel as an example.
Since the notches are 1/4 inch tall many people assume that once the mortar ridges collapse in to the void that there will be a 1/8 inch bed of mortar underneath the tile.
This is wrong.
When you hold your trowel, you don’t hold it straight up and down. Rather, you’re supposed to hold it at a 45 degree angle.
Therefore those ridges are only 1/8 inch tall and once collapsed would leave a 1/16th inch bed of mortar. Technically, this doesn’t meet the 3/32 standard listed above.
Other factors that influence mortar coverage
Was the tile back buttered or did some of the notched mortar fill in the back of the tile?
Was the trowel held at a 45-degree angle the entire time?
It’s not really fun to hold the trowel at this angle. A more natural angle is about 30-35 degrees.
Finally, it’s always assumed that the floor or wall is perfectly flat. It’s not and sometimes more, or less, mortar needs to be placed to even out the tiles to one another.
But the answer above should give you a ballpark idea of how much mortar is left underneath the tile.
Which trowel size do you need?
Remember, the tile trowel size that worked on one project may not work on another.
Rather than worry about the size and shape of the teeth on the trowel you want to ask yourself “Am I getting proper mortar coverage underneath my tile?”
Proper mortar coverage is up to the installer, not the maker of the trowel.
References
- ANSI A108.5, 3.3.2 [2019 version]
- ANSI A108.4, 3.2.1[2019 version]
Leave a Reply