
Ceramic Subway Tile: 3 Pro Installation Secrets
I have 3 tips to share for ceramic subway tile.
The first is a lesser-known layout technique for subway tiles. The second is an installation detail and the third is a cutting method done tutorial style.
Let’s get right into it. Also, don’t forget to check out my previous post: Subway Tile Installation: Three Basic Tips
Quartering your subway tile layout
Note: This first tip on a quartering tile layout is one that I ended up turning into its own post. So you can click on that link and it will take you to a whole article on this subject.
Hint: it’s not just for subway tile. I’ve used it extensively with shower walls and kitchen backsplash tile layouts.
Quartering is a great and little-known technique for centering 50% offset tile, like subway tile, that is different than what most would think.
So, check out that post and the other two pro tips are still written down below.
Subway tile layout video
I’ve included a short video that I made where I talk about the layout of this tub surround and some of the different trim pieces that were used.
Originally, these were 5 short Instagram videos but now they are stitched together in one video.
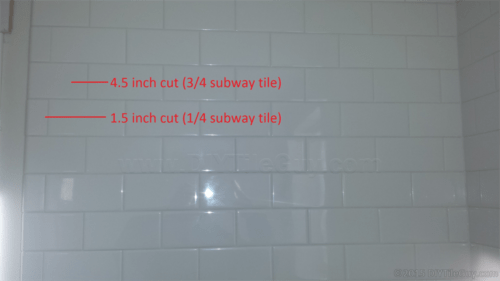
Your first cut would be 1.5 inches (1/4 of a 3×6 ceramic subway tile). Then the next row would start with a 4.5-inch cut. This gives you a 1/4-3/4 offset all the way up.
Sometimes this layout is just what you need to make your corners wrap properly or to keep you out of a little tiny sliver in your installation.
Bonus: This quartering layout technique also works when installing:
- Square tile on point (diagonally)
- Larger subway tile (subway tile have been trending bigger and bigger)
- 12×24 tiles
- Hexagon tiles
Hide the cut edge
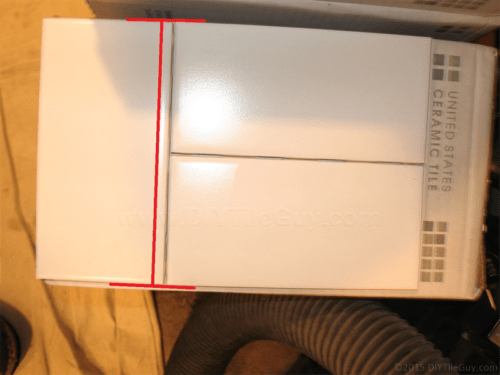
With typical white ceramic subway tile, you’ll have to have cuts on the ends of your rows. There’s no way around it. If you are starting a row with a whole tile/half tile then the half tile is a cut tile.
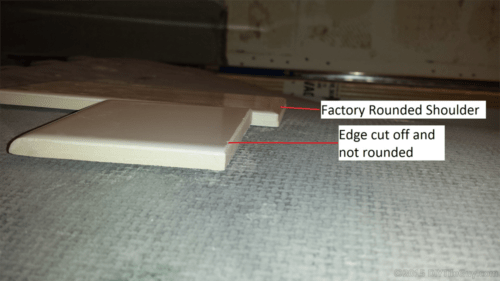
Most ceramic and porcelain tiles have a slightly rounded edge on them. In the photo above you can see that the half tile loses the rounded “shoulder” that the full tile has.
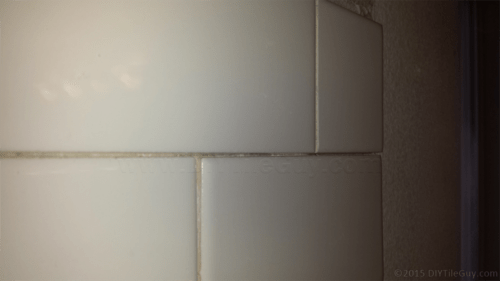
This can cause that cut edge to be proud, or stick out a bit, from the other tiles. This edge can then show up in certain lighting or just when you simply run your hand across the tile.
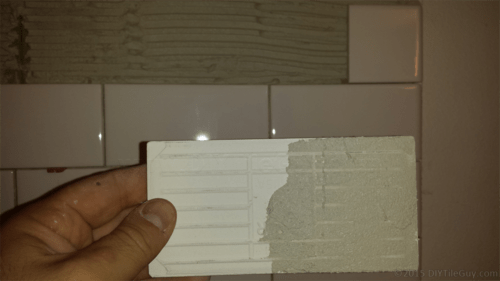
To get around this I will usually apply a bit more adhesive to the full tile next to it so that it “rounds” into the cut edge.
The photo below shows half of the tile back buttered to keep the edge from sticking out past. It’s a pretty simple trick that helps with the details.
Ceramic Subway Tile Cutting Tip
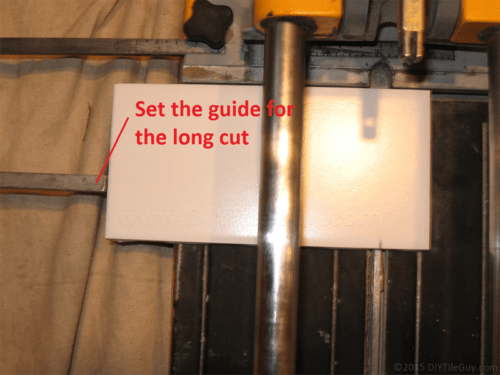
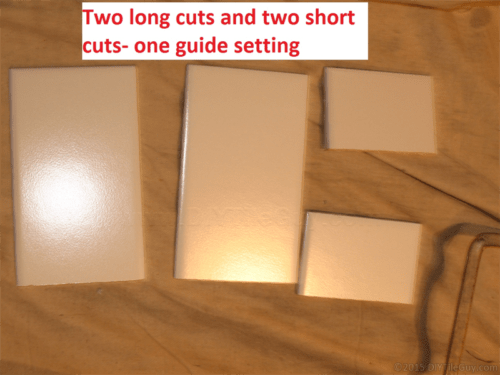
One thing that can be annoying when cutting ceramic subway tile is always having to set the guide in two different positions depending on which row you are working on.
Here’s a way of cutting both rows of subway tile and keeping the guide in one position.
Delta Cruzer 7-inch Tile Saw vs Dewalt D24000 | Tool Review
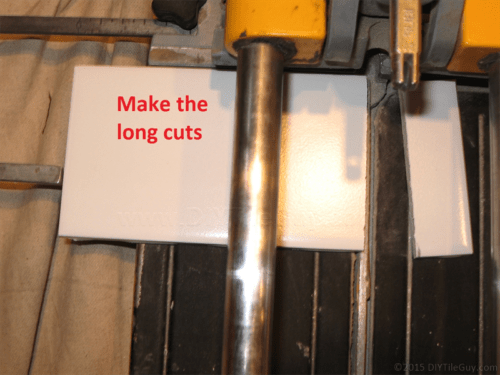
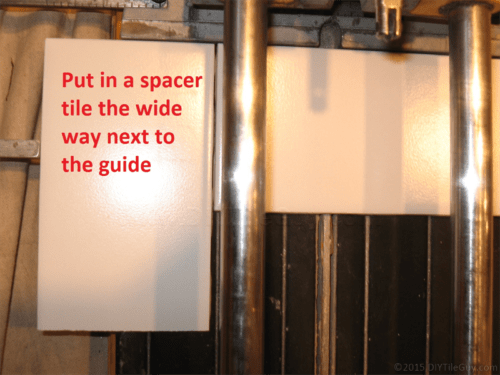
First of all, this works for modular subway tile. Modular means that two tiles with a grout joint are the same as a lengthwise tile. You can make it work for non-modular tile but you’ll have to make your own spacer.
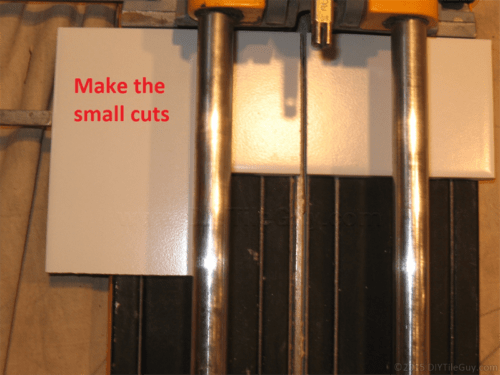
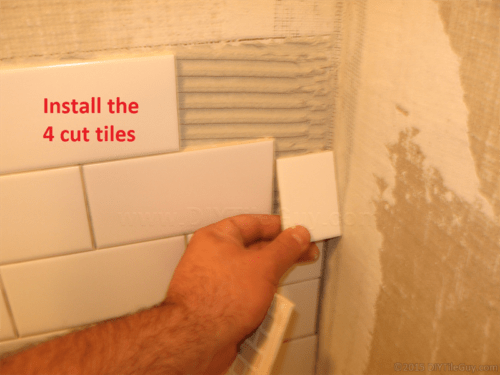
Here’s how to do it photo tutorial style:
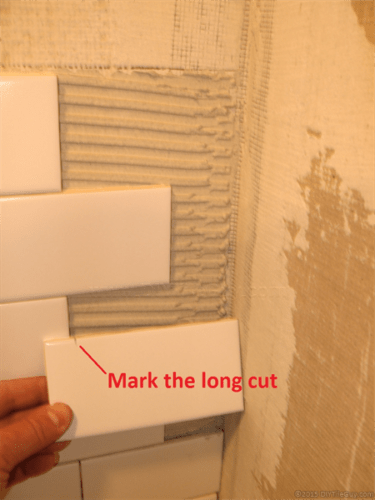
A word of caution: This will only work if you are meticulous about starting on your plumb layout lines. Also, it won’t work if your walls aren’t plumb.
You may be able to use this for 2-4 rows at a time but don’t cut all your cuts before you start if you don’t have plumb walls. It’s probably not a good idea to make all the cuts before you start if you haven’t done a lot of tiling anyways.
Those are 3 secrets that many pros don’t even know in regards to ceramic subway tile. Do you have any subway tile secrets that you want to share? Let’s hear them in the comments below.
Check out my posts on subway tile basics and tile herringbone patterns if you haven’t already.
