This post covers:
- Cement board, foam board, and Hardibacker
- Cutting into wall framing
- Waterproofing
- LOTS of photos!
First, if you haven’t read my post on 10 things to consider before building this shampoo shower niche, please do so before moving forward.
The Ultimate Guide to Building a Preformed Custom Recessed Shower Niche
Other niche building posts:
Part 4: Building a Custom Shower Niche from Scratch
Sometimes there’s no good way around it.
Building your own custom recessed shower niche from scratch can be the best way to add much-needed storage in your shower.
Not every shower works out perfectly to be able to put in a standard-sized preformed niche. Sometimes it makes more sense to start from scratch rather than make modifications to standard-sized foam niches.

So let’s start at the beginning. What material do you want to create your custom shower niche with?
Building material
Foam Boards
Most of the time when I build a custom shower niche I end up using Wedi board. I save my scraps so I always have some on hand. The nice thing about Wedi board and Kerdi board are that they come in different thicknesses.
This can be an advantage when trying to get a niche to layout with the tile. I may end up going with a 1/4 inch thick board on one side and a 1/2 inch on the others.
Another advantage to foam board is that they are easy to cut to size and doesn’t create any airborne dust. Also, the board itself is waterproof so once it’s installed and the glue is dry it’s ready to tile.
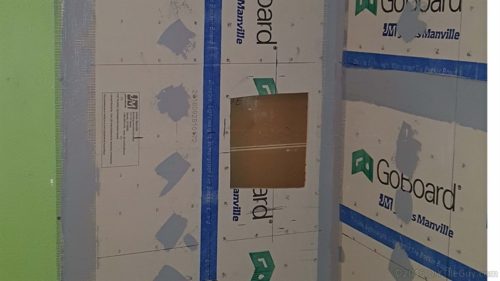
It does need to be installed like the instructions. With lots of glue. Schluter requires additional banding over the seams and penetrations for their Kerdi Board products.
Cement Boards
Niches can also be made out of cement boards like Durock and Hardibacker. These products are not waterproof so they will need an additional waterproofing membrane over them.
Kerdi vs Redgard
To waterproof over the cement board, I recommend either a sheet membrane or a liquid waterproofing membrane.
Liquid waterproofing is much easier to use for this than trying to hassle with all the cuts and folds of a sheet waterproofing membrane.
Examples of sheet membranes are Kerdi, Durock, and Valueseal. Examples of liquid waterproofers are Redgard, Hydroban, and Aquadefense. More on these below.
Building your custom shower niche
Much like the other niches types of niches, you’ll need to have these steps done:
- Tile backer board installed (at least most of it)
- Tile layout and niche placement figured out
- Niche location framed in with blocking on all four sides
Cutting studs in the shower
Sometimes there’s a temptation to cut the wall studs in a shower wall to accommodate a custom shower niche. After all, it is custom, right? Before you do this here are some things to keep in mind:
I don’t recommend cutting any studs on an exterior wall. Same thing for a load-bearing interior wall.
Load-bearing walls are interior walls that are holding up your house. Not all interior walls are holding up your house. In fact, most of them are just there to divide the space up.
Oftentimes, when you see an interior wall that is 2×6 construction it’s a bearing wall. With non-load-bearing interior walls sometimes you can cut a section of a stud out and have it be no big deal.
If you decide that you know what you are doing and want to modify the framing of an exterior and/or bearing wall for a recessed shower niche then the niche should be framed in like a window would be framed in.
Additionally, it probably is proper to get a permit when doing this. This is a tile blog though. I’m not going to give out advice on framing other than this:
If you don’t know what you are doing then don’t cut any studs!
Hire a professional for that aspect of it.
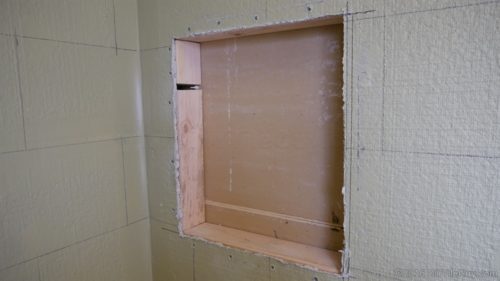
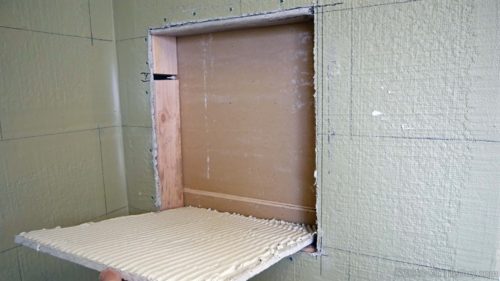
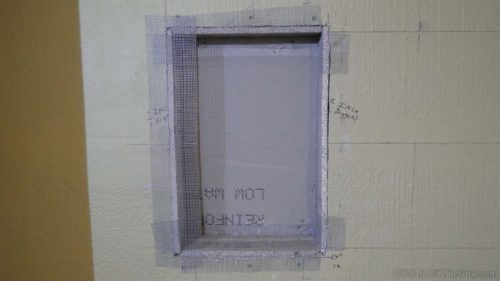
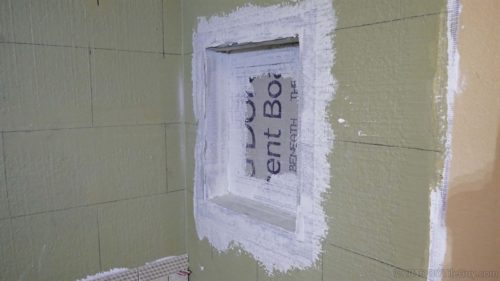
Cutting the wallboard to fit the niche
Assuming the backer board is already installed on the wall around the niche then this is how I typically go about it.
Cut a piece of backer board to install in the back of the niche. This can be either 1/2 inch like the wallboard or you can go thinner with 1/4 inch thick board for example.
The advantage of a thinner board on the back wall is that it gives you a little bit deeper of a shelf.
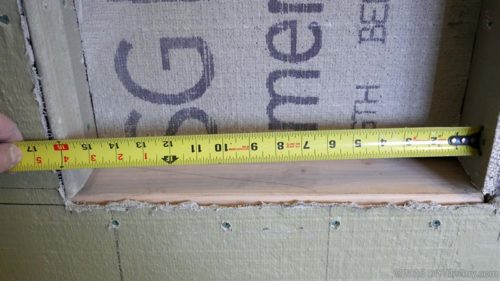
Then cut some pieces for the top, bottom, and sides. So, if you are using the 3ft wide backer board you might cut a strip at 3 3/8″ by 3 ft long.
Then cut the top and side pieces to length out of that.
Installing the wallboard
- You’ll need to mix up a small amount of thinset and put some thinset on the back of the backer board for the niche.
- Use a 1/4 x 1/4 inch square notch trowel for this. Comb the thinset all so that the ridges are all going in the same direction.
- Install the backer board on the back wall and wiggle it so the notches on the thinset collapse. Don’t screw or nail this piece in! Usually, you would be sticking it to the back of a sheetrock wall.
If you are installing this on a deeper wall, such as an exterior wall, then you’ll need to frame in some blocking to attach the back piece.
Assuming that’s the case, then you can forego sticking the back piece on with thinset and screw it into the framing blocks. For an exterior wall that you are installing this niche in you may want to read my post on this.
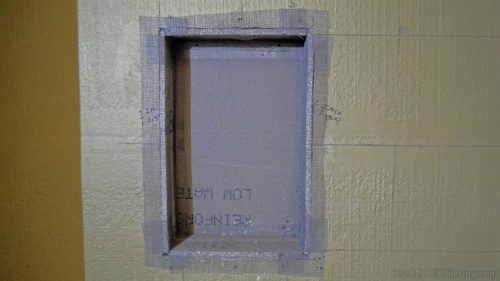
Side and top pieces of the niche
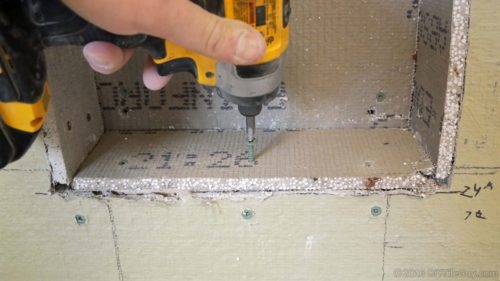
Upon installing the back piece, the side and top pieces can be installed.
No thinset is necessary under these pieces. Just screw them in.
If you’re using Wedi board or Kerdi board then I usually just put screws and washers down the middle of the strip.
If it’s cement board then I will screw a row of two screws in: one screw towards the front and one in the back.
Note for Wedi board users: You’ll want to make sure to put some sealant on all leading edges of the board before screwing it in. Just like if you were installing walls.
If you miss a spot then don’t take any chances. Pull the board back out and use more glue.
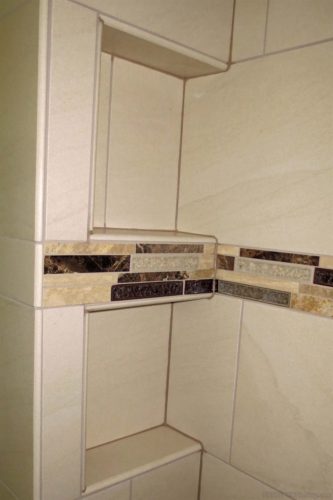
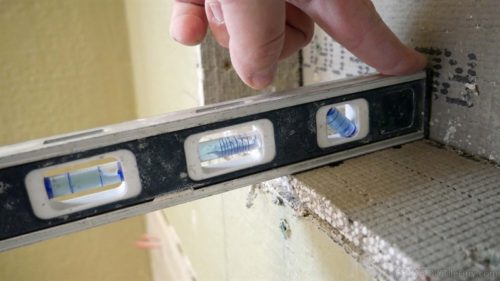
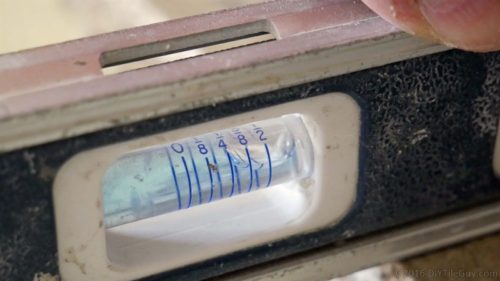
Slope the bottom
The bottom of the niche needs to slope slightly so that water will run out. But not so much that nothing can sit on the shelf.
The rule is 1/4 inch per foot minimum so I usually slope the bottom of the niche 1/8 inch.
One way of doing this is to plane the bottom 2×4 that you install for the niche. This means removing 1/8 inch of material from the front of the 2×4. Obviously, this would be done prior to installing it.
If you don’t want to plane the board then here’s an alternative way of doing it:
- The bottom piece of backer board on the niche should be thinset and screwed down no matter what.
- Typically I will apply thinset to the bottom 2×4 in the niche with my 1/4 inch square notch trowel.

- Then I put some tile wedges or spacers along the back. Maybe every 3 inches or so. Right in the thinset.
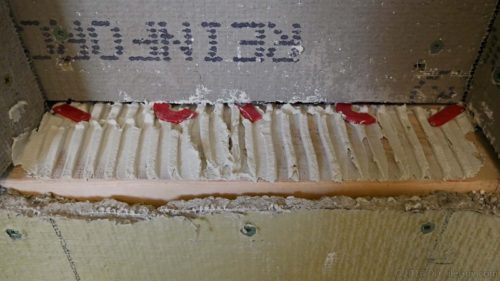
- Notch thinset on the back of the backer board.
- Install the backer board in the thinset and wiggle it. The back should wiggle down until it touches the wedges. Wiggle down the front and be sure it slopes.
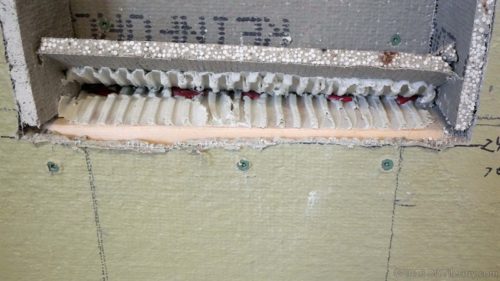
- Screw in the bottom backer board
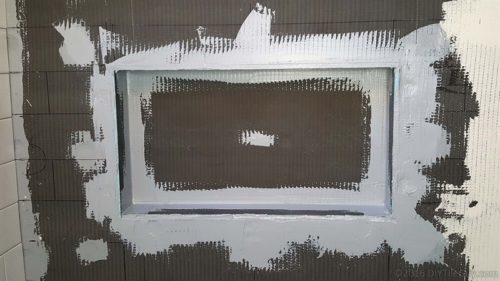
Sealing the seams
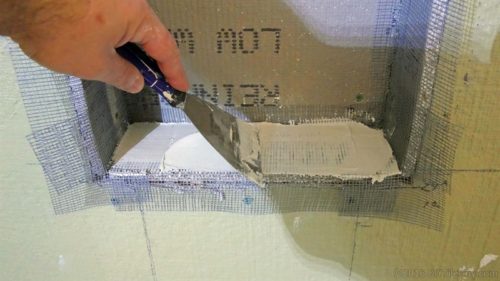
If you are installing foam board in the niche then you’ll want to apply more sealant to all of the seams and smooth it out.
This is where the plastic Wedi corner tool comes in handy [link at bottom of page]. Do the entire inside and outside around the niche.
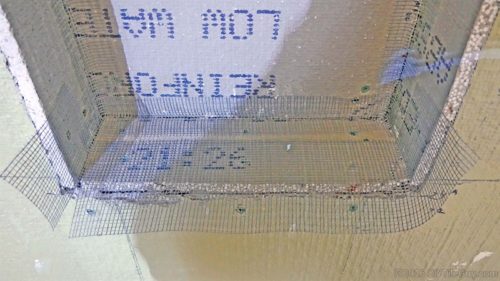
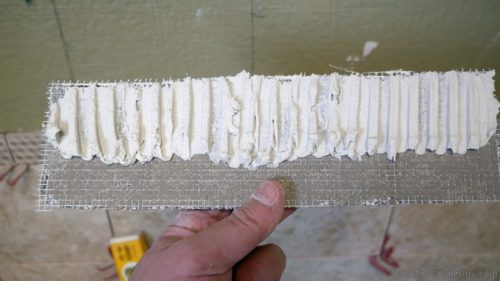
If you’ve installed a cement board then you’ll want to thinset and tape all the seams.
Alkaline-resistant 4-inch mesh tape is nice for this. You’ll want it in every inside and outside corner. Fill in all the gaps with thinset.
Note for Kerdi membrane users: When installing a waterproof sheet membrane in the niche you can forego the mesh tape step. The membrane will act as the tape for the seams.
Waterproofing your custom shower niche
Wedi board users: You’re already done! Your seams should be waterproof and you’re in business!
Sheet membrane users: Precut the sheet membrane for the niche. Make sure to overlap all seams by 2 inches minimum. I would apply a dab of sealant(Kerdi fix, Nobleseal 150, etc) in the corners for good measure.
Liquid waterproofing people: Scrape down any high spots in the thinset that has dried from the last step.
Apply a thick coat of liquid waterproofing over the entire niche. A paintbrush is usually the best tool for this job. Pay special attention to the bottom shelf of the niche. Make sure the membrane soaks into any pinholes.
Once this layer is completely dry (including all the corners) you can apply a second coat.
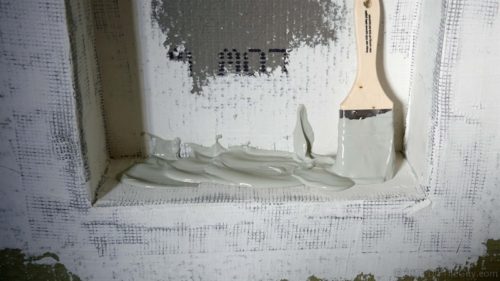
Thickness: A common mistake made with liquid waterproofing is people put it on too thin. However, it can be too thick also.
A general rule of thumb is to apply it “driver’s license thick.”
If you want a more exact way of determining the thickness then a wet film gauge is best [link below]. The exact thickness of each liquid is different and can be found in the installation instructions.
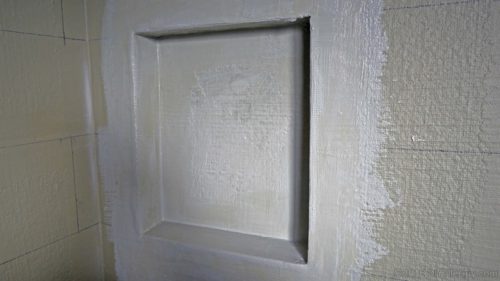
Once it’s waterproofed you’re ready to tile. For more on this step see
How to Build a Recessed Shampoo Shelf
Finally, if you’d rather forego the custom niche you could always add some elegant shower corner shelves.
Products and Tools mentioned in this post:
This post contains affiliate links. The site owner may earn a commission should you click on an affiliate link and make a purchase. Read more
Tools
- Torpedo level with slope indications
- Dewalt 20v impact driver
- Horseshoe spacers
- Wet Film Gauge
- Wedi Corner Putty Knife
Supplies
Waterproof foam backer boards
Liquid Waterproofers
Waterproof sheet membranes
