In this post we discuss:
- What types of prefab recessed shower niches are out there
- Which preformed shampoo niches are best
- Shower niche design ideas
- Why you should plan for a shower insert before you install any tile
- How to lay out a shower niche
- Adding shelves to your recessed niches
Estimated reading time: 12 minutes
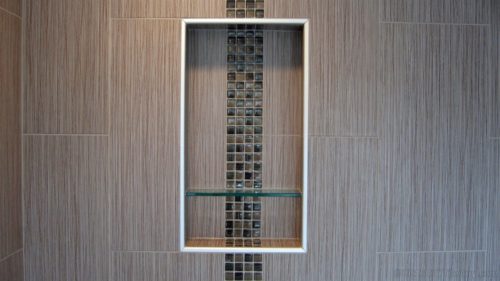
The Ultimate Guide to Building a Preformed Recessed Shower Niche
This is a string of 4 posts that talk about how to build different types of shower niches in a step-by-step fashion.
However, you’ll want to read my post on 10 things to consider with your shampoo shower niche before you tear into your walls (and 2 things not to do).
Part 1: Planning and Layout
Why a recessed shower niche?
Recessed shower shelves are more popular than ever. People are tired of wire caddies and shampoo bottles all over the floor.
You want a shower that is built for your needs. This includes built-in recessed shelving for shampoo and foot niches for shaving.
Yes, you could add some built-in shelves to the corner of your shower.
But, the case for a preformed shower niche is two-fold. These units are waterproof off of the shelf so this takes away a lot of user error. This way one mistake doesn’t ruin the whole house with water damage and mold.
The other advantage is that they make building a recessed shower niche much faster and simpler.
These two things make them a good choice for the DIY installer.
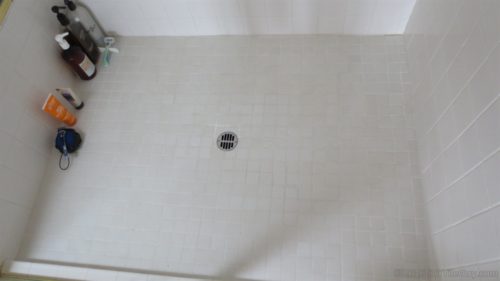
Types of prefab recessed shower niches available
Preformed recessed shower niches are available in a variety of sizes so they fit in between the studs of a standard 2×4 framed wall. Other sizes are available for people that want larger or smaller shower shelves.
First, let’s discuss the different types of prefab niches that are out there. I would put these in three different categories:
- Coated metal
- Plastic
- Foam
Check out the other niche building posts in this series:
Coated metal
The coated metal style are my least favorite. These are composed of aluminum with a rough sand-type ccoating thathelps the tile stick to it.
My experience is that these tend to stick out from the wall too far. This means that the wall tile has to be built out further or you have a bulge in your wall where the niche is.
I also know that some question just how waterproof they are. I’ve never tested them but have never had a waterproofing issue with them either.
Plastic
In fairness plastic probably isn’t the best term I could use. I just don’t know what a more technical term would be.
The main beef I have with the plastic ones is that you have to use an epoxy thinset with them when you install the tile. This is a hassle.
But other than that I don’t see any reason not to use them.
Foam
The foam niches are the ones that I prefer. Typically they consist of a polystyrene foam coated with a waterproof skin.
These are widely available and companies such as Noble, Laticrete, Schluter, and Wedi, all have a line of foam shower products.
You’re not required to use an epoxy mortar so whatever thinset you are going to use will be fine to install tile in the niche.
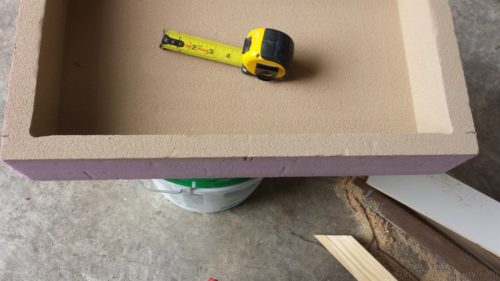
Flange or No Flange
Some preformed foam niches have a flange on the edge of them and some don’t. Personally, I have a very slight preference for the flange-less version but it’s not a significant factor.
Determine the use and purpose of your niche
Determining how the recessed shower niche will be used is the first step. You’ll want to ask yourself some questions.
- Is this for adults or children? (this can help determine the height of the recess)
- How many items will be stored in there?
- What kinds of things will be stored in there? Shampoo? Conditioner? Razors? Bar soap? Liquid soap?
- Do you buy tall shampoo bottles?
This can help you determine how big, how many, and if shelves are needed, or not.
For example, if it’s a kid’s bath and they have a bar of soap and Costco shampoo (11 inches tall) then you may want to build one large recessed box that is at a lower height.
For a bath shared by two adults with a variety of items, you may want to build it higher and incorporate shelves and perhaps more than one niche.
A leg shaving niche is typically much smaller in size than a normal storage niche.
Lastly, you may decide that all you need is a good-looking shower shelf, or two.
Plan the placement of your shampoo niche early

The best time to think about shower niches is waaaayy before the tile starts. Layout planning starts when the shower studs are exposed.
Come up with an idea of where you would like the recesses and look at the stud bays.
Are there pipes or electrical in the way? Does the stud bay work out for the tile layout (more on this later).
Can you put one in the center of the wall? Usually, there’s a stud in the way. Do you want two niches and need them to be aligned? Symmetrical?
All of this stuff matters.
Exterior walls
I would encourage you to avoid installing recessed niches on exterior walls. If this is something that you are considering be sure to read my post
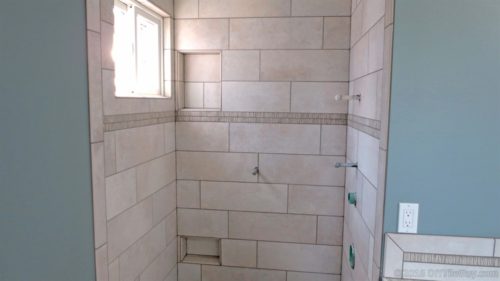
For example, in the photo, the homeowner wants the shower niche in the right hand stud bay- above the shower valve.
Because I knew this ahead of time I had the plumber (that was coming anyway) reroute the shower pipe so that it would be out of the way.
If I hadn’t talked to the homeowner about it ahead of time then the pipe would have been in the way.
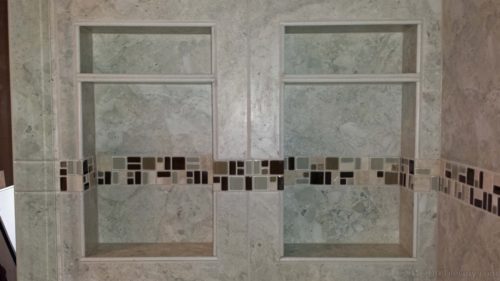
Recessed Shampoo niche design Ideas
Here’s a couple of resources if you are looking for photos to get design ideas for recessed shower niches. The John Bridge Forum has a good niche thread along with Houzz (of course) and Pinterest.
Layout and more Layout
One of my pet peeves is when the niche is framed in ahead of time with absolutely no thought going into the tile layout.
This would happen when I would subcontract for builders. I showed up on the job and a box was framed into the wall.
Asking any questions about how the particular location was determined was met with blank stares.
This section is to help you not make this mistake.
The Dream
The ideal scenario, in my opinion, is that a recessed shower niche should be the size of one tile or a section of tiles. It should look like a tile is pushed into the wall.
Now I understand that you may want a different material in the back of the niche. But the niche should hopefully land on grout joints that make sense.
However, this doesn’t always work. Some tiles are simply too big. There can be other reasons that this simply won’t work.
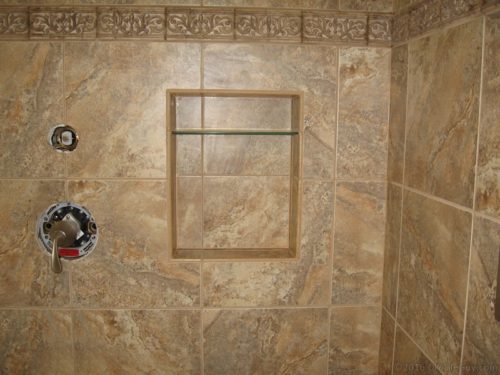
But the niche needs to be thought about in the layout of the tile. Symmetry, centering, simplicity. If these are what you are planning for you’re on the right track.
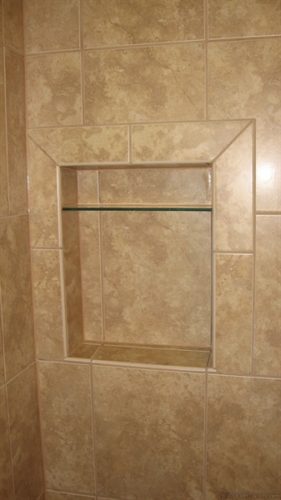
Trim for the corners
So before you install the tile you’ll need to factor in these things:
- What kind of trim will be used for the edges?
- If you’re using bullnose trim- do you want it on the inside or the outside of the niche?
- Are you using a metal trim, such as a Schluter profile trim, instead of bullnose?
- Can you use the edge of your tile?
The reason you need to determine these things is so that you’ll know exactly where to cut out the hole in the wall.
Increments of 12
Tiles are typically sized in 12-inch increments. 12×12, 12×24, 6×6, 3×6, etc.
Additionally, the niches are usually 12-inches wide. This allows them to fit inside a 14.5 inch stud bay. Studs are 16-inches on center which means there is 14.5-inches in between.
Ideally, you want 12-inches of tile to be in the middle of one of the stud bays.
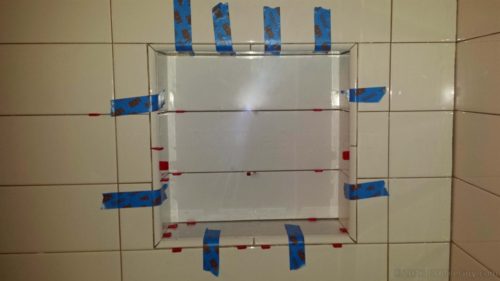
Line it up in the grout joints
You’ll want to layout your tile as you normally would. Usually centering the back wall to the left and right is good and you’ll have to determine which is the best way to layout the tiles from top to bottom.
At a minimum, you’ll want one of two things:
- niche to line up with the top and bottom grout joints in one of the rows
- have it centered in between two rows
Next, you want to see how the grout joints work out in between the studs.
Hopefully, you’ll be able to find 12-inches of space with both grout joints in a stud bay and hopefully, that stud bay is a location that you would prefer!
But it doesn’t always work out this way.
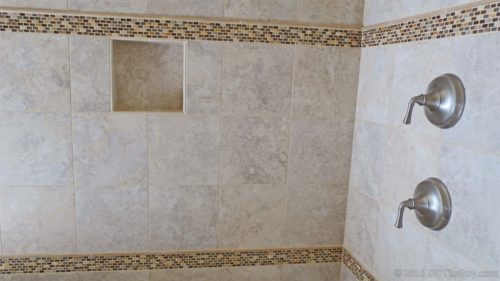
If the above doesn’t work out then is there a grout joint that is somewhat in the middle of a stud bay? Could you center this grout joint in the niche? That way things still look centered and symmetrical.
Do the best that you can. Try moving the layout left and right. Find what is going to look the best.
Not just for the niche but for the whole shower. However, sometimes it just doesn’t work out.
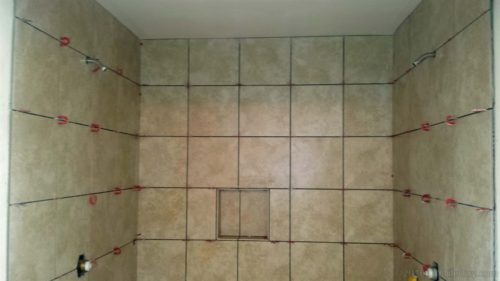
I’m close but not quite
A lot of times it works out that you can center the tile or a grout joint in a stud bay but you need 1/2 inch more room. A future post will discuss how to make modifications to your preformed foam niche.
Other times you may be able to make the niche look good but it requires extensive modification.
If this is the case I will have a future post on how to build a niche from scratch. Not using a preformed niche but building a completely custom recessed niche that is totally waterproof.
Recessed Shower Niches with Shelves
If one niche won’t create enough room for your shower supplies then there are options!
These include installing multiple niches, framing in shelves, buying premade foam niches with shelves, and adding shelves made out of either tile or granite or quartz shelves (2cm or 3cm).
Pre-made foam niches come in a variety of sizes. Many of them have a built-in shelf. These are a good option but don’t always lay out perfectly with the tile.
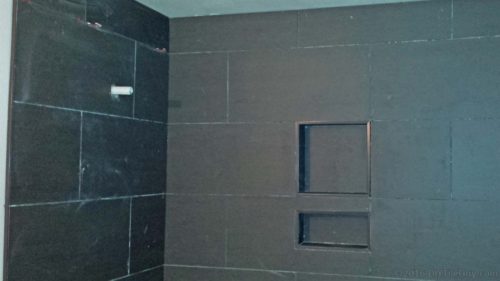
Many times people build a really tall box and make a shelf in between out of tile, glass, or 2cm and 3cm granite or quartz. Usually, this would match their countertop material.
Keep in mind that tile isn’t finished on the bottom.
So if you want to make a shelf out of tile then the usual solution is to double it up by gluing two pieces together. Oftentimes this is done with bullnose trim.
But with tile, you will need to have the top, bottom, and one end finished. That’s why granite, quartz, and glass tend to make a better shower shelf.
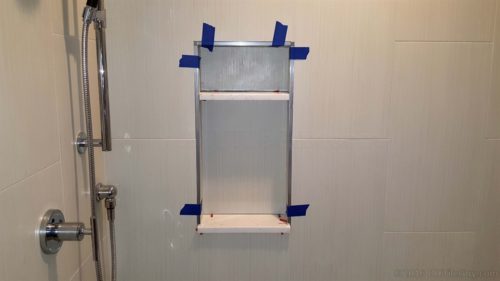
This is over my head
I understand that laying out your tile can be time-consuming by itself. Then trying to incorporate a recessed shower niche, or even two niches, can make this even more of a challenge.
Some of these are advanced concepts. Just do the best that you can with it.
You may not be able to get it perfect but at least it won’t be built in a completely random manner.