4 Shower Waterproofing systems for tile showers
Waterproofing a shower. This seems like common sense, doesn’t it?
Well, a lot of showers that are built these days still have no shower waterproofing whatsoever. Or they have poor or improper waterproofing.
Estimated reading time: 15 minutes
Click to Expand Table of Contents
What! No Waterproofing!?
How can this be? Well, I think there are multiple parties to blame.
For starters, the companies that manufacture tile backer boards deserve some blame. Oftentimes, they are prone to being a bit vague on whether waterproofing is required, or not.
Further, home builders, remodelers, and homeowners focus too intently on the price and go with whoever is the cheapest rather than paying for a properly built shower.
Tile installers lacking proper training and education would be another cause as they are simply doing as they’ve been taught. Maybe sometimes they reason it out themselves and decide waterproofing a shower isn’t necessary.
A common line of thinking is: “I’ve been doing it this way for “X” amount of years and never had a problem.”
Lastly, a lack of enforcement by local inspectors. Most local building codes require some sort of moisture barrier and oftentimes this is overlooked.
At any rate, you’re researching what kind of waterproofing your shower needs. Good! This post will cover 4 different shower waterproofing systems.
But first…
Is Shower Waterproofing required?
There’s a handbook, especially for tile installers. It’s called the Tile Council of North America Handbook (TCNA). It covers different ways to install tile in different applications.
There are certain sections that cover wet areas like showers. Membranes are required and it book gives two different options for moisture membranes.
Now I can’t copy their material because of copyright restrictions but here’s my own drawing based on their information:
Is Hardibacker and Durock cement board waterproof?
So you can see that, yes there are options for membranes. But a moisture membrane isn’t optional. It’s required.
Moisture barrier or Waterproofing membrane?
What are moisture barriers? Stapling sheets of plastic or tar paper to studs is an example. Something that repels water but isn’t completely watertight.
Oftentimes, they are installed behind cement backer board and mortar “mud” walls. It’s more of a minimal waterproofing system and would be used in areas like vertical shower walls and areas that don’t require more heavy-duty shower waterproofing systems.
A waterproofing membrane, however, is a more watertight option. If you have horizontal surfaces, more extreme conditions, or simply want a heavier-duty system then you’ll want a complete waterproofing membrane for your bathtub or shower.
For more information on waterproofing the critical areas in a shower see my post:
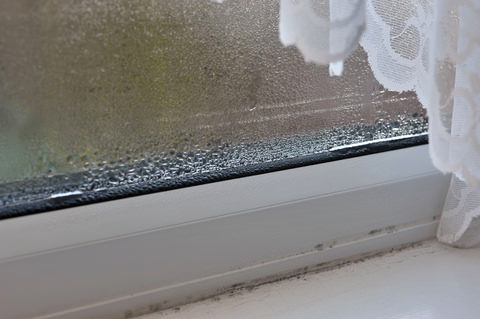
No Waterproofing: Will this cause shower leaks?
Vapor Barrier vs Moisture Barrier
As far as I know, there is no official distinction between these two membranes in the world of tile. In fact, the term moisture barrier isn’t used in the TCNA handbook. They use the term vapor retarder instead.
But I want to make a distinction between these two terms because a residential shower doesn’t necessarily need a vapor barrier (retarder). But it does need a moisture membrane.
When do you need a vapor retarder?
In the world of tile, you need a vapor retarder when you have extreme amounts of water vapor that need to be managed. If you have a steam shower with a steam generator then a vapor retarder is required.
But most residential showers don’t generate enough water vapor to be problematic. But they do generate enough water to need moisture management.
It can be confusing because even though they serve different purposes these membranes are often the same materials.
How bad of an idea is a marble shower?
While this post really isn’t about vapor barriers and perm ratings I do want to touch on the basics.
Perm Ratings:
- 6 mil plastic sheeting: 0.3 perms
- 15-pound tar paper: 5 perms
- Laticrete Hydroban liquid waterproofing: 1.247 perms (2 coats, each 15-22 mils thick)
- Schluter Kerdi Waterproofing fabric: 0.75 perms
- Schluter Kerdi-board 1/2″: 0.48 perms
- Nobleseal TS sheet membrane: 0.15 perms
If you are building a steam shower then you should know there are very specific ways to build these types of shower enclosures to manage both the water and water vapor that these will be exposed to.
Vapor barriers have perm ratings. To qualify as a vapor barrier the perm rating has to be below 1.0 perms for residential use and below 0.5 perms for commercial use.
This chart has some different shower construction materials and the listed perm ratings.
So that’s the background. Now let’s get to the 4 types of shower waterproofing methods. Starting with
What are the 4 shower waterproofing systems for tile showers?
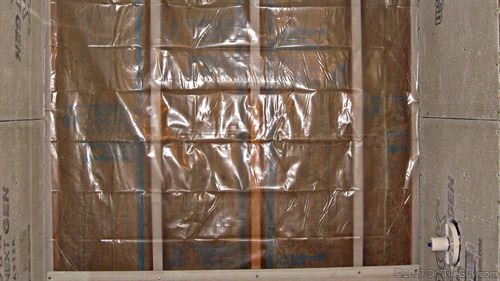
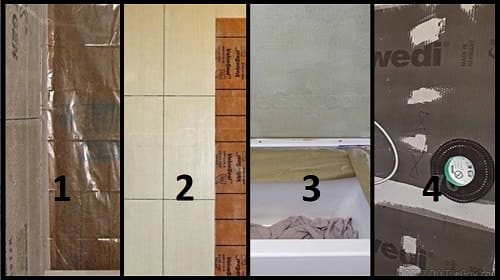
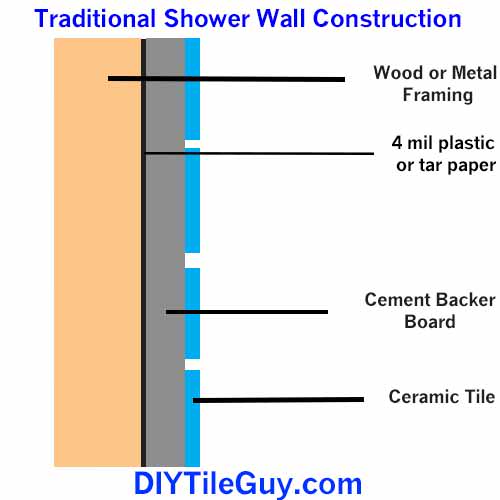
1. Traditional Shower Waterproofing (Water in/Water Out System)
What is a traditional shower? For years showers were built out of “mud” and a sort of metal chicken wire.
The shower pan floor would have a copper or lead pan, a rubber liner, or a “hot-mop” tar waterproofing underneath the tile. Tar paper was stapled to the walls underneath the mud.
While this method is still practiced today over the years those mud walls have more commonly been replaced with cement board and fiber cement backer board. Hardibacker is an example of a fiber cement board.
So this is what I’m referring to when I think of traditional water in/water out showers. These have a moisture barrier behind the walls.
Typically, the moisture barrier is 4-mil plastic or tar paper. The wall backing would either be mud walls, cement board, or fiber cement board.
Looking at this drawing below you can see how these are built. I’m using cement board in this example.
This is an adequate way to build most showers. However, if you have any horizontal surfaces or other critical areas this method won’t work.
No Waterproofing: Will this cause shower leaks?
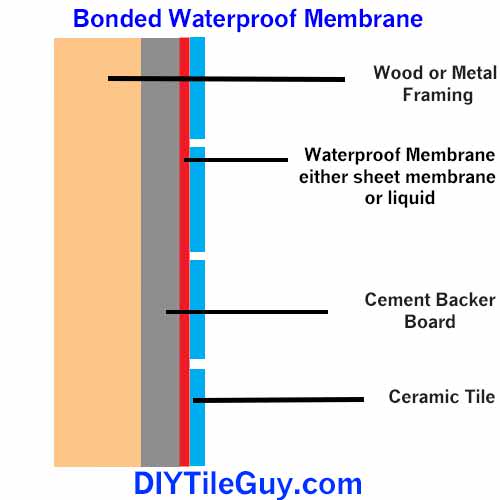
You’ll need to use what’s called a sealed shower system. These come in both sheet membrane and liquid form.
Sealed Shower Systems
A sealed shower system uses a waterproofing membrane that is bonded to a backer on the walls. This would have to be an appropriate tile backer board as drywall is not appropriate for showers.
Bonded shower waterproof membranes include two main types:
- Paint-on liquid waterproofing
- Sheet membrane
From here, I will go into each type. Note: if you are waterproofing a bathtub surround you will want to look at this post no matter which system you end up choosing.
2. Liquid waterproofing membranes
Have you heard of:
- Redgard
- Hydroban
- AquaDefense.
These are the most popular liquid waterproofers although there are much more.
The concept of liquid waterproofing membranes is wonderful. You build your shower to any configuration that you want and then paint over it with a liquid membrane and *TADA* It’s completely waterproof!
Unfortunately, the reality isn’t quite like that. Although these liquids are excellent for shower waterproofing there are some details that need to be honored.
Mil Thickness
One of the tricks to applying these liquids is that you get the proper thickness of each coat. This is more difficult than it sounds.
Each product will have a requirement for the number of coats and how many “mils” (thickness) is necessary.
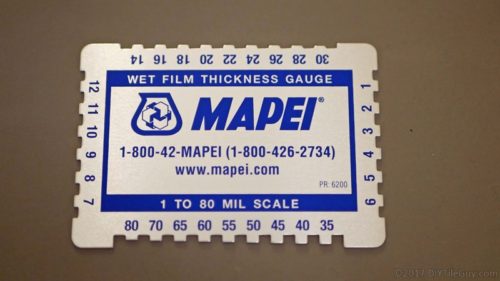
They make special tools called wet film gauges. These help to measure how many mils thick a liquid waterproofing is.
A rule of thumb is that each coat needs to be “driver’s license” thick. Another rule of thumb is that if you can see the lettering on the backer board underneath then it’s not thick enough.
These aren’t hard and fast rules but general guidelines. Putting the liquids on too thin is a problem but you don’t want them too thick either. More isn’t necessarily better.
Cure times
Another drawback of liquid waterproofing membranes is the amount of time things take to dry. You’ll put one coat of waterproofing on a shower wall and have to wait for it to dry. Yes, it needs to dry completely.
Generally, this takes a day for the first coat to dry. Then you’ll need to apply a second coat and allow that one to dry. The second coat tends to dry quicker.
Liquid waterproofing products are constantly improving and so are the dry times.
In fact, Custom Building Products now has a product called Redgard SpeedCoat which is urethane-based and supposed to dry really fast. See also, Hydro Ban Quick Cure.
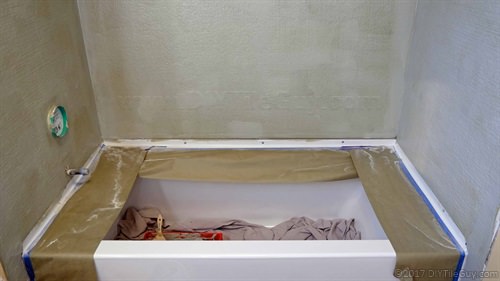
Mud beds
We just talked about cure times while waiting for the liquid waterproofing products to dry. Shower mud pans have their own cure times, also.
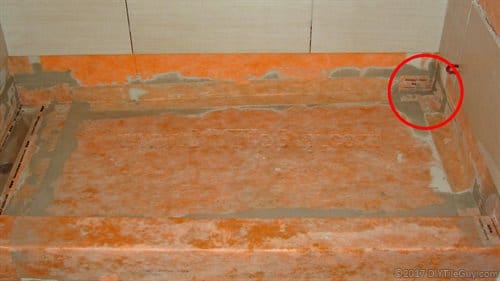
What is a shower “mud” pan? A mud pan for a shower is a custom shower base that is sloped to the drain using a cement and sand mixture.
It’s still a very common practice today although prefabricated foam shower bases are gaining in popularity.
The traditional way of building a mud pan was to install a waterproof liner inside the mud bed.
But when using bonded waterproofing membranes (Redgard, Hydroban, Aquadefense) the waterproofing layer would go on top of the mud pan. Then the tile sticks directly to the waterproofing.
Liquid waterproofing products are one type of shower system we call a ‘sealed shower system. This post has more information on how to build a shower pan. See this post if you want to know more about why I don’t care for liquid waterproofing over shower pans.
Flood testing a shower pan: Why it’s done and how to do it
The reason I’m bringing this up is that before a liquid waterproofer can be applied to the mud bed the mud bed needs to cure for a minimum of 72 hours in “normal” conditions- so sometimes even longer.
So if you want to build, for example, a Redgard shower the cure times start to add up:
- 1 day to build a mud shower pan
- 3 days wait for it to cure
- 1 day to Redgard the shower and wait for it to dry completely
- 1 day for a second coat and dry time
- 1-3 days to flood test the shower pan
Fast-setting mud beds
On the market now are a couple of products designed to speed things up. Custom Speedslope is one that comes to mind.
Reinforcing fabric
One of the perks of using liquid waterproofing products is that they don’t need any special banding or reinforcement in the corners or anywhere else*.
However, my recommendation is that you use fabric reinforcement in the corners of the shower pan, around the drain, and any other critical area when using liquid waterproofing products.
I don’t care what they say in the instructions. It’s too critical of an area to take a chance on. I do know of some shower failures that have come from a separation in these critical corners. A little reinforcing fabric or mesh is good insurance.
This will add a minimal and probably unnoticeable amount of thickness to these areas but it’s worth it, in my opinion.
*Be sure to read the instructions on the products that you are using. Many liquid waterproofing products don’t require fabric reinforcement but there are still some on the market that do.

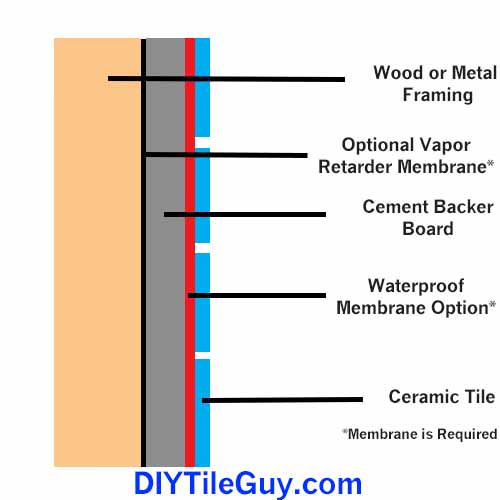
3. Sheet membranes
The third type of shower waterproofing system is the bonded sheet membranes. The most well-known example would be the Kerdi Shower system by Schluter Systems.
However, there are many other products:
- Laticrete Hydroban sheet membrane
- Mapei’s Mapeguard
- Ardex SK-175
are three examples and also considered a sealed shower system.
Additionally, many other companies like Noble Company, Blanke, Prova, and others have waterproof shower sheet membranes. See my review of the Noble Freestyle linear drain.
What’s nice about these sheet membranes is that you don’t have to worry about the mil thickness of the sheet. Another advantage is that you don’t have to wait 72 hours for the mud pan to cure.
Additionally, you don’t have to apply multiple coats and wait for them to dry.
The overlaps
But they do have some drawbacks. The biggest one is how you waterproof the seams. Typically, you have to overlap the seams by 2-inches to be completely waterproof.
Alternatively, you can use a 4 or 5-inch banding material for this purpose along with preformed waterproof pieces for the corners.
So, once you get into the corners you can have both a 5-inch banding material and a preformed corner over the top of the membrane. This adds up to three total layers of fabric.
Consequently, the corners are now built up and stick out further than the flat middle parts of a shower.
Other challenges include getting the membrane and the seams to be well bonded to one another and keeping wrinkles out of the membrane.
This post contains more information on how to build a shower pan using a sealed shower system like the Kerdi shower system. Additionally, I also have information for how to build a curbless shower pan.
For curbless showers, a sealed system is the method to use for building a shower with no curb.
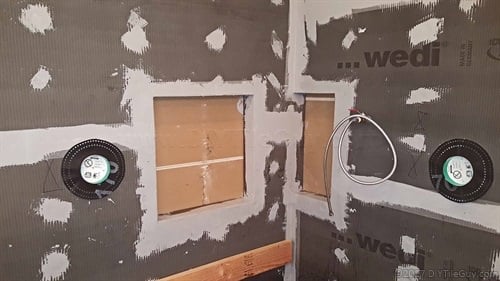
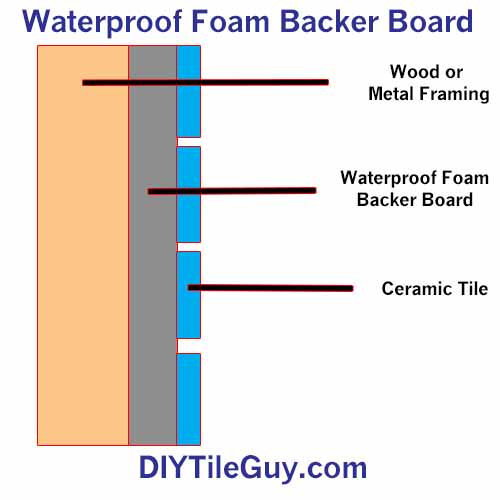
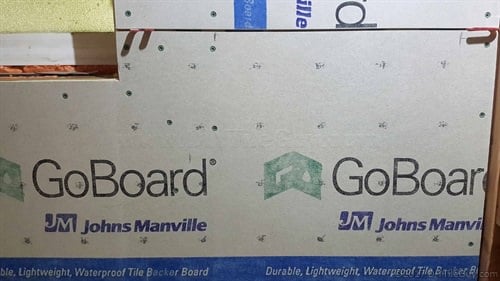
4. Waterproof foam backer board
Lastly, the final type of sealed shower system to be covered is foam backer board building panels. These include:
- Wedi Shower System
- Kerdi board
- GoBoard
- Hydroban Board
The waterproofing concept is essentially the same as with the bonded waterproofing systems mentioned above. They are waterproof on the surface rather than letting moisture absorb through to the back of the board.
What are the advantages of these backer boards?
Well, there are many.
They are lighter and easier to carry. The board itself is waterproof so you don’t have the labor of installing cement board and then waterproofing on top of it.
The waterproofing is where they really have an advantage. Usually, they have a waterproof sealant that you stick the boards together with to waterproof the seams. Others, such as Kerdi-Board, require a banding material that they want you to use like you would with Kerdi fabric.
Basically, once you install the board and glue everything together the shower is waterproofed and ready for tile.
Further, many of the manufacturers make prefabricated shower trays that will allow for a curbless shower installation without cutting any floor joists.
Costs of Waterpoofing Showers with Foam Systems
As you can imagine the costs are much higher than other options. In addition to the foam board panels, there are usually stainless screws and washers to buy. Don’t forget the urethane glue either.
Some of the newer boards such as GoBoard, Hydroban board, and Durock board can be installed with cement board screws.
Additionally, there’s more flex in these foam board panels and tile doesn’t like flexing. Some are worse than others.
In my unscientific opinion, Wedi makes the stiffest foam panels. As you can imagine they aren’t the cheapest either.
Wrapping up Shower Waterproofing
Well, that’s the breakdown of 4 waterproofing methods for tile showers: traditional, liquid, sheets, and foam. My hope is that this will give you enough information to make a choice on how to waterproof your own shower or tub walls.
Alternatively, it could arm you with the information needed for selecting a contractor. Do they intend to use waterproofing? Which method do they prefer? Which method would you prefer?
Let me know which shower waterproofing systems you guys choose to install and why in the comments below.
