• Skip to primary navigation
  • Skip to main content
  • Skip to primary sidebar
  • Skip to footer
  • Home
  • Blog
  • About
  • Contact Me

www.diytileguy.com

Tile installation blog for the Do It Yourselfer

  • Waterproofing
  • Products
  • Tips & Tricks
  • Tutorial
  • Tool review
  • Video
You are here: Home / Waterproofing / No Waterproofing: Will this cause shower leaks?

No Waterproofing: Will this cause shower leaks?

September 6, 2016 by DIYTileGuy 87 Comments

Share this post!

133shares
  • Share
  • Tweet
  • Reddit
  • Email
shower leaks
Cracking and swelling tiles can happen when flat surfaces aren’t properly waterproofed in a shower. These are signs that moisture is getting into the walls.

Shower leaks. The last thing anyone wants when they build a new shower. And yet I hear the following questions quite often:

  • Is cement board waterproof?
  • The tile and grout will keep the most of the water out, right?
  • My contractor didn’t put any waterproofing in our shower. Will this cause shower leaks?
  • We didn’t know we were supposed to have a shower moisture barrier. Should we start over?

What inspired this post was that recently, on the John Bridge forum, a member had asked a simple enough question:  Is a moisture barrier required? He had hired a contractor to install his shower and the contractor said that it wasn’t necessary. But as more information came out- and photos were posted- it was obvious that there were going to be some shower leaks. I would encourage you to click the link and skim over the post.

This might be news to some but let’s get a couple of things out in the open:

Cement board is not waterproof. Hardibacker is not waterproof. Tile and grout are not waterproof.

Cement board will not fall apart when exposed to water. But like a concrete walkway, it can soak up water. It can also dry out and be perfectly fine.

Hydroban waterproofing
The second coat of Hydroban (light green) being applied to the top of the half wall.

What is a moisture barrier?

A moisture barrier is essentially a waterproof barrier. Its purpose is to keep moisture from getting through the backer board and into the wall. Acceptable forms of waterproof barriers for a shower are:

  • 4 mil plastic sheet behind the tile backer board
  • liquid waterproofing on the surface of the tile backer board
  • a waterproof sheet membrane on the surface of the tile backer board

Shower Waterproofing Crash Course

I have a hard time calling a 4 mil plastic sheet behind backer board a waterproof membrane. Why? Because you attach this membrane by stapling it to the studs then puncture it further by nailing (or screwing) backer board in front of it. But it is an acceptable, and minimal, way to keep moisture from getting into a wall cavity.

So here’s where I draw the distinction between a moisture barrier and a waterproofing membrane:

    • Waterproofing for vertical walls is a moisture barrier
  • Horizontal surfaces, even those that slope, need a waterproofing membrane.

Moisture Barrier vs Waterproofing

Now I’m not the only one that makes a distinction between waterproofing vertical and horizontal surfaces. Custom Building Products requires two coats of their Redgard liquid waterproofing on all waterproof surfaces. However, they also have this technical bulletin which says that only one coat is needed on the vertical surfaces of the backer board.

It’s sort of like: All bourbons are whiskey but not all whiskey is bourbon. Waterproofing can serve as a moisture barrier but a moisture barrier doesn’t necessarily qualify as a waterproofing barrier.

A moisture barrier is all that’s needed to keep water out of the water cavity. But more extensive waterproofing is required for the horizontal surfaces if you want to prevent a shower from leaking.
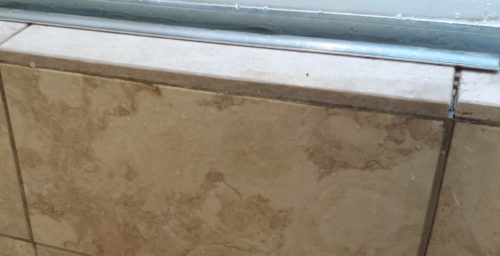
dryfly whiskey
I prefer handcrafting with real hands

Where you are likely to have shower leaks

The horizontal surfaces in a shower usually include the shower floor, half walls, benches, curbs, and recessed niches. These need special attention to ensure that they don’t leak. Acceptable ways of waterproofing these types of surfaces are 2 coats of liquid waterproofing, a waterproof sheet membrane, or the many different foam waterproof products that are available now. They make foam recessed niches, corner benches, floating benches, curbs and shower pans.

Flood testing a shower pan: Why it’s done and how to do it

Here’s the Point

The whole point of this post is to get to this bottom line:

Water containment on shower walls is important and a requirement. Waterproofing on horizontal surfaces is absolutely critical.

If your shower doesn’t have a moisture barrier failure isn’t necessarily imminent. But I wouldn’t consider it to be a well-built shower. If your horizontal surfaces in the shower aren’t waterproofed a leaking shower is nearly guaranteed!

Share this post!

133shares
  • Share
  • Tweet
  • Reddit
  • Email

Related Posts

  • improper tile liner corner
    5 signs your new tile shower will leak

    What to look for in proper tile shower construction You've hired someone to build your…

  • Shower waterproofing systems
    Shower Waterproofing Crash Course

    4 Shower Waterproofing systems for tile showers Waterproofing a shower. This seems like common sense,…

  • Flood testing a shower pan
    Flood testing a shower pan: Why it's done and how to do it

    Flood testing a shower pan. I get several calls per year about showers that are…

Powered By Related Posts for WordPress

Filed Under: Waterproofing Tagged With: aquadefense, custom building products, hydroban, laticrete, redgard, Sheet Membranes, waterproofing

Reader Interactions

Comments

  1. Mary Sue Butch says

    February 1, 2017 at 11:47 am

    My shower has a regular sheetrock ceiling, which developed black mold. I washed it with a mixture of vinegar and borax, which cleaned the surface but left a stain. Can I tile over this to prevent future mold? Or do I have to replace the sheetrock with backerboard?

    Reply
    • DIYTileGuy says

      February 2, 2017 at 7:36 am

      You shouldn’t have any issues sticking the tile to the sheetrock on the ceiling.

      Reply
  2. Bill White says

    October 4, 2017 at 10:45 pm

    In simple terms please. Redoing bathroom. Shower/tub alcove is cement board duralok. Behind cement board I put plastic what next. On other wall do I need plastic first then cement board. Now do I need to do more on walls with tiling half up not near shower. Also floor. Redid subfloor what goes on before cement board thin set and tiles.

    Reply
    • DIYTileGuy says

      October 7, 2017 at 9:34 am

      I’m having a hard time understanding what’s being asked. Please check your questions and ask again.

      Reply
  3. Chris says

    October 11, 2018 at 1:33 pm

    I am putting tile down in my kitchen and will be putting Durock and tile in the dishwasher alcove. The alcove is part of the center island that has the sink as well. The subfloor is exposed next to the alcove. My concern is that if the dishwasher should ever develop a leak and water gets out, or the sink over-flows, etc… if water gets in the alcove and thus to the exposed Durcok, will this cause a warping or mold issue with the Durock and subfloor? Should we put a liquid water barrier like Redgard down on the Durock and sub-floor before the tile is applied and the dishwater reinstalled? Thanks for the input.

    Reply
    • DIYTileGuy says

      October 15, 2018 at 7:32 pm

      It certainly wouldn’t hurt but it’s only effective as long as water is contained in the area of the dishwasher. So it’s very likely that water would simply run off of the waterproofed area unless more of the floor is waterproofed and it’s flashed up any vertical surfaces.

      Reply
  4. Rob says

    November 24, 2018 at 9:11 am

    Can green board be used anywhere inside shower area including ceiling?

    Reply
    • DIYTileGuy says

      December 10, 2018 at 7:23 pm

      You can use it on the ceiling.

      Reply
  5. barrett says

    January 14, 2019 at 1:00 pm

    I am remodeling an old house and am in the middle of re-doing the master bathroom shower. The original mud deck and mortar layer on walls are over chicken wire but I doubt it has any moisture barrier or waterproofing layer. I have removed the old tiles and want to install new large tiles with CBP LFT modified mortar. I would like to use RedGuard over the original mortar bed and wall layer to provide an improvement to what is currently there. Do you see any issues with this strategy?

    Reply
    • DIYTileGuy says

      January 16, 2019 at 6:23 pm

      For whatever reason, I’m reluctant to say that it’s OK but I can’t think of a reason that it wouldn’t be. The walls can be coated with Redgard but I wouldn’t put any on the shower pan.

      The shower pan is either waterproof right now, or it’s not. There’s no way to tie Redgard into the drain with the way the old shower drains are designed so covering the pan with Redgard doesn’t fix anything. If anything, it can have an adverse effect by trapping moisture between the two waterproofing layers- the layer below the mud bed and Redgard above. But doing the walls is a good plan, I think.

      One word of caution: the old mud beds were usually hot mopped or maybe it has a copper or lead shower pan. It’s not unusual at all for those to be compromised at this point in their life. So the best course of action would be to remove and start over.

      Reply
  6. Rafael Alvarez says

    March 4, 2019 at 3:31 pm

    Hello.I recently renovated my kids shower/tub and only did one coat of Redgard on the vertical walls above the tub.Will this be enough or will I have an issue?

    Reply
    • DIYTileGuy says

      March 6, 2019 at 7:44 am

      It’s more about thickness than coats but for something like that I think you’ll be ok.

      Reply
  7. Keith says

    April 12, 2019 at 5:39 pm

    Hey Tile Guy,

    Noon question—I recently finished building a tile shower floor and foolishly did not first lay a barrier. Is there anything I can use after the fact to seal it up? Anything like caulking the grout lines helpful? ?

    Reply
    • DIYTileGuy says

      April 13, 2019 at 10:32 am

      If you don’t have a waterproof membrane in the shower then the best thing is to start over. All that caulking the gaps would do is slow down a leak and when it comes to water damage the slow leaks do the most damage.

      Reply
  8. Nancy says

    May 30, 2019 at 5:13 am

    Hello Tile Guy,

    First, many thanks for all the time you put into your very helpful website. I’ve learned lots and my home renovation projects are better for it.

    Second, our contractor agreed to prep a new walk-in shower (I will be doing tile and finish plumbing). The space was formerly a tub/shower combination. Contractor did a presloped pan, plumber did rough plumbing and rubber membrane, then contractor finished the pan, installed a curb, and hung Denshield, taping the abutting joints.

    My concern is: his installation of the Densheild doesn’t look much like the manufacturer’s diagram I’ve since seen. In my shower, the Denshield comes down to meet the horizontal plane of the sloping floor base (withing 1/8″). In the Densheild diagram, they show the sides of the pan as an elevated rim around the perimeter (similar to the height of the curb). The diagram shows how this rim elevates the bottom edge of the Densield a couple inches above the horizontal plane of the floor. This isn’t what I have to work with and I’m concerned about longevity of the backing material.

    I know Densield is less prone to wicking and I know I can/should seal the small gap at the bottom of the backer boards, but I’m hoping I can add an insurance policy. I’m using redgaurd with a crack isolating fabric to fully waterproof the curb and areas more prone to leaks like the windowsill (vinyl window). Could I use this same method where the Denshield meets the floor?

    Reply
    • DIYTileGuy says

      May 31, 2019 at 7:18 am

      In my opinion, Denshield is a pretty minimal product, quality-wise, to have in a shower like this. Consequently, now there’s a sort of “belt & suspenders” fix so that everyone feels better about things.

      Here’s the main issue: the shower pan method that was used is designed to work in a certain way. Trying to patch things up with more waterproofing, although it sounds advisable, can actually be counter-productive and trap water in.

      Water will get into the mud bed (top layer) and then travel so that it’s underneath the corner that you are wanting to install the waterproofing. Same thing with the shower curb (hopefully your contractor didn’t screw Denshield onto the curb). As you can see, waterproofing these corners isn’t going to accomplish what you want.

      So, at this stage, the shower pan either works or it doesn’t. If it doesn’t work, then it needs to be torn out, or repaired, until it functions properly. Hopefully, a water-test was done on the shower liner to make sure that it doesn’t leak. But I don’t recommend a band-aid approach to the shower at this point.

      With that being said, the Denshield needs to be waterproofed at all seams and penetrations and I would definitely use the Redgard waterproofing fabric around the window.

      Reply
  9. Zach says

    June 1, 2019 at 5:38 pm

    Hello Tile Guy,

    After my contractor finished and left I realized he did a couple things wrong with the shower:

    1) the pan was sloped however after I turned on the shower I realize there is a low spot that collects water. I can just sweep the water up and into the drain, so this is more of an annoyance, but so you see a major issue with this? I’ve contemplated having just the area tiles ripped out, slope corrected, and tiles reinstalled. I think this might work bc the waterproofing is redgard uncoupling mat which probably wouldn’t rip (more concerning question on redgard mat below).

    2) more concerning issue. My contractor used redgard uncoupling mat. It’s the thicker “waterproof” barrier fabric. After I did some research (after this was finished of course), I realized this is meant for general tile floors or even shower walls, but not the shower floor. It’s clearly too late to do anything about it. The material is waterproof after all. Do you think I am doomed to have a failure/ leak/ mold? We have small hex marble tiles. I’ve applied two coats of floor sealer and all seams are caulked. Would of course prefer to not have to have the floor ripped up as it is expensive tile, our contractor is from out of town and not coming back, and based on labor costs in my area ripping out the floor and doing it again would be a couple thousand.

    Reply
    • DIYTileGuy says

      June 2, 2019 at 7:45 am

      I would definietly fix the corner and hopefully it won’t hurt the waterproofing below. But by repairing the tiles in the corner you can see how the corners of the waterproofing were done.

      One of the things about the uncoupling membrane is that it’s dimpled and that would provide a little bit of an impediment to attaching waterproof seam tape to it and running it up the wall. I’m assuming that’s how it would be done- the mat on the floor and seam tape folded in the corners.

      I’m not saying it couldn’t be done but it would have to be fussed over a little bit during the installation.

      Hopefully, everything with the shower is waterproofed OK and there’s nothing to worry about.

      Reply
      • Zach says

        June 2, 2019 at 11:23 am

        Thanks for the reply! That is somewhat a relief, about the uncoupling membrane being usable. The spot that isn’t sloped properly/ puddles is actually in the middle of the shower floor near the side of the shower step (the drain is all the way on the right side). So if we popped those tiles out and built up the floor it would not affect the seam, but would be just the uncoupling membrane may only. I’m thinking the membrane would be fine if we popped those tiles.

        Reply
        • Zach says

          June 5, 2019 at 5:52 pm

          Also, unfortunately I already have a leak. The grout on the shower curb has cracked and water seems to have gotten behind the tile and around to the side of the step of the bathroom floor. Water leaks out of the bottom of the curb at the bottom of a grout joint. At this point I’m thinking we’re going to have to completely redo the step, and some of the shower floor tile, as a best case scenario. Re-grouting and caulk would just be a bandaid. Our originally contractor just used pressure treated wood for the step with no waterproofing. I wish I had been more educated while he was doing this but now I know. He made some major mistakes.

          Reply
          • DIYTileGuy says

            June 12, 2019 at 9:39 pm

            That is unfortunate but at least you have caught it before it does major damage. As an FYI, you don’t want to use pressure treated wood in a shower. It seems like a good idea on the surface but what happens is it dries out and twists. Normal wood is the way to go.

            You might look for a contractor that has taken training from one of the companies that sells a complete shower system. Laticrete, Wedi, and Schluter are probably the three most popular names.

            As a rule of thumb, the shower should be waterproof before tile is installed. You never rely on tile and grout to keep water out.

  10. Eddie says

    August 20, 2019 at 8:11 am

    Water proofing is a relatively new concept for shower walls. I’ve tiled probably well over 1000 showers in my 20+ years of setting tile directly over backer board and to my knowledge never had a problem. STANDING water is the problem, water cannot stand on vertical walls. I’ve tiled around a dozen family members and relatives showers, many of whom still live in the same homes decades later and noon of them have developed leaks or water damage that I’m aware of. I’ve tiled 5 showers in my own two homes over the last 20 years (my best friend bought my first home and the old tile showers are still in tact), never using anything but cement board and all showers are still leak free. HardieBoard does NOT recommend a vapor barrier behind their product in showers. Shower pans are the only areas that NEED waterproofing. If it makes you feel better to apply waterproofing membrane to the whole shower.. be my guest, I do it all the time for customers, but it’s a big waste of money in material and labor. I just ripped out a 60 year old shower recently, which had nothing but mortar and lathe on the walls and everything was a dry as a bone. The whole shower waterproofing membrane industry is questionable. A solution looking for a problem. At least when it comes to walls, which of course takes up most of the budget for “waterproofing”.

    Reply
    • DIYTileGuy says

      August 20, 2019 at 8:27 pm

      I also am a 20+ year tile setter and have no idea of how many showers that I’ve built. The earlier ones didn’t have a waterproofing barrier.

      Not using a waterproof barrier doesn’t guarantee failure. I can point instances where tile that was installed over drywall that lasted 30 years. I can also point to showers that didn’t last 10 years.

      You’re welcome to build showers how you like but we know better now and there are better products now than what existed in the 80’s and 90’s. Why one wouldn’t take advantage of these products is a mystery to me.

      Reply
      • Tom Blythe says

        August 27, 2019 at 5:54 am

        Question along these lines – our contractor has installed Go Board and a prefabricated shower pan and covered everything with a green water proof material. So far so good. Now the shower wall tile is being installed. We are using the larger 32” x 12” tiles. They are not covering the entire wall with mud or thin set. Rather the mud / thin set is applied where the corner of the tile meet and spacers are needed. This is leaving an air gap behind the tile. I am concerned that if the grout cracks in the future moisture and mold will find a home behind the tile. Should I be concerned?

        Reply
        • DIYTileGuy says

          August 28, 2019 at 10:23 am

          It sounds like what we refer to as a ”5 dot” installation which is not approved. Additionally, the number of “dots” of thinset are irrelevant.

          Basically, industry standards require 95% mortar coverage in wet areas and it doesn’t sound like that’s what you are getting.

          So, yes, you should be concerned and the contractor needs to do better.

          Reply
          • Kelly says

            October 15, 2019 at 7:44 am

            I have spent so much time, energy and money to fully tear apart and rebuild a shower because the previous owners used this “five dot” method of installing all the tiles. I think they re-tiled an old shower as quickly as possible in order to sell the home.

            After 3 or 4 months of regular use, the tiles started literally falling off the walls. A very dangerous situation, when children were taking showers and had 4″ x 4″ ceramic tiles falling on their heads and shattering when they hit the floor. I can’t imagine the damage that could be done to someone in the shower if one of those 32″ x 12″ tiles fell on someone’s head. I hope you were able to stop and make them redo the job correctly.

            Do NOT under any circumstances ever let anyone use that method to tile in a shower.

          • DIYTileGuy says

            October 20, 2019 at 8:27 pm

            Again, thanks for your comments. Real feedback is important and helpful to others.

    • Denis says

      July 20, 2020 at 1:56 pm

      Eddie, do you use moisture barrier at all on the shower wall if it is adjacent to an interior wall closet on other side? Do you use moisture barrier of sheer wall is adjacent to an exterior wall?

      Reply
  11. Kevin says

    August 24, 2019 at 2:43 pm

    Question

    I have installed Hardieback 500 on the walls and purchased Redgard and about ready to apply but have been reading most people use wonderboard with this product. If I use the diluted Redgard for first application is my Hardieback ok to use?

    Reply
    • DIYTileGuy says

      August 25, 2019 at 6:50 pm

      You don’t have to use cement board. The diluted Redgard should be fine as a primer coat.

      Reply
  12. Michael R Short says

    September 8, 2019 at 5:35 am

    I am renovating my tub into a tiled shower unit with a dreamline shower base. My plan is to use hardie backer board and redgard. Here are my questions:

    1. Should the hardie backer lip over the tile flange and if so how much?

    2. I will mortar and tape all joints but should I also apply a mesh with the redgard?

    3. What extra precautions should I take to waterproof my niche? Niche will be built on site with hardie backer

    Thank you

    Reply
    • DIYTileGuy says

      September 8, 2019 at 8:15 am

      The Hardibacker should extend past the tub lip. How much doesn’t really matter however you should check with the manufacturer and see if they have a guideline on this. It’s something that’s a little bit hard to control because you are using an existing framed space usually.

      You don’t need to add any additional mesh with Redgard. For your niche, you might find this post helpful:

      Building a Completely Custom Shower Niche from Scratch | DIYTileGuy

      Reply
  13. Fbreezie says

    September 15, 2019 at 10:42 am

    I have a moisture barrier on the outside facing walls with insulation. The heavy plastic is covering the insulation and studs and my mild resistant green drywall is on top of that. My contractor said he was going to mud everything and use an oil based kilz primer to seal it, essentially making it waterproof – I found nothing about this technique while researching waterproofing a bathroom. I made him buy the redguard and we’re using this on the entire bathroom floor and in the shower over the green mold resistant drywall and around the build drop in for the tub. Truly I’m debating taking off the drywall and replacing it with duralock or whatever backer board is required for waterproofing. So my question is will it be worth it or just a waste of time? Would the redguard work over the green drywall and then we tile directly on to the redguard? Or should I take off the drywall replace with the cement board and waterproof that and then tile? And if I use cement board can I use redguard to waterproof it or should I be looking at something else?

    Another question I’m having is waterproofing the entire bathroom floor. The subfloor is replaced. And redguarded I was thinking of placing concrete leveler and then laying my vinyl plank flooring on top. Is this even necessary?

    Reply
    • DIYTileGuy says

      September 19, 2019 at 7:41 am

      It sounds like there are several different methods and products being considered but they don’t all work together.

      It sounds like the contractor was going to do a one-step mud method which is acceptable if done correctly. You don’t want to redgard over drywall and stick tile to the redgard.

      You can Kerdi over drywall but usually it’s best to remove the drywall and install a tile backer board.

      I don’t know a lot about lvt. Be careful which self levelers that you install over wood subfloors

      Reply
  14. K.N. says

    November 17, 2019 at 2:59 pm

    Hi!
    I stumbled upon your website while looking for tile setting tips and tricks so we can tackle a bathtub surround remodel!
    I just want to be sure I’m understanding of the proper methods to ensure a successful project so that we aren’t redoing this in the next 10 years.
    1. Install 4mil plastic to studs of walls. All walls above the bathtub? Do we put the plastic behind the tub or let it over hang the lip a bit?
    2. Cement board. Do we touch the cement board to the lip of the tub or leave a gap?
    3. Red guard all the seams and screws or do we redguard the over all the cement board?
    4. Mortar and set tiles.
    5. Grout.
    6. Seal grout.
    7. Caulk edge of tub and corners.
    Am I missing anything? Any other tips?

    Thanks!

    Reply
    • DIYTileGuy says

      November 19, 2019 at 9:17 pm

      You’ve got it basically right but I wouldn’t install the plastic over the studs unless there is some sort of reason to. The Redgard on the surface would be a better way.

      Make sure that you thinset the seams and corners of the cement board with mortar and alkaline mesh tape. Then, once that’s dry, apply the redgard over the complete surface- thicker than you would think. It should be nearly “driver’s license” thick.

      Typically, I keep the cement board above the flange of the tub but it can depend on the tub. The best tip I can give you is to flatten your walls prior to installing the cement board.

      Good luck!

      Reply
      • K.N. says

        November 20, 2019 at 6:47 pm

        Perfect! Tha k you!
        I ask about the plastic because 1 of our 3 shower walls is an exterior wall with insulation? Does that give us a reason to do so?

        Reply
        • DIYTileGuy says

          November 24, 2019 at 9:27 pm

          You don’t need the plastic for the shower if you use Redgard. You’ll have to make a determination on what you need for your insulation and house wrap. That’s beyond my tile niche of information.

          Reply
          • Diego says

            December 28, 2020 at 8:08 pm

            Hi Tile Guy ! I have a similar question about “the plastic” and redgard… i’m working on my bathtub walls and already installed the cement boards.. and my plan was to use regard but I installed the plastic barrier behind the boards (just up to 4’) before finding out that I can’t do both… so do you think it would be an issue if I use regard for corners and seams ? Like i said, i just installed the plastic barrier up to 4’ above the flange..

          • DIYTileGuy says

            December 29, 2020 at 12:34 pm

            The plastic should go up a little higher but I probably wouldn’t worry about Regdard unless you want to put it on from about 3.5 ft to 6 or 7 ft high. That way it overlaps the plastic.

            Keep in mind that if you have any horizontal surfaces like half walls, niches, and benches that those need the Redgard over them.

  15. Allan says

    December 14, 2019 at 11:57 am

    Hi
    I am in the process of finishing my basement. The contractor installed cement board in the tub surround but the tile guy didn’t redguard. Just tiled to the cement board, should this be redone?

    Reply
    • DIYTileGuy says

      December 15, 2019 at 2:33 pm

      It should be waterproofed but, if it’s not, it doesn’t mean that failure is imminent. But if they cut any other corners then it could be a big problem.

      So you’ll have to figure out the course of action that you want to take. Waterproofing is an industry standard. You may elect to have the contractor extend their warranty, discount the price, etc. There’s no one way to handle it from here.

      Reply
      • B. Pryor says

        November 22, 2020 at 1:56 pm

        Hi,

        We recently remodeled our bathroom. Our contractor used green board everywhere, including the shower area! Foolishly, we tiled over the green board not knowing better as the contractor said that was fine. It’s all grouted and tiled now… shower is installed (we used 3×6 subway tile with 1/8 inch grout lines). Now I’m freaking out knowing we should have used a membrane before laying tile. Can we do anything to the tile and grout after the fact? We bought high quality grout/tile sealer already.

        Reply
        • DIYTileGuy says

          November 24, 2020 at 5:46 am

          Sealer certainly won’t hurt anything and will help in a very small way. The best thing to do is just to keep an eye on things and make sure everything is sealed up. You should have a 100% silicone sealant in the corners and around the plumbing trim pieces. Make sure the grout holes are filled.

          The danger comes when water gets past the tile. You want to make sure that happens as little as possible.

          Reply
  16. Jun Li says

    December 27, 2019 at 10:56 pm

    Hi,
    Thanks for the article, I read every single question and answer. It’s an emergency here, we are in the middle of remodeling our master bathroom, my contractor just finished the installation of cement board. And he is going to put mortar and tile on the shower wall directly, which I disagreed with. I actually bought the aquadefene as suggested by Lowe’s to waterproof the shower wall, but he refused to do so because he think the cement board is waterproofing. And he always says he has done this for dozens of household, I am the first one to ask him to do this. For the shower floor he did put the shower pan liner above the cement board.
    So my questions are: 1. Do I need to put the aquadefense all over the shower wall or just the corner/ seam/ nail hole?
    2, how to apply the aquadefense? Just paint over the cement board? Or apply the thinset mortar first then 2 coats of aquadefense then mortar/tile.
    3, will the aquadefense affect the tile setting? My contractor said it will weaken the attachment of the tile to mortar.

    4. For the shower floor is the shower pan liner enough to waterproof? Do I need to apply aquadefense additionally?

    5. Do I need to waterproof the rest of my bathroom floor? I mean other than shower floor.

    I will appreciate your answer and help. Thank you very much.

    Reply
    • DIYTileGuy says

      January 1, 2020 at 11:42 am

      You should apply Aquadefense over the top of the cement board. First, the seams should be taped and thinset over and the screwheads should be filled flat. Then two (or three?) coats Aquadefense over everything with dry times between each coat.

      Don’t apply it over the mud bed- just the cement board. You can put it over the rest of your floor if you want or maybe just immediately outside the wet area also. Neither of those places is required.

      The waterproofing membrane may weaken the bond a bit but, if the contractor is using the right mortar, the bond will be plenty adequate.

      Reply
  17. Lee says

    December 28, 2019 at 10:53 pm

    Hello. I am redoing a small bathroom. The only bathroom in the house–about 30 square feet of floor space. The tub and toilet are about 2 feet apart. The shower has no shower doors on it anymore and the bathroom floor has had some water abuse. Vinyl tile was used with plywood. I am now redoing it and finding wet wood underneath the vinyl tile. The toilet needs to stay functional as much as possible. I have removed 2 square feet of wet plywood and discovered mold on the subfloor. What do I do at this point? Use some type of mold treatment and reinforce the subfloor by sistering up the joists or do I replace the subfloor at the affected sections and then build back up? What do I use instead of regular plywood? Do I use Kilz stain or something else? What flooring is best for this application(while remaining somewhat economical, not high end stuff)? Can I keep the vinyl flooring on the dry parts of the bathroom and mix the flooring up a bit? Thank you very much because these answers will get a long ways to completion and doing it the right way at the same time!

    Reply
    • DIYTileGuy says

      January 1, 2020 at 12:04 pm

      You’ll want to take care of the mold. I’ve seen a product called Concobrium at Home Depot. I’ve used that for minor things before and you may need to look into remediation if it’s bad enough.

      Once the mold is taken care of then you’ll need to assess if the subfloor is sound. Does it need to be replaced in spots? Maybe completely?. Same for the joist structure.

      For the subfloor, you need 5/8 inch minimum exterior grade plywood over the joists for a tile installation. You can replace the plywood in stages if you want if that makes things easier for you. The seams and edges all need to be supported.

      Reply
  18. Neil says

    January 28, 2020 at 2:32 pm

    I recently did a bathroom renovation and the contractor did not use any redguard or waterproofing on the vertical surfaces of the shower. So, the walls were built up as durock on wood studs, mudded and then tiled. The tile is ceramic hex mosaic tile on one wall and slate on the two other walls. There is a window with a horizontal shelf. This was painted with at least one coat of redguard on the sill and the side jambs of the window (wrapping around the corners about 4″). The water proofing of the floor is just a rubber pan beneath the topping slab and tile.

    Should I be worried that the vertical surfaces of the walls are not water proofed? My worry is that the wall grout and especially slate tile is quite porous. So, the walls will become damp over time.

    Reply
    • DIYTileGuy says

      January 29, 2020 at 4:40 pm

      It’s not ideal but I don’t think it’s something to panic over. I’d keep up on the sealing of the slate tiles as those are pretty porous tiles.

      Reply
  19. Karen W. says

    January 29, 2020 at 5:38 pm

    Hi Tile Guy,

    Quick question for you. I hired a contractor to install an American Bath Factory shower kit only to be left in a mess and a lot of wasted money.

    It seems the contractor had not taken any steps at waterproofing the vertical portion of shower, he did not use any kind of membrane and had not taken any care to tape or seal the seams.

    Fortunately, he cut the pre-sized wall panels to the point where there are large gaps where the pieces should butt up to each other making his mistakes easily visible. (gaps from 1/8 to over 1/2 inches due to some wavy cuts)

    Frayed material from the cement board was clearly visible through the gaps and the wood studs could be seen in looking closer.

    I did hire another contractor to come in to install a tile shower. All is well at this point. However, I’m hoping you can answer a few things for me.

    In your experience, was the initial install as bad as it sounds? The first contractor had told me to just grout the corners and everything would be fine.

    Is it common practice to skip the taping or sealing the seams?

    Would grout do anything to keep the water from entering in through the corners?

    Reply
    • DIYTileGuy says

      February 4, 2020 at 6:00 am

      I really don’t know on this because the product that is being installed isn’t tile. You’re installing panels and they would have different guidelines. It’d be best to ask someone with experience with this type of shower.

      Reply
  20. Dejan says

    February 23, 2020 at 4:35 am

    Hello and best regards from Serbia,

    I just stumbled upon Your article and realised that Your opinion might be of an immense help to me, for which I’d be very thankful.

    Well, I’m working on a bathroom where the cement floor screed is made nearly a week ago. Water pipes are placed and it’s all patched with the mixture of grit sand, cement and a bit of the whitening lime. It’s drying nicely despite the cold period of the year. I’m about to put tiles on both, the floor and the walls up to the ceiling. SomeIItalian grouting compound that I bought says to have an aqua-resistant property (will choose 2mm width for the wall and 3mm for the floor). There’s going to be an acrylic bathtub with side panels, but also the shower head high on the wall so it’s also used as a shower tub. The floor do have a nice slope towards the drain in the middle of the bathroom. In other corner will be the toilet, there’s also a wash basin, and in some time will place the washing machine.

    So, now should get in touch with the tiler and schedule the tiling but his opinion on whether or not to apply that liquid elastic hydro isolation (applied by the brush in two coats) isn’t clear. And my choice will further influence what glue to buy for tiling. That’s why I’m here. The water insulating liquid is quite pricey for me and I’m thinking whether do I really need it hence there’s going to be a bathtub (not a tile shower), and that (to be tiled) corner of the wall where the shower will be splashed by the water, I’d surely wipe after each use. So, do I really need to spend extra money on those one or two-component hydro isolating liquids? In the case that it’s still the must, should I then be required to apply it on both the surfaces, the walls and the floor, or just on the part of the walls that are going to be in touch with the water. By the way, the house is a one floor one so there’s no one living below, instead of the worms deep down in the ground. 🙂

    Thank you very much for your time to consider my dilemma.

    Reply
    • DIYTileGuy says

      February 28, 2020 at 2:38 pm

      Here in the USA, the only time you need to have waterproofing is when it’s inside an area that is going to get really wet- like a shower. It’s expected that outside the shower could get wet but waterproofing isn’t required in that situation.

      If I understand your situation correctly, you could use the liquid waterproofing on the walls but using something like plastic behind the walls would work too.

      Good luck on this project and it makes me happy that my blog can be of benefit to someone as far away as Serbia.

      Reply
  21. Sarah says

    March 3, 2020 at 1:25 pm

    I live on the second floor of a concrete building. My boyfriend redid my bathroom with hardy board and 2 coats of redguard and then tiled it. He never used a membrane of rubber or plastic and no shower pan. He claims with red guard we dont need it. I am worried it will leak and my downstairs neighbors will sue ! Help can I stop worrying????

    Reply
    • DIYTileGuy says

      March 8, 2020 at 12:47 pm

      It depends on how the shower floor was waterproofed and if it tied into the drain properly. I have no way of knowing how well it was done.

      Reply
  22. Oscar says

    March 4, 2020 at 6:50 pm

    What are your thoughts on Diamonback Board vs HardieBacker or Durock. Planning to use RedGard or Auqa Defense regardless. I also built a niche the length of the wall. Should i use Kerdi on the entire niche area or is Kerdi Tape on the corners of niche and two coats of waterproofing sufficient? Thanks for your advice.

    Reply
    • DIYTileGuy says

      March 8, 2020 at 1:02 pm

      I’ve seen Diamond board in photos but I don’t know much about it. It appears to be in the same category as Denshield. If this is the case, I would Kerdi the whole niche and around the outside of it.

      Reply
  23. Diane says

    March 15, 2020 at 5:39 pm

    We recently had our bathroom remodeled. They used Fusion Pro as grout. It did ok on the walls but failed on the floor. It was chalky and had pin holes and areas of grout coming out. They took it all out and wanted to use Fusion again even though we weren’t too excited about that. They had to add more slope also as water was pooling so they pulled out a section of tile. It was a 12 inch by 12 of 2×2 by one side of the drain. They put a new sheet in and not sure what they used to adhere and after a couple of hours regrouted with Fusion. The replaces square all did strange things with the grout and was a different color. My guess is too wet underneath. The rest of the shower floor was much lighter and chalky on top. Update, removed all of the grout again. He used a razor blade and some other manual tools. I can tell the red guard membrane underneath has been cut in a few places. It also had a Kerri liner under that and I can also see in one place it has been cut also. He regrouted with Prism on Friday and there is still a lot of grout on top so is coming back Monday to remove the rest. Are we screwed now that our waterproof membrane has obviously been perforated on a number of places. We don’t know what to do. This is the second replacement now of the shower floor .

    Reply
    • Diane says

      March 16, 2020 at 2:07 pm

      Update, this is actually the third shower floor since they have taken the fusion out twice now. Saturday was Prism grout day. Finished in afternoon. Came today (Monday) and watered down the entire shower floor with hand held shower head and removed haze. Told me to water it two more times today and then tomorrow morning. Not what the package said.

      Reply
      • DIYTileGuy says

        March 16, 2020 at 5:06 pm

        Prism is a good grout. I’d be more concerned about the shower holding water than I would with discoloration. Prism does quite well with being color consistant.

        Reply
    • DIYTileGuy says

      March 16, 2020 at 4:59 pm

      If the primary membrane is on top, directly underneath the tile, and it’s been pierced or punctured then your shower is going to leak. I’d want them to prove that they didn’t puncture it. Maybe they remove all of the tiles and retest it with water?

      Reply
  24. Randi says

    March 20, 2020 at 10:50 am

    Hello,

    I recently had a home built and the shower does not appear to have been waterproofed. The contractor has assured us that it was but said that we could take off a single tile to prove that. He has since come back and said that if we remove the tile the waterproofing behind it will be compromised. Is there a way to tell without removing tile?

    Reply
    • DIYTileGuy says

      March 21, 2020 at 11:11 am

      If he waterproofed the surface that is immediately behind the tile then it probably will compromise the waterproofing. You could try to remove the shower faucet trim and see if you can see waterproofing behind there. That may be a way to check.

      Reply
  25. Jill Adkins says

    June 24, 2020 at 6:15 am

    We are building a bathroom and installing a shower. For the shower pan the contractor put down a PVC liner, then covered that with Quik Rite Mortor. He let that dry. Then used SimpleSet Pre-Mixed Thinset on top of the mortor and installed the floor tile. He did not waterproof the pan. Then he put in the durock board on the walls. The floor tile goes under the walls. Walls do not touch the tile. The curb at this time only has the liner wrapped over it. When the curb gets covered with durock board, the board will be over some of the tile. First, is the liner under the Quik Rite sufficient to waterproof the pan? Second, when the durock walls get taped and mudded can I use the tape and mud to close the gaps between the wall and floor covering a little of the tile? Then can I use Red Gard over the dried mud between the wall and the floor? Or, do I need to remove the tile and use Red Gard to waterproof the floor?

    Reply
    • DIYTileGuy says

      June 24, 2020 at 2:21 pm

      If this contractor used simple set pre-mixed adhesive on the shower floor it makes me question every step he’s done.

      For starters, having a liner under the mortar bed is a perfectly fine way of waterproofing the shower. It should have a flood test done on it to check for leaks but there shouldn’t be any additional waterproofing on the top. Additionally, I’m not a fan of how he did the Durock board but I can’t say that there is technically anything wrong with it.

      Installing Durock over the curb, however, is an issue. Once the liner wraps over the curb there shouldn’t be any penetrations to the liner unless it’s on the front, outside part of the curb. What was supposed to be done was to embed some reinforcing diamond lath (think chicken wire) into the mud bed and wrap it over the curb. But that wasn’t done and I don’t see a way to do it now without removing the mortar bed.

      Hopefully, your liner completely covers the corners and all exposed wood on the curb when it wraps over. They make preformed corners that go on each end because that is a likely spot to leak if it’s not don’t correctly.

      Finally, just to be clear Simple Set mortar shouldn’t be used for a shower floor. It’s right in the datasheet for the product.

      Reply
  26. Erica Graham says

    June 26, 2020 at 4:33 am

    I am purchasing a rental house that has a second bathroom with a large jetted tub but the walls are just plain drywall and painted the same color as the bathroom. There is a shower head installed but I believe the residents just used it as a tub to bathe their kids as the upstairs bathroom has a shower as well. What are my options for making this into a usable shower as far as waterproofing the walls? I suppose I could just install a D-shaped shower curtain rod (like the ones they make for claw foot tubs) as a temporary solution but could I redguard the walls as is and then tile over them in the future? Thanks!

    Reply
    • DIYTileGuy says

      June 28, 2020 at 10:30 am

      What it depends on is if the walls come down directly on the tub, or not. If the tub is sitting in a wood platform then the walls probably wouldn’t work to use it as a shower. You have to think about how the water would drain when it’s on the walls. Would water run down the walls and be able to find it’s way to the drain?

      If the walls come down and sit on top of the tub then there’s probably a way to make it work. The curtain that you are talking about would definitely work.

      Reply
  27. Karla says says

    July 1, 2020 at 8:19 pm

    Hi diytileguy!

    Contractor tore out old tub, custom framed walk in shower, poured cement pre-slope pan, put in membrane (inside) cement board. Said, ok, ready to tile! (Our deal was he would get it tile ready, I’m a novice at everything. So I went to the store and bought what they told me to buy…) Well, the drain was too high for the thinset and tile. So my family built it up, using versa bond LFT. (The store…) Well, of course it’s uneven and has cracks. So I called the technical number on the bag of versa bond (the guy, Gabe, sounded surprised to talk to a homeowner that used Versa Bond LFT on a membrane. Of course, he told me it won’t bond to the membrane). I called because I didn’t know what was wrong, why was it uneven and cracked, of course we used the wrong stuff. Should have used something to dry pack the floor and then tile. And that’s not Versa Bond LFT. So here’s the big Q: All these mistakes. I can just take out the Versa Bond floor and start over above the membrane. However, a downstairs shower that won’t get a lot of use most of the year…what is the most likely scenario if I just add another thin layer of Versa Bond LFT (evenly) and then set the mosiac tile on it? Thanks!

    Reply
    • DIYTileGuy says

      July 3, 2020 at 6:03 am

      Hi Karla, I need a few more details about your situation. It sounds like your contractor built a traditional shower where the liner goes inside the mud pan. Does that sound right? I refer to a traditional shower in this post so see if that looks like the right one.

      Did the contractor expect you to install tile directly on top of the liner? Or is there an additional mud layer on top of the liner that you were to install tile over?

      Reply
  28. Brian says

    July 5, 2020 at 9:21 pm

    Have you ever heard of using 30# felt roofing paper instead of 4 mil plastic between backer board and studs? I’m doing a small 32″x32″ shower stall with a pan. Felt paper would go over all studs and down over the lip of the nailer edging of the pan .. Then backer board just a little lower to about a 1/4″ above the finished ledge of the pan. Does this sound OK to you?
    Joints for backer board would be covered with mesh tape and skim coated prior to tiling.
    Thank you!

    Reply
    • DIYTileGuy says

      July 6, 2020 at 8:13 pm

      Yes, that works just fine.

      Reply
  29. Diane Johns says

    August 13, 2020 at 4:02 pm

    Hi there, our tiled shower has some grout missing. I’m worried about leakage as it’s upstairs. A tiler came to inspect yesterday but can’t re-grout until next week. Will a waterproof tape be suitable to cover the areas of concern until the tiler can come? I wouldn’t want it to damage tiles when being pulled off? thanks!

    Reply
    • DIYTileGuy says

      August 15, 2020 at 9:15 am

      It’s hard to say. If your shower is built the way that it should be then missing grout won’t have any effect on the shower’s waterproofing. However, many showers are not built properly and sometimes missing grout can speed up a leak.

      But waterproofing tape would probably work in a pinch if it’s your only shower. I would let it dry out for 24 hours prior to the regrouting.

      Reply
  30. Alyssa says

    October 30, 2020 at 2:34 pm

    Fixing Shower After Membrane Installed Improperly:

    Will you please provide advice.
    Shower Size: 4’x9’

    What has been already performed:
    1. The flooring was removed
    2. Beams were reinforced
    3. Plywood laid on the floor

    Is there anything you would recommend to ensure this will never happen again outside of what is listed below (pending quality workmanship)?
    1. Remove one or two rows of 18×18 tiles (ordered enough tile for two rows)
    2. Install membrane
    3. Lay tile

    *Should I have a cement layer installed under the plywood?
    *Should I have a mold barrier sprayed?

    Thank you incredibly for your advice!! ☺️

    Reply
    • DIYTileGuy says

      November 1, 2020 at 9:49 am

      It sounds like you are wanting to repair the waterproof membrane by only removing the lower part of the shower. If so, it should be only necessary to remove one 18×18 at the bottom of the shower.

      What you need to do is leave about 1 inch of the backer board that is hanging lower than the second row of tile. That way, you can reinstall new backer board and you have 1 inch to apply mesh tape and tie the two backer boards together.

      What I don’t know is what type of shower you are building. Is it a traditional shower with a liner under the mortar? Is it one of the newer showers like a Kerdi shower?

      This is important. Assuming that it is a traditional shower, you will need a cement layer underneath the liner that slopes to the drain. Then you would install another cement layer that is a minimum of 1.5 inches thick.

      Make sure that you are also redoing the curb.

      https://www.diytileguy.com/shower-waterproofing/

      Reply
  31. Jennifer Condliffe says

    November 17, 2020 at 7:51 pm

    My dad’s 1956 house has three tiled shower stalls. a handyman refinished one of the showers by rebuilding the floor with correctly sloped mud and membrane. He removed the pink tile about four feet up and put in white tile. It looks nice and does not leak, but I am concerned that he did not put any moisture barrier all the way up all four vertical sides of the shower. Is a membrane required all the way up?
    He also started to rebuild the downstairs shower, which had a leak, but after tearing out the 4×4 tiles he wasn’t able to finish. We need to have the shower working, so we will hire someone else. should we have them tear out all the tiles and install redguard or a membrane all the way up, or leave it with moisture barrier 4 feet up the vertical sides?

    Reply
    • DIYTileGuy says

      November 18, 2020 at 7:32 am

      When doing a repair, there are, undoubtedly, going to be some compromises involved. Assuming this person repaired the one shower properly he probably has a liner installed under the floor tile and this would fold up the sides and be behind the backer board.

      It’s always nice if he can install a waterproofing layer on the walls as high as he can but if the existing shower didn’t have a waterproofing layer on the walls anything that he puts on is going to have limits to its effectiveness.

      Reply
  32. JillianBee says

    November 25, 2020 at 11:40 am

    Hi. Did our shower about 4 years ago and realized we never used waterproofing over the hardie board. We are having moisture issues with the groutline along the edge of our bathtub. We have had to keep applying and removing caulk because it gets moldy and gross looking after a few months on this line where the tile meets the tub. Today I pulled the caulk off and some of the grout came with it and was crumbling and wet. So if moisture keeps getting stuck along that area, what is the solution? Since it only happens along the bottom grout line, (closest to the spout I might add) do we REALLY have to tear out the whole thing and start over or would it be possible to just remove the lower tiles along the tub and waterproof, then re-lay tiles? I’m so heartbroken over this mistake, I appreciate your advice..Thanks!

    Reply
    • DIYTileGuy says

      November 26, 2020 at 6:05 am

      If you have a tub then the likelihood of water damage problems is reduced compared to a shower. There are two things here: water getting behind the tile and the caulk getting moldy.

      First off, do your best to figure out why water is getting behind the tile. Make sure your faucet trim is caulked to the tile (usually clear silicone). Make sure there are no holes in the grout that are allowing water a free way in. Next, some tubs have a weep system on them and, if your tub has something then you want to make sure that it’s not grouted, caulked, or sealed up.

      A weep system is simply an indentation in the tub. They look like this (second photo down) and are on the side walls right before the rim of the tub that you step over.

      Not all tubs have them and if yours doesn’t then don’t worry about it.

      Next, remove all the silicone around the perimeter of the tub, clean it off really well, and let it sit and dry out for a couple of days, if possible.

      Then recaulk with 100% silicone using this technique in this video.

      You may find that the silicone will attract dirt over time but you will be able to clean any dirt and mildew off of it. It won’t become part of the caulking.

      Reply
      • JillianBee says

        November 26, 2020 at 8:32 pm

        Thank you! I am going to open up the access panel in the closet behind the shower to see if I can find any answers. Also, I watched your caulking video. There are no weeps from what I could tell. Should I remove the grout from the tub line to install the backer rod and apply caulk or is that grout necessary?

        Reply
        • DIYTileGuy says

          November 27, 2020 at 7:55 pm

          I would caulk it but I suppose you could leave it open if you wanted.

          Reply
  33. Melissa says

    January 25, 2021 at 1:26 pm

    Hello!
    we just had a plastic shower insert removed and hired a contractor to tile. As far as I know, he used Durock on the walls and floor and created a built in shelf as well, then used Mapai uncoupling membrane mortar (just the mortar not the actual membrane) between the Durock and the tiles. According to him this seals everything and prevents any leaks. Should I trust this or should I have it redone?
    *The shower floor is tiled, no pan. and a liner wasn’t installed… just the Durock all over.

    Reply
    • DIYTileGuy says

      January 26, 2021 at 6:07 am

      Hopefully, you haven’t paid this contractor in full yet and I would advise against doing so until you’re able to test the shower, at a minimum. There has to be a liner in the shower or the water flow isn’t managed. And, no, the mortar doesn’t seal everything.

      Now if you are in a state like Florida, I know that sometimes they try to tell you that liners aren’t necessary. I’ll admit that the risks aren’t as great as other areas but every shower needs to have the water managed to get down the drain. It’s also a problem if there is no waterproofing on the shower niche. That will rot the wall out over time.

      However, it doesn’t sound like this contractor is very skilled and may even be a con artist.

      Reply
  34. Nandita says

    February 4, 2021 at 1:55 pm

    Just got our basement guest shower done and feel the contractor didn’t do it correctly. He put Durock sheet on the base and curb along with coat of red guard. Didn’t even let it dry before putting thinset and tile. The slope is minimal so some water collects around the pebble tiles. I also don’t think he put the drain properly as the contraption with weeping holes is sitting in the box and obviously not installed. My question is would laying epoxy on top of pebble tile help waterproof it?

    Not in budget to spend more money right now with a baby on way. This was supposed to be a guest shower for my mom who is going to help with baby. Clearly if issues come up in next few months, we will have to tear up and re do base but reluctant to proceed that way right now. Thanks

    Reply
    • DIYTileGuy says

      February 5, 2021 at 7:27 am

      I think trying to regrout with an epoxy would be more trouble than it’s worth. At this point, your shower is either waterproof or it isn’t. Any additional coating on top of things isn’t going to make it waterproof. Your best bet is to keep an eye on it and watch for signs of leaks.

      The weep hole protector not being installed doesn’t mean that the weep holes are plugged. They may, or may not be, but not installing the protector doesn’t guarantee that they are.

      Reply
      • Nandita says

        February 5, 2021 at 8:57 am

        Thank you! Appreciate time and advice.

        Reply

Leave a Reply Cancel reply

Your email address will not be published. Required fields are marked *

Primary Sidebar

Recent Comments

  • DIYTileGuy on Miserable Pebble Tile Flooring
  • DIYTileGuy on Shower Waterproofing Crash Course
  • Judy Larson on Miserable Pebble Tile Flooring
  • Daniel Gawlinski on Shower Waterproofing Crash Course
  • DIYTileGuy on Tile Backer Board Breakdown

Top Shared Posts

custom shower niche

Building a Custom Shower Niche from Scratch

The Ultimate Guide to Building a Preformed Custom Recessed Shower Niche Part 4:  Building a Custom Shower Niche from Scratch This post covers: Cement board, foam board, and Hardibacker Cutting

Shares: 795

subway tile layout lines

Subway Tile Installation: Three Basic Tips

Subway Tile Installation: Three Basic Tips Subway tile- what's not to like? It's classic and timeless. A fairly easy tile to work with and install. And the white subway tile

Shares: 958

recessed shampoo niches in an exterior wall

Installing a Recessed Shampoo Niche in an Exterior Wall of a Shower.

Here's the dilemma. The customer wants a recessed shampoo niche. But once the walls were opened up there's no good place to put one. There are either wires and pipes

Shares: 3232

direction wood plank tiles

More tips for installing wood look tile flooring

Installing wood look tile Wood plank tile floors have gained a good amount of popularity in the last couple of years. For good reason: they don't have ugly wear patterns

Shares: 2916

improper tile liner corner

5 signs your new tile shower will leak

What to look for in proper tile shower construction You've hired someone to build your tile shower in your bathroom, but how do you know he or she's doing it

Shares: 674

Footer

  • Waterproofing
  • Products
  • Tips & Tricks
  • Tutorial
  • Tool review
  • Video

Privacy Policy

Search

Follow me!

Copyright © 2021 · News Pro on Genesis Framework · WordPress · Log in

133shares
  • 23