Reader question: Hi there. I recently finished grouting my tile surround in my shower. I posted photos on Facebook and somebody questioned whether I had waterproofed the Hardiebacker 500 board. Much to my dismay, I had never even heard of this…
Anyway, I went to the James Hardie website and see nothing about waterproofing being required… In my research, and reading forums, it seems quite evident that it is needed.
I am not somebody that skimps out or cuts corners. I simply have never come across this… VERY FRUSTRATED!!! DAMN YOU HOME DEPOT :)
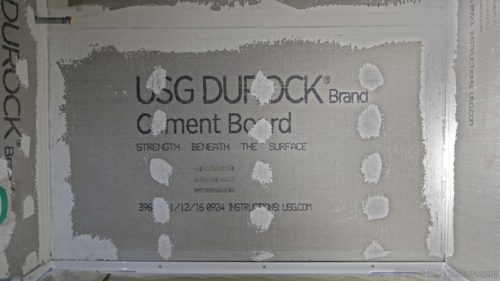
This is a common question.
Furthermore, the last thing a contractor needs is for the whole Facebook community to be criticizing how a shower was constructed.
However, after researching the manufacturer instructions for each backer board I find the confusion on the matter is understandable.
Is cement board waterproof?
Tile contractors have a “bible” from an organization called the Tile Council of North America (TCNA). Here’s what the TCNA handbook has to say about the matter:
A waterproof membrane or vapor retarder membrane must be specified to prevent moisture intrusion and protect adjacent building materials.
B412 Bathtub or shower with prefabricated receptor. Cement board or Fiber-cement board. Ceramic Tile.
What do cement board manufacturers say?
This seems quite clear. Yet, it seems like where the confusion comes in is when you look at the different backer board manufacturer’s instructions. Hence the question “Is cement board waterproof?” Well, here’s what some manufacturers have to say about waterproofing:
- PermaBase (National Gypsum): PermaBase PLus is not a water barrier. Consult local building code for moisture barrier requirements
- Wonderboard (Custom Building Products): See update below
WonderBoard® Lite is not a waterproof barrier. If the area behind the backerboard must be kept dry, use RedGard® Waterproofing and Crack Prevention Membrane or Custom® 9240 Waterproofing and Anti-Fracture Membrane - Durock (USG): If waterproofing is desired, use USG Durock™ Tile Membrane or USG Durock™ Brand Waterproofing Membrane
- Hardiebacker (James Hardie): the use of a waterproof membrane, vapor barrier or vapor
- retarding membrane is optional unless the local building code requires it
Update: Custom Building Products has changed its stand on this since I originally wrote it. Here is the latest:
- A moisture barrier must be installed to protect the wall cavity for wet area installations. Nail or staple 15 lb roofing felt or 4 mil polyethylene sheeting to the studs… Any shelf, ledge or horizontal surface subjected to water exposure must have a slight downward slope for water runoff. These areas also require proper waterproofing. ~WonderBoard® Lite Backerboard / TDS266 3/29/2018
Consult local building codes. Talk about passing the buck. In fact, they may even be vague on purpose.
Which cement board do you think will sell better: Brand A (waterproofing unnecessary) or Brand B (waterproofing definitely required)?
Shower Waterproofing Crash Course
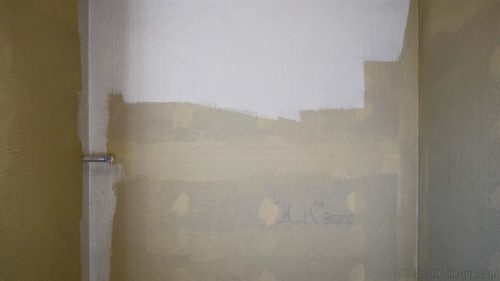
“If waterproofing is desired…”
Who builds a shower and doesn’t desire waterproofing?
Furthermore, the problem is that most people that purchase the backer board from a big box retailer don’t have access to a TCNA Handbook.
Certainly, it seems like better instructions are necessary if more waterproof showers are to be achieved.
In fact, here’s where things get really dicey: if there’s a horizontal surface in a wet area it’s absolutely critical that it gets waterproofing applied to it.
Because if it doesn’t then failure isn’t just a possibility but rather nearly guaranteed. However, where is that in the cement board instructions?
How bad of an idea is a marble shower?
A three-wall tub surround could possibly survive with no waterproofing.
However, a shower with a bench and a half wall is almost certainly doomed to failure. Certainly, this is no time to be vague on whether the cement board is waterproof.
How should cement board be waterproofed?
How exactly does one go about waterproofing a shower, a tub alcove, or a wet area? In other words, how do you make cement board waterproof?
Well, the very minimum would be to install a sheet of 4 mil plastic behind the cement backer board or Hardiebacker.
However, if you are waterproofing horizontal surfaces like a shower bench then plastic isn’t good enough. For more on this please see my post:
No Waterproofing: Will This Cause Shower Leaks
In the case of the reader above, the Facebook criticism was harsh but the internet is helping to get instructions out that cement board manufacturers have been hesitant about.
Hopefully, shower waterproofing instructions will continue to become more transparent in the future.
Remember, if you aren’t working in a wet area then tiling over drywall is often perfectly acceptable.
Alice McCollough says
My house was built in 1979. I bought in 2003 after is set for two years. I didn’t pay attention to the bathtub/shower tiles that fell off along the bottom wall at the tub until much further down the road. The sheet rock paper was moldy and it was determined that black mold was present. Then the tiles fell off around the tub below the shower wall and more black mold. About 8-10 of tiles fell away leaving nothing behind them. I am now removing the stuff and have discovered that sheet rock was all that was use behind all the tiles making up the shower wall on the tub. The paste/ glue on the tiles has dried out and not longer adhering to the sheet rock. Along the wall where the shower wall meets the tub, all the tiles are coming loose and the sheet rock surface is moldy and its paper peels off and the sheet rock just falls apart. What can I do? Must I tear out the whole wall all the way up to the top to the lowered ceiling? Can I just try and put bathtub/shower insert over this mess? or what is the best economical way to go? I am on a low fixed SS income and don’t have much $$$ to do a major overhaul. The toilet needs to be replaced and the sink counter top needs to be replaced. So I hadn’t figured on a major overhaul of the bathtub shower. But oh, what I mess I have uncovered!!!
Mark says
Does hydrant work well with wonderboard?
DIYTileGuy says
I’m not sure what your asking.
MIchael says
Hello,
My drywall contractor finished the ceiling of the shower with drywall mud between the ceiling the top layers of cement board and along the edges to the floor. There is overlap onto the durock. Also, a heavy texture was applied to the drywall and ceiling. The spray overlapped onto the durock.
How much and how aggressive do I need to be in cleaning? Do I need to knock out the drywall mud between the ceiling and the durock? If so, I would assume putting mortar in the gap before waterproofing would be necessary. Do I need to completely remove the spray texture on the walls?
Thanks for your help!
DIYTileGuy says
The texture usually comes off with a wet sponge. That typically isn’t a problem. The waterproofing needs to go up to the shower head height but doesn’t need to go to the ceiling in a typical shower. If you want the exact right answer for going over the drywall mud then your best bet will be to call the tech line of whichever brand of waterproofing that you are using. But I think you could paint a primer on the overlapped mud seam and then tile over it.
MIchael says
Thanks so much! That answer significantly lowered my chores to sitting on the couch ratio!
DIYTileGuy says
Perfect!
mike says
never ever put plastic behind cement board. ever.
Michael says
Why do you never put plastic behind Durock??
John says
you need to take out all tiles and Sheetrock that are loose and contaminated with mold. Then treat the black mold with bleach and then allow to throughly dry and possibly put a fan on the moist area to ensure it is completely dry. Replace any Sheetrock with a product called hardibacker board which you can get at Home Depot.
if you don’t have any money to replace the tile but you need a safe moisture barrier you can simply purchase a can of Redgard at Walmart fir $50 and paint over your shower tiles and sheet rock with this rubbery material. Then your shower is ready for use until you come into more money and can afford to have your tile replaced properly.
This video shows how to apply the Redgard. [edit by diytileguy. Please see my comments in the reply.]
https://www.youtube.com/watch?v=mG5GIqcYkSs
DIYTileGuy says
Hi John, the site filtered out your comment as an automatic precaution because of a link in the comment. It’s obvious that you’re a real person with a comment that helps contribute to the site so I manually approved your post.
The link that was posted is a guy on youtube that I don’t want to link to his videos. He’s notorious for doing things incorrectly and refuses to change. Case in point: The video shows that he built a shower out of greenboard (drywall) and is going to Redgard over this. Nowhere on the Redgard data sheet will you find gypsum-based drywall as a suitable substrate for a waterproofing application.
I removed the link to that video and replaced it with a link to Custom Building Products own video on Redgard application.
But thank you for your comments and I appreciate your participation. I hope that you continue to participate.
Woody says
If you call or email James Hardi they will tell you specifically that hardibacker does not need to be sealed. You can do it but it is definitely not a requirement.
DIYTileGuy says
Yes, this is the problem and the reason I wrote this post. It should be more clear that water management is necessary.
Paul says
Just came across this site and after reading a bunch I see I have a little more work to do now.
I’m rebuilding one of my bathrooms after tearing it down to the studs due to a tub leak. I’m using Hardiebacker under the tile and understand now that I need to water proof it.
My question is this: What do I do when the framing for the tub isn’t square to the tub? When I hang the Hardiebacker over the lip of the tub flange on one wall it’s not flush to the studs, I have a 1/4” plus gap. If I pull the Hardiebacker up off the flange it sits flush to the studs. What should I do?
DIYTileGuy says
This can be an issue with some tubs and tub openings. The short answer is that the hardibacker needs to extend past the tub flange. Even just a little bit.
If you have the option of adjusting the tub then try to split the difference and shim out the rest.
Keep in mind that the important part is the end of the tub where the backer board will meet up with drywall. Try to get both sides to cover the flange and meet up with the drywall acceptably then shim out the corners until it’s flat.
Another trick is to shim the cut drywall edge that meets up with backer board. A lot of times you can remove all the fasteners along this edge and wiggle in some drywall shims underneath that edge. This will help that edge meet up with the backer board edge better.
I just went through this on a project this week. Try to get anything that you can and hopefully it will all add up and work out.
kathy h says
so, DIY Tile Guy,
Are you saying that the Hardibacker statement that no waterproofing is needed, and your statement that “water management is necessary”, is your way of saying “don’t be caught in the middle of a yes/no game…. just USE A WATERPROOF MEMBRANE (like Redgard)”?
DIYTileGuy says
Yes, that’s what I’m saying. ? I wish backer board manufacturers were more clear.
Matt says
Agreed, no plastic sheet behind cement board.
Jill says
Hi! What about when installing a shower surround to the studs? Do I need to waterproof the studs and wood behind it? Should I put up 4 mil plastic? Or would that cause further issue?
Earlier this year I had osb with corrugated metal on top surrounding my tub walls. I was concerned about moisture, so I removed rhe corrugated metal. There was no visible mold, but I painted the osb with killz and put up plastic as a temporary measure until I figured out if I wanted to tile or do a shower surround.
Within 6 months, the wall area behind the plastic closest to the shower became densely packed with mold. I’ve cut it all out and am considering how to proceed next with a shower surround without recreating the same issue.
Thanks!
Joe says
Hi, one thing I’d say about Kilz is especially the oil primer, it can be a mold magnet. Oil primers attract mold as the oil in the primer is a mold food, similar to how mold can form in diesel fuel. I’ve had good luck in mold remediation jobs using Zinsser Mold Killing Primer and Zinsser Permawhite paint, though I’m not really positive of how it would work under direct water contact, both are my go to bathroom paints. If you use oil primer to remove water stains/etc from walls, but the walls had a mold issue, it’s better to use the Zinsser Mold Killing Primer first, then oil, then Permawhite.
I’ve since redid my shower with a proper tile job on cement board (Wonderboard, I felt like it’s better than Durock) waterproofed with Mapei Aquadefense. But before this, I had the cheapest thinnest $100 plastic shower surround on green board, and there was some mold, but not really as much as I thought there would be. The only places that did have mold were places that didn’t get mastic on them or detached from the mastic when mounting it to the Greenboard, so if you’re careful and make sure the plastic boards are attached well, and you leave a 3/8″ or so gap between the drywall and the plastic boards, then siliconed that area well, it probably will work. A lot of people are lazy with them and do some lines of liquid nails instead of troweling out a whole layer of mastic, though, and that is basically guaranteed to get moldy. But personally I hated that plastic shower surround, they never clean up well, they look bad, they seem to offgas a little bit of plastic smell from the hot water, etc.
If you do tile, any of the cement boards are fine, but I’d personally use a liquid waterproofer, and not plastic behind. It’s $50 more, but if you’re sensitive to mold, it makes it a lot less likely to have mold. (I’m unfortunately mold sensitive…) With plastic behind the cement board, the cement board still absorbs water, but it just can’t get the water to the studs/etc and wreck the framing of the house. The boards sponge water in, though, and if you have a house where a lot of people take showers/etc, the boards won’t dry off between uses, and there’s more chance of mold and/or bad looking grout. Whereas with a surface waterproofer, the water can go through the grout, the water can only go through the grout lines, then back down, so the drying time is a lot less. The other good thing to do is make sure you get the best thinset coverage you can on your tiles, so water can’t sit behind the tiles forever between uses. See the TCNA “Trowel and Error” video for this. Lastly, though this costs a lot, too, urethane or epoxy grout may be better. I have urethane grout in my tub surround and am really impressed at it. The grout doesn’t even feel wet after a shower. Using it as a primary waterproofer isn’t a good idea, but if you got the money for it, I do feel it’s worth it (though the one I used has a 3 day cure time for use in a shower, though….) to prevent water from even getting behind the tiles.
Hope this is helpful, and whatever you decide to do goes well.
Joe says
I forgot as well, with the cement boards, make sure to use thinset and mesh tape (alkali resistant tape specifically for cement boards…) in the seams and joints before applying your surface waterproofer. A waterproofer isn’t meant to fill say, quarter inch gaps between the boards. So make sure any seams or gaps are filled with thinset and floated out as flat as you can make it, then apply the liquid waterproofer after the thinset is dry. Ideally, too, using a fiber tape at the corners with the liquid waterproofers is ideal, but Lowes/HD/etc don’t sell the fiber tape, you’d need to go to a real tile shop and hope they have some, but as long as the corners/seams are thinsetted, most likely you’ll be fine.
Also, do not use plastic behind and a surface waterproofer, use one or the other. Using both could theoretically result in a “mold sandwich” because if any got past the surface waterproofer, it wouldn’t be able to evaporate out of the cement boards anymore.
DIYTileGuy says
You don’t need to waterproof the studs themselves. But the plastic barrier sounds like it did its job. You may have a bigger issue than moisture created during a normal shower.
DIYTileGuy says
Also, I read your comment as mold is getting behind the plastic on the non we side? If that correct, or is it ok the shower side?
James Davis says
Do I need to waterproof Durock for a non shower application.
DIYTileGuy says
No. Seams should still be taped though.
Steve Moreno says
I’ve been doing tile for 35 years and have never waterproofed hardibacker or used a vapor barrier behind it. I have no failed installs out there throughout all these years. I do tape off the seams and corners with thinset mortar which is important, however to note once those seems have cured I have mastic set many of these enclosures vertical surfaces with a high quality waterproof Mastic, which my theory on this is it is more flexible to any movement that may happen over time.
For many years back in time I specialized in old school mortar set shower pans, doing the membranes with a 3-ply hot mop application and an easy test drain, with the membrane itself sloped towards the weep holes of the drain for a very good reason. The membrane would wrap over a fabricated curb consisting of three 2x4s and extend up the walls 4-5″ be on the top of the curb. For many years I worked in San Francisco retrofitting the shower pans into existing mortar set showers stalls and enclosures in the old Victorians when they would go up for real estate sale, and the termite inspection report would reveal failure of the membrane in a water testing of the bottom part shower pan, achieved by plugging the drain and filling up the pan to the top of the curb and letting the water sit in there for 24 hours. In today’s world we have chloraloy and other type rubber membranes that can be utilized as the pan liner instead of boiling tar in a hot mop, however back then pens that were originally installed before using hot mops consisted of metal type pan formations usually lead or copper, and obviously overtime these would deteriorate and a 24-hour water test what’s your water coming out through the pan underneath the shower enclosure.
Retrofiting a new pan with a hot mop had the advantage of creating that needed slope in the surface toward the drain, however in today’s world of the rubber membranes it is important to create that slope in the horizontal surface underneath the membrane by whatever means, even though of if installed and glued together without it, would still not leak, it would become the gathering point of a mold generating stagnant pool of water, as the mortar set bed and tile floor are totally vitreous to 100% of all the water that comes from all areas of the shower when its being used, and the water that collects their needs to shed toward and down the drain to prevent such a condition from occurring.
I usually don’t post anything and forums like this, so please forgive my ramble here about my knowledge in this area. With over 30 years experience I’m pretty much an expert on leak troubleshooting, tracing / repairs, and installation of custom watertight showers. As stated I have been using the hardibacker in tile sets for years, without waterproofing the surface or or installing a vapor barrier between the stud and the back of the board, and have never had a failed installation. Reason? The product is impermeable.
Impermeability is the big secret in life-long maintenance-free watertight shower enclosures, meaning the surface of your final wall enclosure material is non vitreous to any prolonged exposure to water and moisture, meaning it never absorbs even a fraction of that exposure beyond its surface, no matter how long in time or how extensive that exposure is. That’s why those ‘ thin plastic shower panels’ held up so well over time, because they are impermeable. Many of our customers choose to have their enclosures done in cultured marble, Onyx or granite, a popular top choice as it also is an impermeable material, and works out quite well holding up over the years with minimal maintenance required in keeping up with the harsh conditions caused by continuous shower usage, whereas tile and it’s counterpart grout joints would require a lot of maintenance trying to keep it in good appearance and condition over time. Other examples of impermeable type enclosures would be the prefab molded fiberglass & acrylic types.
I should note here removing a tile from a mastic set install done properly will take pieces of the backer board with it, so it is a solid set and nothing less. Now as far as tile is concerned, this is where a big misnomer in the field may exist. While tile affect may be considerd waterproof , as it remains unaffected by contact with water, the tile itself is not impermeable to moisture, and is in fact vitreous to a certain fractional extent, depending on the type of tile, that is established in the spring for that tile. So the final effectiveness of a tile shower enclosure and keeping water and moisture contained through it’s usage over time, is completely dependent upon the type of subtrait it is installed upon. The best substrate of course would be a impermeable one, making the shower enclosure 100% contained, and requiring less maintenance and upkeep through its life. Currently the only such substrate for tile that is impermeable is He, which is why I use it.
No I know many old school wire and mortar tile setters will swear by this type of installation process as the only way, which goes back into time immemorial, with such installations having held up through the centuries in Roman and Greek architectures. However just like today’s fabricated concrete backer boards as well, Duraock and Wonderboard, mortar set tile installs are in fact permeable, to varying extents depending on circumstances, and will require a 15 pound felt or plastic vapor barrier be installed over the studs before any concrete backer board, or a wire and mortar base application is installed onto the vertical walls. Most all building departments require this, whereas with the hardibacker it is not required.
And again this is why independent waterproof shower pan membranes are required under mortar set tile shower floors, as they are totally permeable to the water that will penetrate them. Any one who knows the mortar set shower pan process, takes the floor tile and immerssis it into water for an hour or so before it is actually set into the mortar bed. This is so maximum water absorption with the given vitreous factor of the tile will have already occured so it does not draw any moisture out of the mortar and thinset in yhe curing process
To reiterate an impermeable surface absorbs absolutely no moisture at all because of the density of the atomic structure,
which is why hardibacker can be installed directly over framing and subfloor, and with corners and seams taped properly, and without any waterproofing needed on the surface, can have tile installed directly onto it without fear of a failed installation.
I have to wonder, have I developed OCD over all this s*** over the years? I fear so my friends, LOL And as such I apologize for the ramble but there’s my $0.02 of wisdom, gained from the experience of all my years, …..what a legacy.
A.T.I. General & Tile Contractor
Mikelyn says
I just had my carpenter tile my new shower upstairs. He did not waterproof the walls and I live in a coastal climate. I know by living by the water, I am going to have problems with leakage sooner than later. The tiles are on but have not been grouted yet, can I take the tiles off and down the thinset and waterproof over that or do I have to re do the backer board? I am so frustrated right now!
DIYTileGuy says
Conceivably, you could waterproof over the thinset.
It would have to be scraped smooth and the reinstalled tile will protrude out further than previously but it can be done.
John says
Hi, I’m doing a tub/shower enclosure with Durock. I called them about waterproofing and this is the response. Is this right no nothing?
I was thinking of redguard the backside or just hang plastic
Hello John,
I have included the Durock Installation guide for your reference. Durock does not require a water proofing treatment before tile is applied.
We do not test other companies products so we do not have any data on how well the Durock will perform with “Red Guard” applied over it.
Thank you,
[personal info removed]
DIYTileGuy says
Companies can make whatever claims they want. Typically, building code standards will require water management as does ANSI and TCNA.
For water management, I would recommend waterproofing the front side of Durock after the seams are taped and mudded. If you want to do the backside instead of the front then 4 mil plastic is the way to go.
D. L. Daniels says
Well, I think it important to distinguish between a couple different questions. “Waterproof” is too vague.
1. Is the material damaged by water?
As I understand it cement board is not. Sheetrock of course is damaged by moisture.
2. Is the material impermeable to water? Can water seep through it?
As I understand it, neither cement board or grout is impermeable. And many tiles aren’t either.
So, when I did my shower 6 years ago, I followed the instructions that the people at Menards gave me and put plastic sheet between the stud wall and the cement board. I put the plastic and the cement board and the tile over the lip of the tub. I am getting a little mold along that bottom edge which I have to scrub off every now and then, but I think it is just water that is sitting there where it runs from the surface of the tile, and not water seeping through the tile wall and getting caught by the plastic and running down.
DIYTileGuy says
So here’s the test that I did: I made a small box out of a scrap piece of GoBoard.
Before making the box, I peeled off the facing on both sides so the box was made out of simply the GoBoard core. Also, I sealed the box with sealant (seams only).
I filled it up with 3 inches of water and it’s held without leaking for about 3 days now.
I plan to do some further testing down the road but that’s what I know so far.
As far as the mold concern, I believe you are correct. Even fiberglass shower surrounds will mold.
Mark says
I am a kitchen cabinet installer in New Jersey and have been at a lot of houses that were having the tile done In showers and i can’t remember one job where they put any type of water proofing on the face of the CBU no matter which one was used or any plastic behind it. Now I am doing my own master bath and I’m doing everything except the tiling just to save me some time and I know for a fact the tile guy I’m using which I have dealt with in the past and is a professional tile person and a good one at that doesn’t waterproof the durock that he likes to use. Also my house was built in 87 and the tile in my shower was just installed over green sheetrock and to tell you the truth the wall was almost perfect behind the tile when I tore it out. So I dont know what to do. Either everyone I read about is going over the top to make sure their is no water issue or its total overkill. I always want the job done 100% right but I also dont want to waste time doing something that really isn’t necessary. I’m really just totally confused now on what should be done.
Carolyn Pearson says
You were lucky, Redoing showers on Green board, kept me in work. for 20+ yrs. You are really just gluing to the PAPER face. Think of wet cardboard……………. I refused to EVER tile on green board. Was on an Island, any word went around REAL fast. It’s better to be safe, than sorry. Two coats of the waterproofing is so easy to do.
DIYTileGuy says
Looks like I missed this one.
Not waterproofing doesn’t guarantee failure. I’ve seen plenty of green board tubs that were in good condition but also plenty that aren’t.
Having a waterproof membrane is an industry standard. Whether people choose to use one, or not, is a different matter.
Homeowners are becoming more knowledgeable about proper methods and not having a membrane could cause a conflict and mistrust with a project.
DIYTileGuy says
I understand why people say this but plastic behind cement board is a recognized method by the Tile Council of North America.
Carl says
A vapor barrier (plastic sheeting) is used in cold weather climates In Canada the entire house has a vapor barrier behind the Sheetrock. This prevents warm moist air from inside the house getting to the cold side of the insulation and condensing behind the outside wall. Nothing to do keeping concrete board dry
In warm climate the moist humid air is on the outside so you would want any vapor barrier on the outside of the insulation so it can’t get to the cold sheetrock wall inside the house and condensate.
While Concrete board should be coated with a liquid membrane 100 % coverage if grout cracks and water gets behind the tiles this will not prevent a mildew problem only prevent the wallboard from being part of the problem. The water will not awakes find a path out and if the shower is used daily will never totally dry. This is why you want to caulk corner where cracks usually occur and maintain the caulk
DIYTileGuy says
Yes. There is a difference in plastic used as a vapor barrier for the exterior of your house and plastic used as a moisture barrier in a shower system.
It can be the same product idea in exactly the same way but with two different functions.
My blog is about using it on regards to a shower enclosure.
Old Timmy says
If you take a new piece of Hardibacker and stick the corner of it in a 5-gallon bucket of water in no time at all it will absorb quite a bit of that water throughout the entire sheet. So if you don’t waterproof something that you know easily absorbs water and will, therefore, transmit it through to whatever it touches then why on earth wouldn’t you waterproof behind or in front of the product? Really folks. It’s a no- brainer that if you are doing a shower/tub enclosure with anything other than a complete solid surface product (manufactured product/not stone or tile), then you need to waterproof. I’ve built and remodeled several homes and learned the hard way. Waterproof unless you are using a solid surface tub/shower enclosure (manufactured product) – most home builders won’t install on a tub/shower anything but because of the warranty/service issues.
DIYTileGuy says
Thank you for your comments. I don’t know why people resist waterproofing either but some do.
newcastle says
For bathroom tile floor installation: Can you apply water proof primer to hardy backer board to protect the plywood subfloor underneath from water intrusion? Would the thin set mortar dry and set well ceramic tiles over a primed hardy backer board?
DIYTileGuy says
Perfectly fine to do this. If you really want it to be waterproof the perimeter should be siliconed also.
catalina bakas says
My question is going to be totally different, from a tile project. But I need to know if is even possible to attempt. I have a very large canvas painting, that I would like to put outside in the Florida sun. Possibly affixing it to a waterproof board, then a UV Epoxy Resin. Then placing it a pool area, exposed to Florida humidity. What are your thoughts?
DIYTileGuy says
Sounds like a neat idea but I really don’t have any analysis to provide. I would keep trying to find out more. :-)
Kaci says
:o That sounds super neat! You should update us on how it goes :) Maybe do a trial on a cheapo print from Walmart or something and see how it holds up :D
Adrienne says
Hi! thank you for the helpful post! I am trying to fix a moisture/mold problem around the top edge of my shower insert. The house was built in 1989 and unfortunately, I have no idea when the shower was done. There appears to be a plastic vapor barrier behind what I think is some kind of concrete backer board [or very very hard grey drywall]. Strangely there appears to be some kind of thick brown paper/cardboard on top of the board which was then sealed with drywall mud and paper tape [again, looks like drywall feel like concrete.]. Mold and moisture got into the drywall tape and mud and the paper backing of the board.
Questions, Is there a kind of backer board that has paper, and would it make sense to waterproof the front side even though there is a vapor barrier? I’m planning on scrapping off the moldy paper because without using a very heavy saw or sledgehammer I don’t think I can take this stuff down. then I was going to re-mud, seal with kilz and paint and caulk.
DIYTileGuy says
I think what you are saying is that you have fiberglass shower walls and the wall above is coming apart? The wall board could be normal drywall with the paper facing. It might be hardibacker if it’s coming out in really hard layers.
I don’t think waterproofing over the top is probably a good idea. Using good drywall mud might fix the issue?
Donna Pace says
I have a question. We are building a house and they only put durarock up to the head height even though the tile goes to the ceiling. We have a rain shower head also with regular drywall on the ceiling. I am telling them it should all be durarock as the moisture content will be high. The builders says no. They have already retiled 3 times because of the mistakes made and still don’t have it right as the bullnose is matt finish and the tile a gloss. Frustrated beyond belief at this point as I do my own tile work. What is the proper drywall to be used and up to what height? I’m ready to just ask for a refund of the shower and do it myself!
DIYTileGuy says
Even with a rain head I don’t think drywall at the top foot, or so, would be a problem. If the cement board is 6ft high and the rain head extends down maybe a foot then it’s not going to hurt anything.
Problems in a shower are 4ft and below. Showers don’t usually have problems at the 7ft high mark.
Sorry to hear about the frustrations. It’s no fun having to hire someone and then constantly watch and monitor how they are doing things.
Allie says
Help!! I’m about to redo my shower. I was removing the frame from the sliding doors and some tiles yanked away with it and the board behind was wet. We are just going to strip all the tiles and replace the cement boards then retile. I bought the hardibacker boards from home depot but the contractor says durarock or whatever it’s called is more durable overtime. We are using porcelain tiles to redo the whole shower area. Is there truth to this? I also suspected whoever O bought the house from hadnt put that rubber liner under the shower floor sand up the sides of the shower and the contractor confirmed it. Do i definitely have to dig up the shower floor so we can put in the liner etc or can we retile over the existing floor and use a drain extender?
DIYTileGuy says
If you don’t have a liner in your shower then you are in a world of trouble if you try to proceed with the existing shower floor. The shower floor will have to be removed down to the subfloor and rebuilt. The older liner showers are still fine but I would look into some of the new technology with shower waterproofing such as the Kerdi and Wedi system.
Sarah says
Hi DIYTileGuy,
After our master shower walls began to crumble, we hired a contractor to gut and redo it. They used a plastic liner at the bottom, and Hardibacker for the walls. In our contract, it says that they would seal the walls with a waterproof membrane. We can clearly see that they did not do this. With all of the conflicting information out of there, we don’t know how serious of a problem the missing membrane is. We’re also not happy our contractor didn’t fulfill his contract. How would you handle this situation? Thank you for your thoughts!
DIYTileGuy says
A lack of a waterproofing membrane doesn’t mean that failure is guaranteed. But the more things that are done incorrectly mean the higher risk of failure.
Here are some ideas on how to handle it:
You could try to get some money back from the contractor. You could have them extend the warranty in writing. You could ask them redo the shower.
Sarah says
Thank you for taking the time to reply to me, I appreciate it so much, we’re in a tough spot. We followed your advice, they agreed to extend their warranty up to 2 years, from 1. The last shower took eight years before the walls crumbled away, but anything helps. They declined to offer us a partial refund or a shower redo, which isn’t surprising of course. I appreciate your time!
DIYTileGuy says
I think it’s more your choice than theirs about which option if you had it outlined in the contract.
If they are reluctant to repair now then I think they’ll be reluctant in the future.
Amy says
Hi there! I’m trying to make sure I get the waterproofing right in my DIY shower remodel. We are planning to use Durock cement board. I’ve read that it is a bad idea to use BOTH plastic sheeting behind the cement board and to apply a waterproofing coat on top of the cement board. I live in a hot, humid climate. Which waterproofing method is better in this case? The shower is located on interior walls. The previous surround was pre-fab plastic glued to drywall. Except for a little mold on the drywall behind the leaky tub faucet, there was no evidence of mold in the walls.
I should note we are building a recessed shelf/alcove along the entire side (long) wall of the shower, so there will be a horizontal surface. I know that waterproofing is necessary, especially with the built-in shelf, but which method is best? Thanks!
DIYTileGuy says
I think you’re going to be best off using a topical waterproofing system. Redgard, Aqua Defense, Kerdi, or something along those lines. No plastic behind, just the waterproofing on the surface.
Amy says
Thanks!
Dan says
I am going to replace an alcove bathtub (60″ x 30″) and install Corian solid surface wall panel sheets above the new bathtub to a height of 72″ (in-lieu of replacing the 4″ x 4″ ceramic tile now in-place, which is affixed to 1/2″ green board).
In lieu of using green board (1/2″ thick) in the shower surround above the new bathtub I am considering the use of HardieBacker cement board (.42″ thick).
Question 1: Will I need to use some sort of shim between the backside of the HardieBacker Cement Board (.42″ thick) and the wall studs so that the front side of the HardieBacker Cement Board is on the same plane as the front side of the remaining green board (1/2″ thick) that is still in the alcove?
Question 2: Will I need to apply any water proofing to the front side of the HardieBacker Cement Board (e.g., seams and screw penetrations) before affixing the Corian solid surface wall panels with silicone adhesive?
Question 3: James Hardie Company introduced a new version of HardieBacker Cement Board in early 2019. The new version of HardieBacker Cement Board is called HardieBacker Cement Board with HydroDefense. The new cement board is supposed to be “water proof”. None of the retail stores or
tile supply houses in my area sell this new product. Can anyone tell me where this new product can be purchased?
DIYTileGuy says
1. I think you’ll probably need to shim it. Drywall shims are made for this.
2. I would think the Hardibackervshould be waterproof but you’ll want to check the Corian instructions to see how they want it set up.
3. I’ve heard of this product but have never seen it and don’t know where to buy it. You might look into the waterproof foam boards like Wedi, Kerdi, and GoBoard.
PapaCrafty says
Consider this… plastics condensate trapping moisture between the cement board and plastic this causing molds and mildew on the cement board algae on the plastic . This does not effect the other side which is a cavity that allows the condensation to evaporate. Therefore as far as the Tile Council of North America is concerned no structural damage will be caused to the studs or structure.
PapaCrafty says
Hardiebacker has a newer product called HydroDefense this is a waterproof product try that
Sam says
Why not remove the remaining green board and continue the HB up to the ceiling? That’d be the easiest thing to do, in my opinion.
Sam says
This is a contract dispute, not a tile issue. You know who handles contract disputes? An attorney! Seriously, Sarah, you got screwed. May I ask why you caved so easily? You said you were “in a tough spot.” What sort of tough spot were you in? Is the contractor your next door neighbor or your best friend’s husband or something? I hope you see this and respond.
Mark Meier says
I have 2 questions… First is my contractor placed Backeboard over regular sheetrock in the shower. Is this a problem or code violation? The second question is where in the code does it state to waterproof the backerboard. I just want something to show the contractor. Thanks in advance.
DIYTileGuy says
Installing cement board over drywall probably falls to whatever the manufacturer specifies. So, if the manufacturer of the backer board says it’s ok then it would be ok.
If you live in multifamily housing then it does get interesting on the shared walls because there are fire requirements.
But you’ll probably have to contact the manufacturer and see what they will say.
For waterproofing, this very article quotes directly from the TCNA handbook which is the industry standard. That is the quote that you’re looking for.
Jim says
Here’s what I’ve done on my tile showers and tub surrounds. I double all studs first then put either 1/2″ or 3/4″ cdx plywood. Then line the whole area with Grace Ice and water shield including past the edge of the tub or shower 12″ onto the floor. I use Dupont Flex wrap to seal all corners and niches. For tile tub surrounds, I do all the same including the floor and about 12″ or so above the tub flange line with the Grace. Then set and fasten the tub as required by the manufacturer, then Flexwrap over the flange onto the Grace, then finish Grace as high as needed. (I go up to the ceiling). Then I install the backer board, usually Durarock, tape and mud seams then apply tile. The Grace seals around the screws of the backer board. Never had cracks or leaks. I don’t even caulk anything because the corners don’t crack. The double studs and plywood strengthen the walls, no cracks. l double the floor joists if I can otherwise just install blocking to tie the joists together. I do use the shower pan membrane as well and Flexwarp around the drain flange. Lot’s of extra work, but it’s extremely waterproof and have zero call backs.
DIYTileGuy says
Sounds like you build for the long haul. The way that you’ve described in unconventional but it seems sound, to me. However, I still would not rely on the Grace, alone, when it comes to waterproofing horizontal surfaces like niches, benches, and the tops of half walls. I would still want a bonded membrane waterproofing on the surface. Something like Redgard or Kerdi but it doesn’t have to be those specific products. That way the waterproofing layer is over the top of any penetrations.
But I like how you think about the building process. I wish more people were inclined to exceed minimum standards.
Jim says
Thanks for the compliment. I do build for the long haul in all I do. I don’t like problems and it’s easier to take a few extra steps to make a better job that will last a long time. I get what you’re saying about horizontal surfaces and penetrations. By the time I get done with the Grace and Flexwrap, there ends up being at least (2) full layers of both, especially in my niches. The fasteners are completely sealed because of this. I can still access the backside of the niches I built in our tub surround 8 years ago on the wall opposite the shower head (a carpenters house is never done) and there is no leaking. They get a lot of water too. Not saying you’re extra step isn’t worth it, just saying I’ve not had any problems doing it this way. Well worth all the effort, I’ll say that.
DIYTileGuy says
Sounds like you’ve got it handled. Good luck in your build!
Molly says
I would like to create a curbless shower on concrete slab. How does this plan sound?
1. Chip out concrete slab deep enough to create new mortar bed with correct slope. 2. Vacuum dust and apply thinset slurry to newly exposed surface. 3. Create mortar bed with appropriate slope, 4. Attach kerdi membrane or another membrane to the pan surface, extend up the wall, and cover the entire bathroom floor with membrane following manufacturers instructions. In the shower, membrane covers walls entirely floor to ceiling, but in non shower area in the rest of bathroom, the membrane would only go a few inches up the wall. 5. Apply tile
Igor says
Holding Masters Degree in Civil Engineering from Russia and designed a lot of buildings and plants back in Russia, specifically thermo/hydro dynamics calculations of walls for different climates, I could say only one thing — you guys are not talking seriously, Right? Because serious talk would definitely be involving discussions of climate regions you are talking about.
The question with water barriers in showers, saunas and other high moisture/temperature rooms is not only related to possible direct leaks of water: While being more or less water tight, walls are for sure not air tight and any moisture in the form of evaporation possibly accumulating inside walls due to high moisture/temperature level of air inside and low moisture/temperature of air outside of such rooms could cause this moisture to condensate inside the body of the wall. Just imagine on one side (inside shower) surface of the wall you have temperature of 100F with 100% humidity, while on the other side you have outside temperature for example 50F and just 40% humidity. That means that somewhere inside the wall, you have some point with for example temperature 75F, Right? Now the question is, what humidity would be at that point? If it’s 100%, then you would have water condensation in there… Condensate, might cause huge damage to building structure not just due to bacterial/mold and etc., but also structurally. If we also imagine that somewhere inside the wall temperature drops below 0C, condensate will convert to ice, with expansion and etc.causing structural damages.
Contrary, if someone lives in hot and high humidity area (or near the ocean), where outside temperature/humidity is higher then inside shower/sauna, no point of installing water barrier exist, as there is no conditions for condensation inside the wall. However, in those climate areas, such water barrier required in other rooms that have air conditioning, refrigeration and etc. as condensation in the walls might happen from the moisture going in opposite direction (from outside to inside)
So, my point is: you cannot discuss this issue without knowing particulars of geographics/climate areas you are talking about.
DIYTileGuy says
Sounds like a good plan. If you go with Kerdi, they will want you to use Ditra on the floor as opposed to Kerdi. You would overlap the Kerdi from the shower floor onto the Ditra. They have good instructions in their handbook.
Molly says
How do I make up for the difference in height between the ditra and the Kerdi without interrupting the continuous waterproofing membrane? Would you put the ditra down and then float the mud pan to the top of the ditra, then place the Kerdi membrane over the shower floor overlapping the ditra by a couple inches? Thank you
DIYTileGuy says
Yes. Exactly what you mentioned but I’m pretty sure the Kerdi needs to overlap Ditra by more than 2-inches. The right amount is in the Kerdi handbook and I don’t remember what it is off-hand.
Eric says
Thank you, Igor! This is so true. I’ve been searching for hours for the best way to waterproof (or not) before tiling around my bathtub/shower, considering where I live: in a mild, coastal, rainy climate (in Seattle USA) that has hot summers but not so cold winters. Although I’m unable to understand your expert jargon, I do appreciate your addressing this issue!
Beverly Roberts says
Hi there. I have two wood columns at the entry way to my house. I would like to mosaic them with stained glass. I understand that I can’t adhere the glass directly to the wood columns as the pieces of glass will eventually fall off as the wood swells and shrinks. I was planning on Screwing durarock to the columns, and applying the glass to that. I would cover the 4 corners with wood trim and silicone all the seems. Do you think this will hold up? I live in the northeast. Many thanks.
DIYTileGuy says
I would think you’d want to waterproof the Durock and use a really good white thinset mortar. But I don’t see an issue with it.
Morley says
Hello
Are there any issues with installing 1/2″ Kerdi board over 3/4″ wall plywood that will be placed over the 3′-0″ wide plumbing wall of a shower. The shower is approx 6′-0 x 3′-0″ located at the end of a long bathroom wall. The plywood will be installed over the studs ( studs at 16″ oc) along the wall which includes the 3′-0″ shower wall.
The plywood is desired for several reasons: – backing for a wall hung toilet & to reduce the overall length of the 6′-0″ wall of the shower, slightly ( approx 3/4″), to fit the tile module .In addition the plywood would provide opportunity to fasten the handheld showerhead sliding bar at various locations. The shower & this entire wall will be tiled with 6″x18″ Carrara marble.
The Kerdi board would be screwed thru the plywood only at the stud locations.
Schluter says to only install over open studs but will not elaborate.
I have considered many options for this wall but much prefer plywood if there is no detriment to the shower wall.
DIYTileGuy says
I think it’s fine to install it over plywood. I’d be inclined to thinset it to the plywood and screw it both but I doubt that would be necessary.
Morley Walbaum says
Thanks for the quick reply.
I will be using the plywood.
Curious why Schluter would not allow this? Do they consider exter. grade plywood to be unstable. Too bad they wont offer an explanation.
DIYTileGuy says
I don’t think it’s just Schluter that doesn’t approve of it. It has to do with movement and deflection though.