That pesky bathtub flange. It doesn’t make a lot of sense to go to the trouble of waterproofing your bathtub walls if you don’t handle the flange properly.
But what is the proper way? And why do most residential remodels not do it that way?
Let’s dive in.
Estimated reading time: 4 minutes
The proper way to install backer board around a bathtub
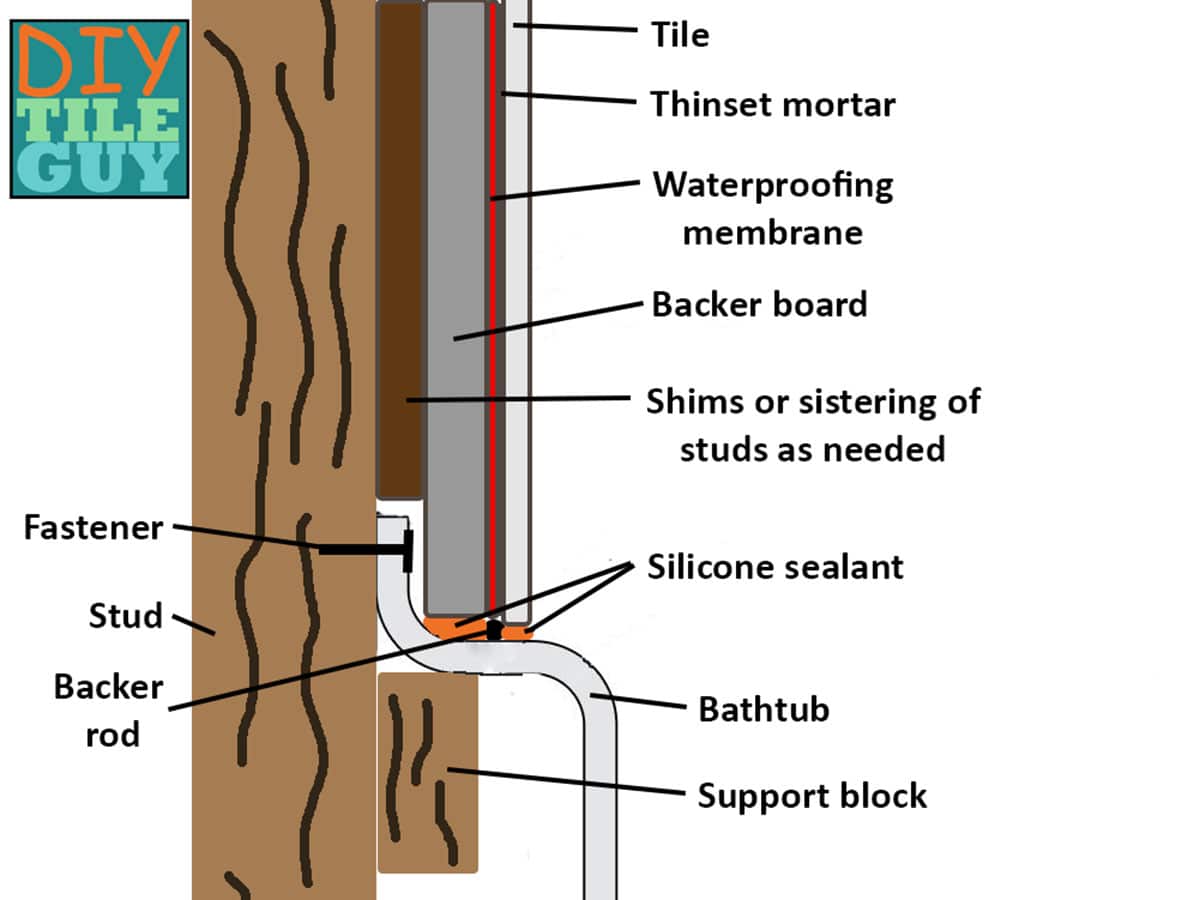
Most bathtub manufacturers want you to install the backer board around a bathtub so that it is shimmed out in front of the flange.
The backer board would then be installed with a 1/8-inch gap between the bottom of the board and the horizontal bathtub surface.
This is the by-the-book way of installing backer board around an alcove bathtub. [2,3]
This installation isn’t always ideal for renovators
The reason why this method is disliked by remodelers is that the tile backer wasn’t commonly installed that way, to begin with.
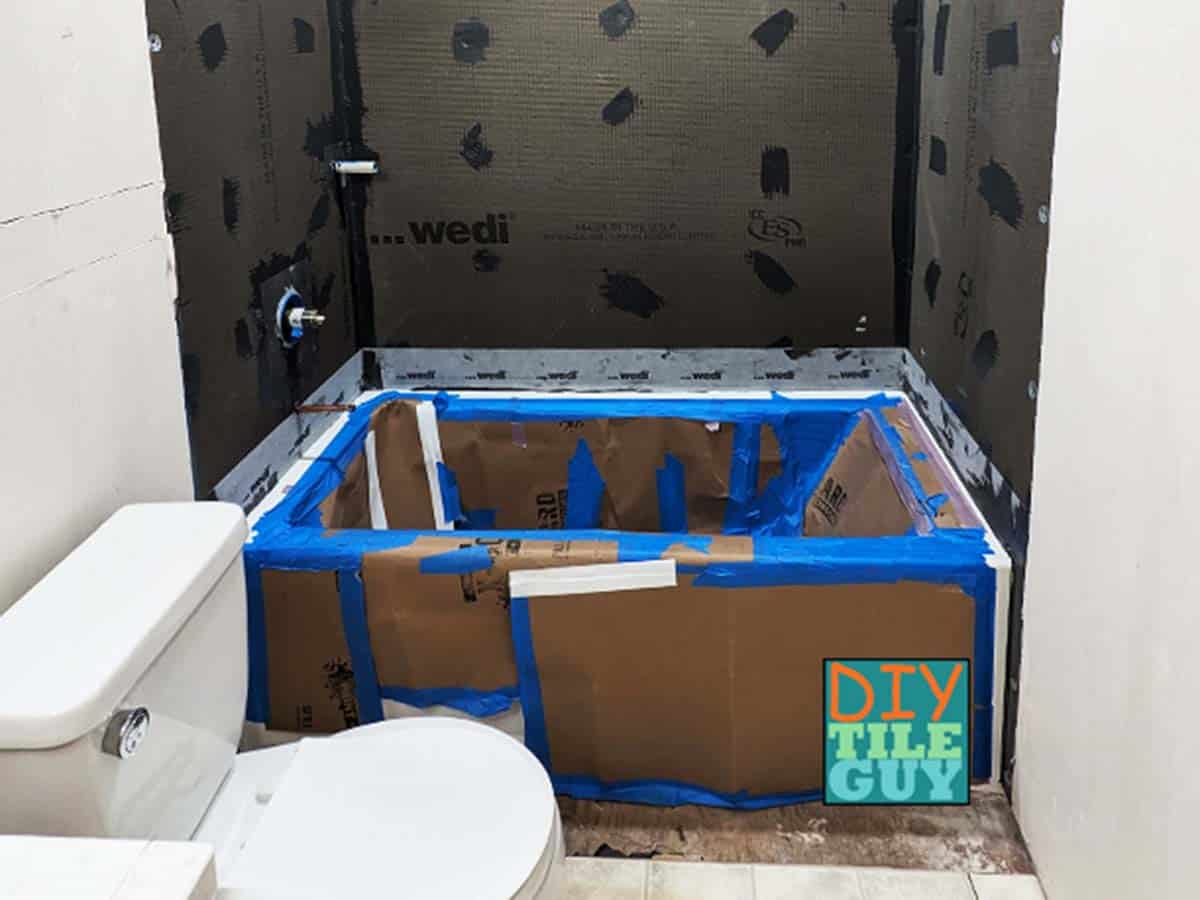
Consequently, to renovate that bathtub surround, walls have to be built so they are in front of the flange. This means that the walls on both ends of the bathtub may not align with the rest of the room.
Therefore, you may have to add a corner in the wall where there wasn’t one previously. See the photo below as an example.
Not only is this practice more work for the contractor, but homeowners may not like the look.
Some fiberglass bathtubs have thick flanges
Another factor is that some bathtubs have 1/4-inch thick flanges. That means you need to do a lot of shimming to get past the flange.
Both walls may have to be shimmed in. Further, shims may not be enough. You may have to sister studs on each side to properly support tile walls.
This adds additional costs to the project so that your installation can be ‘by the book.’
Is there another way?
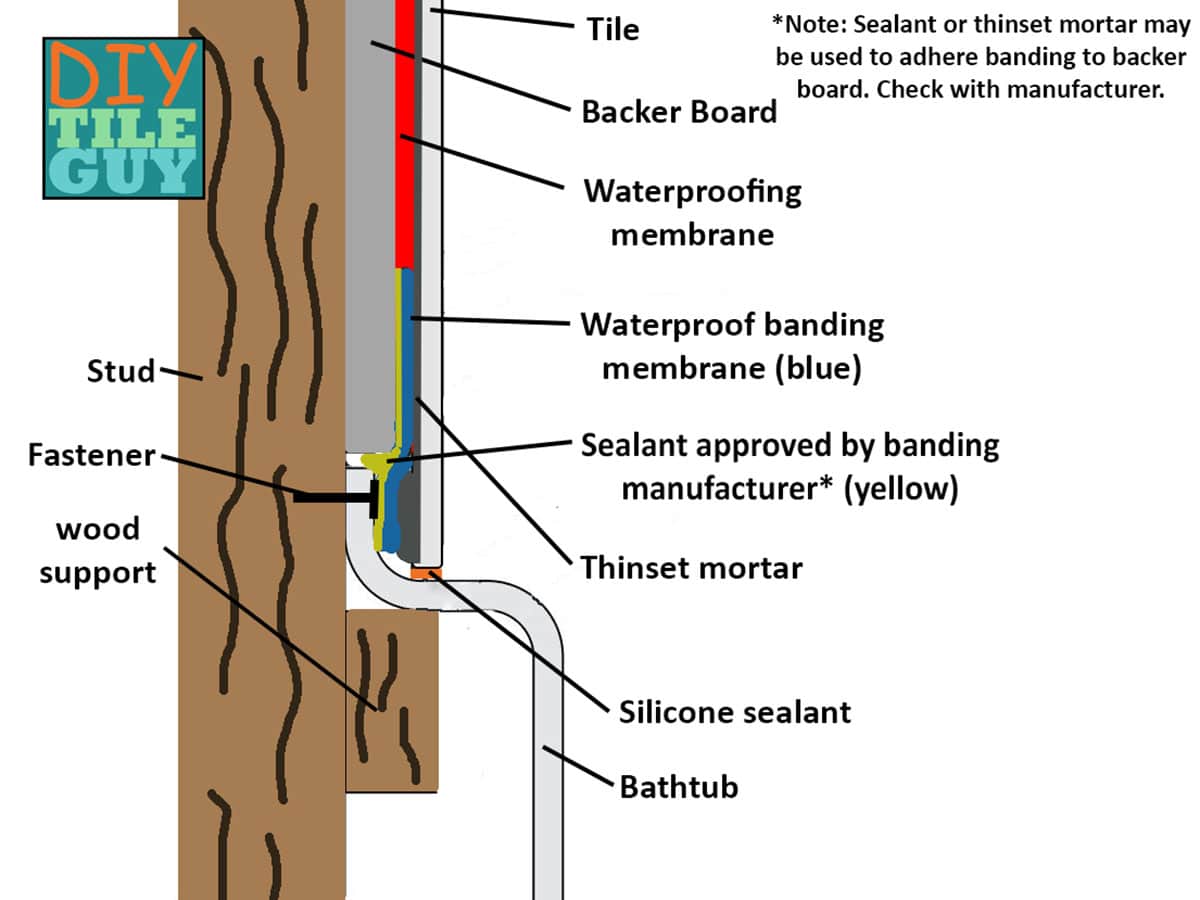
Band the Flange
Many companies, like Wedi, Schluter, and GoBoard, make a waterproof banding that works great for sealing backer board to the bathtub. For example, Schluter details this procedure on their website. [1]
They show applying Kerdi-fix, on the tub flange and thinset mortar on the backer board. Then, embeding the Kerdi-band into those adhesives.
This method is not the ‘exact and proper way.’ However, it’s often times more cost-effective than shimming the walls so they are in front of the flange.
Hopefully, we all know that cement board isn’t waterproof, and if not, this post has more information about waterproofing showers and bathtubs.
What is the Best Way of Sealing the Bathtub Flange for Tile?
The way to seal the bathtub flange for tile is going to depend on the situation and the customer.
On a commercial project, it’s common for contractors to follow specifications and industry standards exactly.
But for residential renovations, it’s not always this simple. Typically, the walls weren’t shimmed out to begin with.
So, now you have to explain to the homeowner why there will be additional costs just to follow the rules.
They may not like paying extra for shimmed walls that they don’t like as well.
That’s where this second option can be the best result.
How do you prefer building your bathtub walls?
Footnotes
- https://www.schluter.com/schluter-us/en_US/showers/shower_with_bathtub
- TCNA Handbook method B412; B419; B425; B430
- ANSI 108.01; 3.7, 3.8.1, 3.8.3
