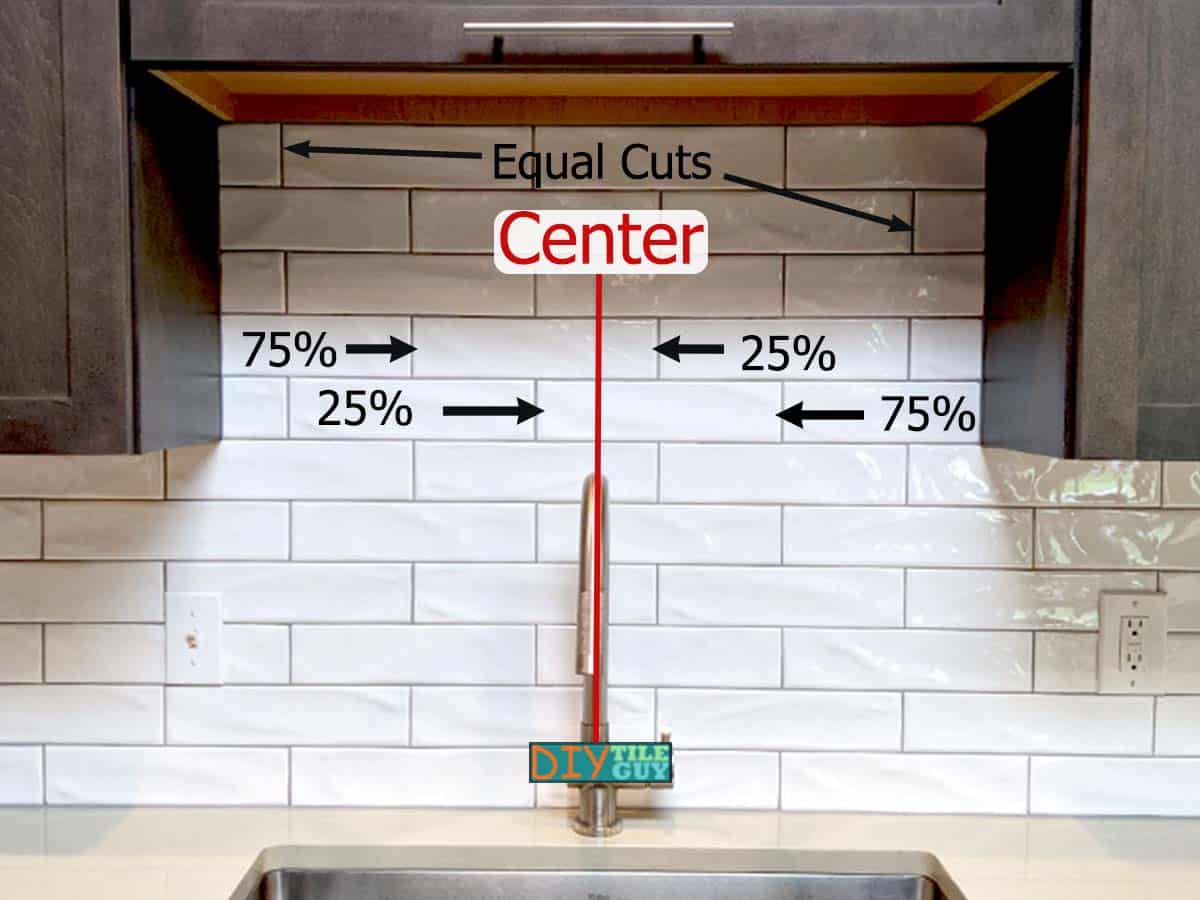
You’re installing subway tile, or perhaps 12×24 tiles, and you’ve put them on a center line and now have small cuts on each side.
Further, because it’s an offset pattern, there’s nothing you can really do, right? Every other row is going to have the sliver cut and that’s the way that it is.
Wrong!
There’s a way to fix this dilemma. It’s done with what I call quartering or a quarter’s layout.
Read on to learn how to fix this issue.
Estimated reading time: 4 minutes

What is a Quarters Tile Layout?
With quartering the layout, you are still going off of the center line. In other words, your layout will still be centered and balanced.
It’s just going to be centered a different way.
What Tile Patterns does the Quartering Layout work with?
Quartering works with any tile layout that has a 50% offset. This includes:
- Offset patterns including:
- Subway Tile
- 12×24 tiles
- 24×48 tiles
- Large subway tile
- Diagonal tile patterns (square tile)
Consequently, if you are using a 33% offset, which is a common tile pattern used with 12×24 tiles, then this technique won’t work.
When to use a Quarters Layout for Tile
As was stated in the intro, if you have small cuts right at the focal point of your wall or floor then this layout can fix that issue.
It can also be a useful technique whenever you don’t like how your normal ‘centered’ offset is manifesting itself.
But, keep in mind, it only works for 50% offsets. It doesn’t work for straight-lay tile patterns or 33% offsets.
Two Ways to Center a Tile
We all know that there are two ways to center your tile. You can:
- Center on the tile
- Center on the grout joint
With straight-lay tile patterns, if option 1 isn’t working then you switch to option 2. But, with a 50% offset, it would seem that you are out of options.
This is not the case.
How to Quarter your Tile Layout
Quartering is just what it sounds like, you are dividing the tile into quarters.
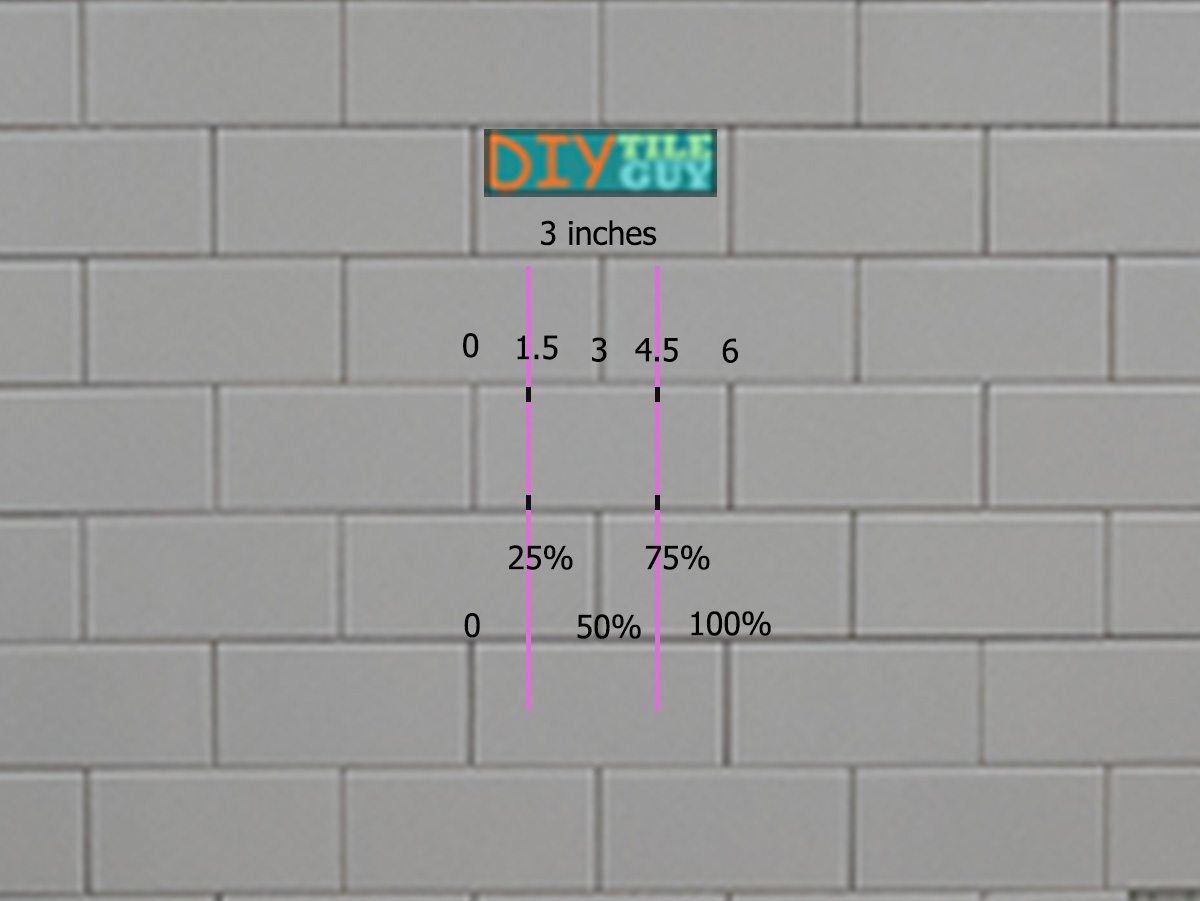
Let’s use 3×6 subway tiles for example.
For example, when you center a tile layout normally, you center on the ‘whole tile’ mark (the grout joint) or the ‘half-tile’ mark (center of the tile).
So, the grout joint goes on the center line and the next rows, above and below, will overlap this row by 3 inches.
25%|75% tile pattern
With a quarters layout, you would mark 1.5 inches (25%) on the tile and put that on the center line.
Then, the rows immediately above and below would still overlap by 3 inches. In fact, those rows will hit the center line at the 4.5-inch mark, or 75% of a tile.
So, instead of centering on the whole/half marks of the tile, you are centering on the 1-quarter/3-quarter sections.
The pattern still overlaps by 50%, or three inches. But it does it in a different way.
How do you know that this is a centered layout?
The reason that you know that this pattern is still centered is because of the size of the cuts on each side.
- On a whole-half layout, the cuts will be equal and in the same row.
- On a 1/4-3/4 layout, the cuts will be equal but in alternating rows
Quartering Wrap-up
Use this tile layout anytime that you have a 50% offset pattern and you are finding that conventional centering of the layout isn’t working for you.
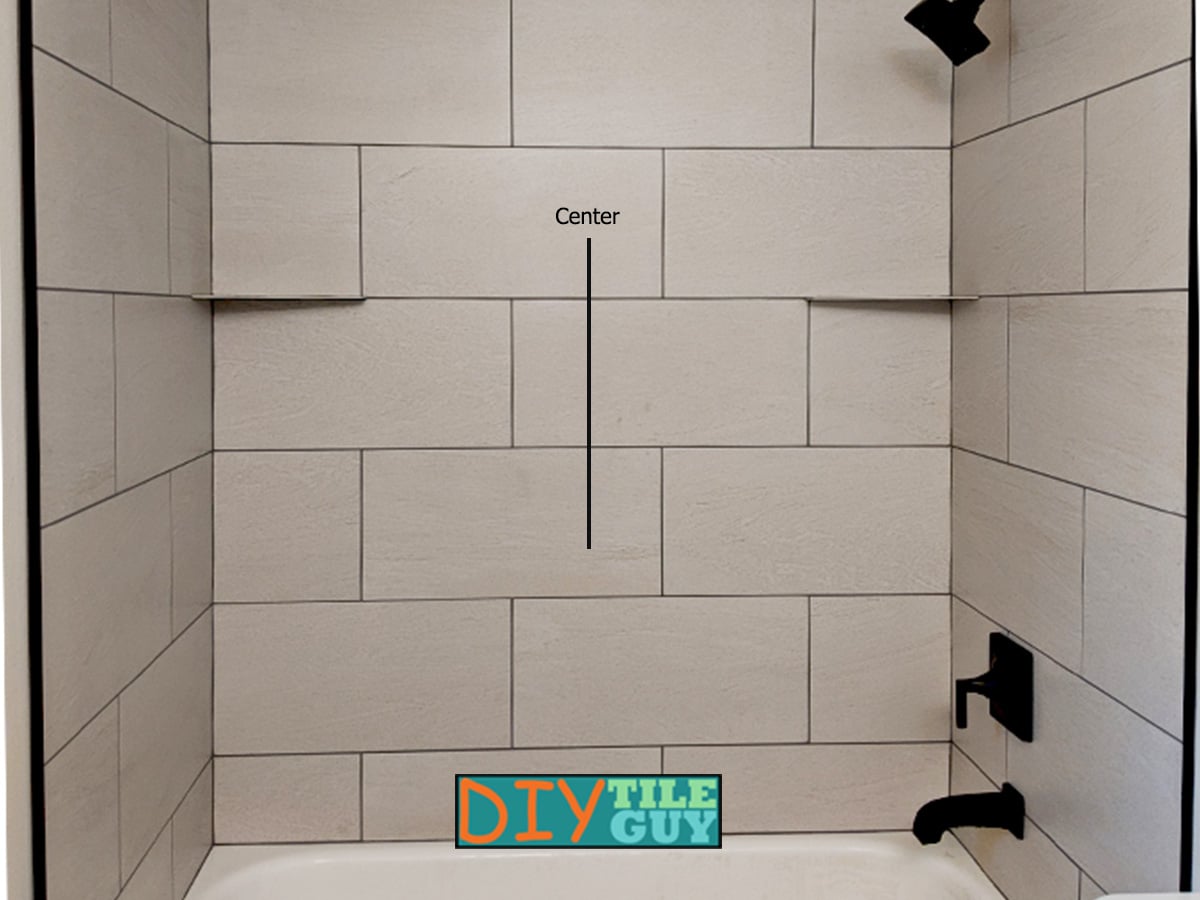
This is a common technique to use when laying out backsplashes, back walls of showers, and anytime you want a centered tile layout with a 50% offset.
Finally, make sure you don’t end up choosing one of the 4 worst tiles for a kitchen backsplash!
