Installing electrically heated floors is not overly difficult. However, there are some definite do’s and don’ts that you want to comply with.
That’s what this post is about. Ten sins that you don’t want to commit when installing electric floor heat.
Estimated reading time: 9 minutes

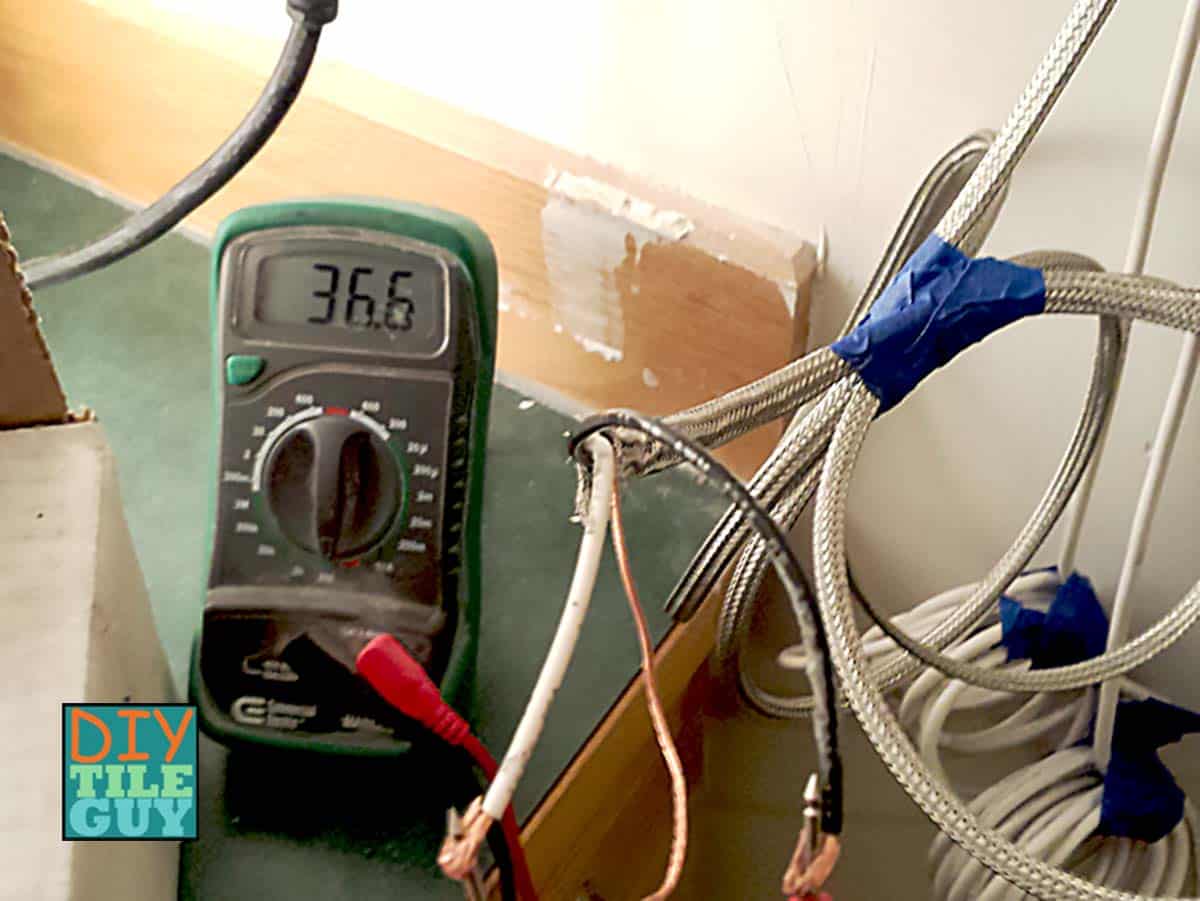
1. Not checking the resistance
You need to check the ohm resistance on electrically heated floors. I go over, in detail, how to check your floor heat resistance in another post.
You should do this before you ever take the wire out of the box. Even better, before you leave the store.
Then, continue checking the resistance throughout the duration of the installation.
2. Not Encasing the Hot/Cold Joint
An electrically heated wire has both a “hot” and a “cold” end to it.
Hot Lead of an electrically heated floor wire
The hot end of the wire is literally the portion of the wire that produces the heat. This is the portion of the wire that is installed in the flooring.
Cold Lead of an electrically heated floor wire
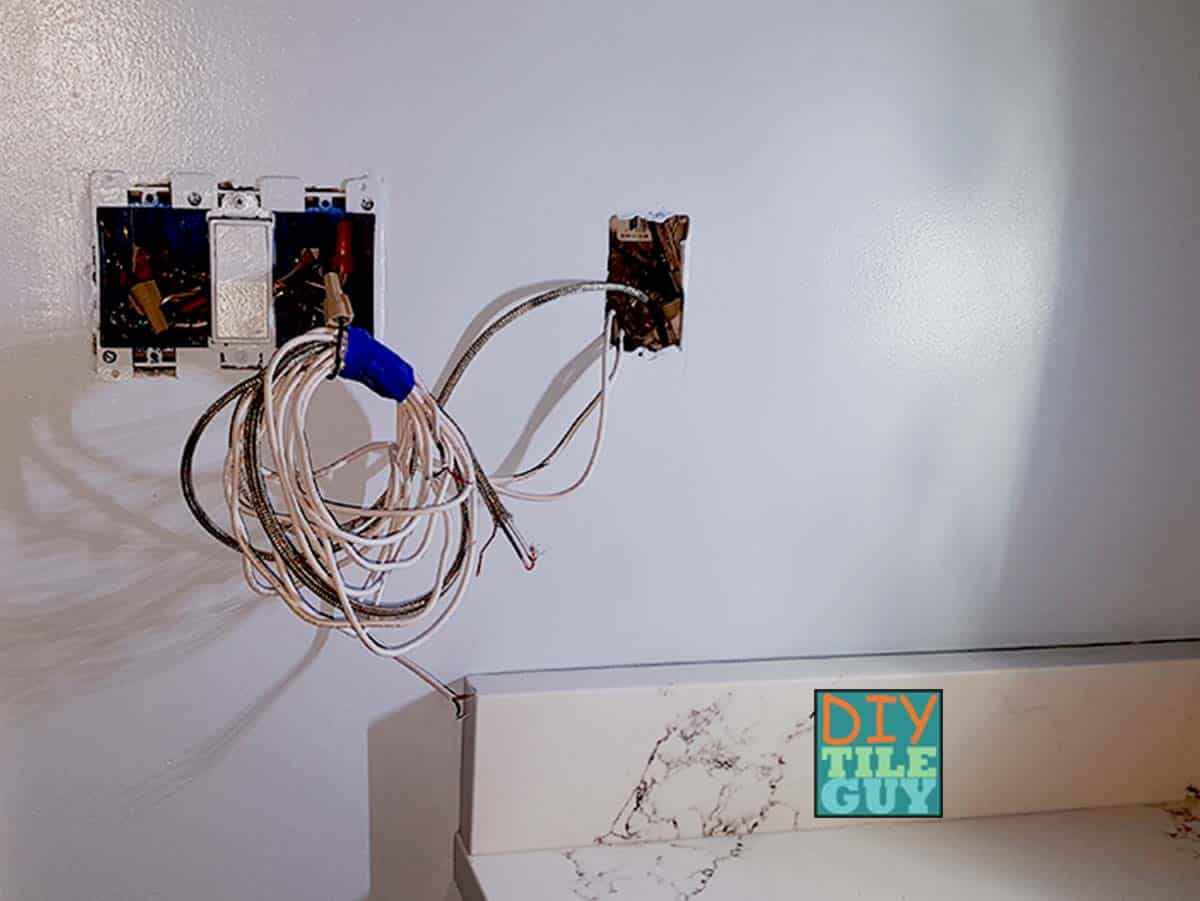
The cold portion of the wire does not heat up when power flows through it. This is the portion of the wire that gets run up the wall and connects to the thermostat.
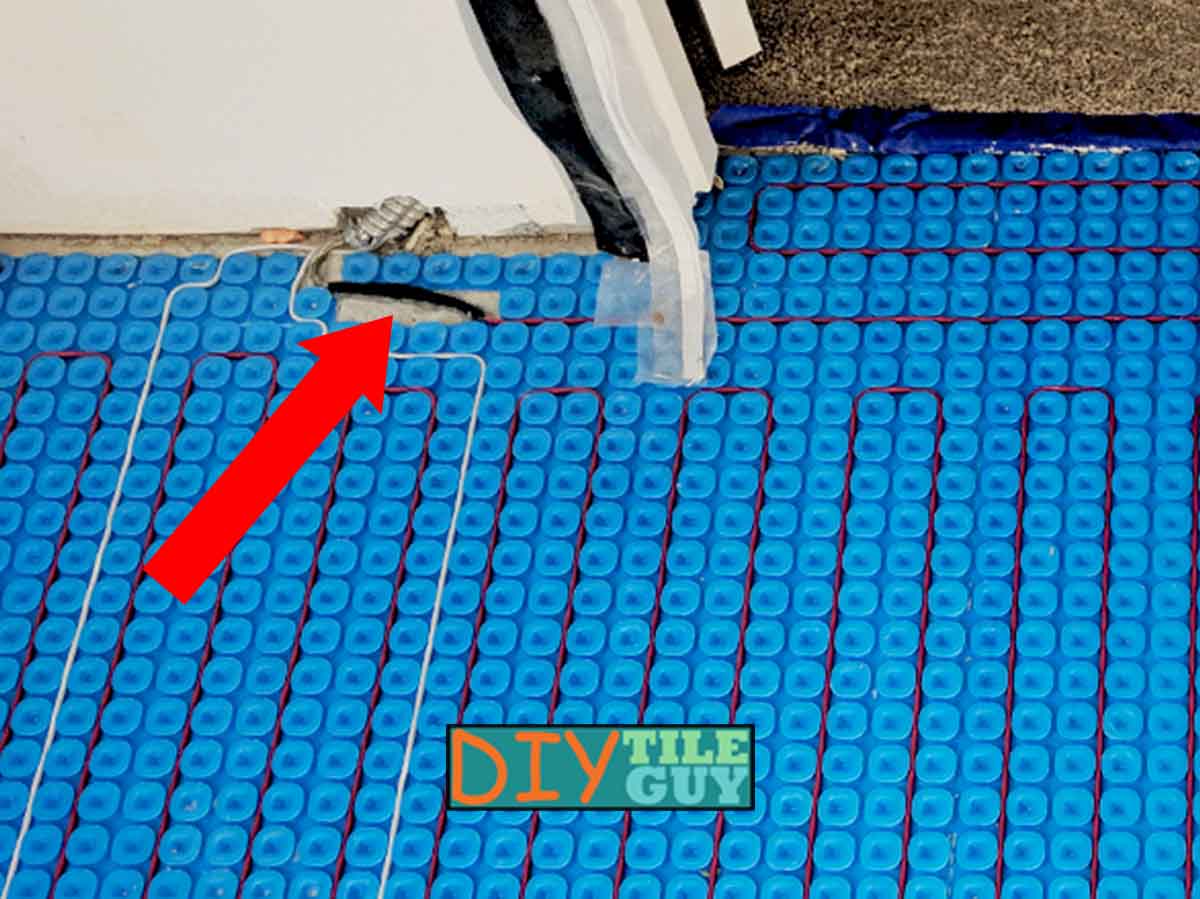
Hot/Cold lead junction
There is a point in the wire where the hot lead transitions to the cold. This transition is typically well-marked and noticeable.
Sometimes, this transition is bulky and thicker than the other parts of the wire. Other times, it will be marked with some sort of label.
Where to install the hot/cold transition
It’s critical that the hot/cold junction be installed in the floor and encased in mortar like the rest of the heated portion of the floor.
If the junction is bulky, you may have to remove some of the underlayment and maybe even part of the subfloor to get it to sit flat and even with the rest of the floor.
It may mean removing part of your Ditra-Heat membrane.
Other times, the transition is thin and will be clearly marked by the manufacturer.
Either way, make sure its encased in the mortar in the floor. Don’t run it up the wall or tuck it under the drywall.
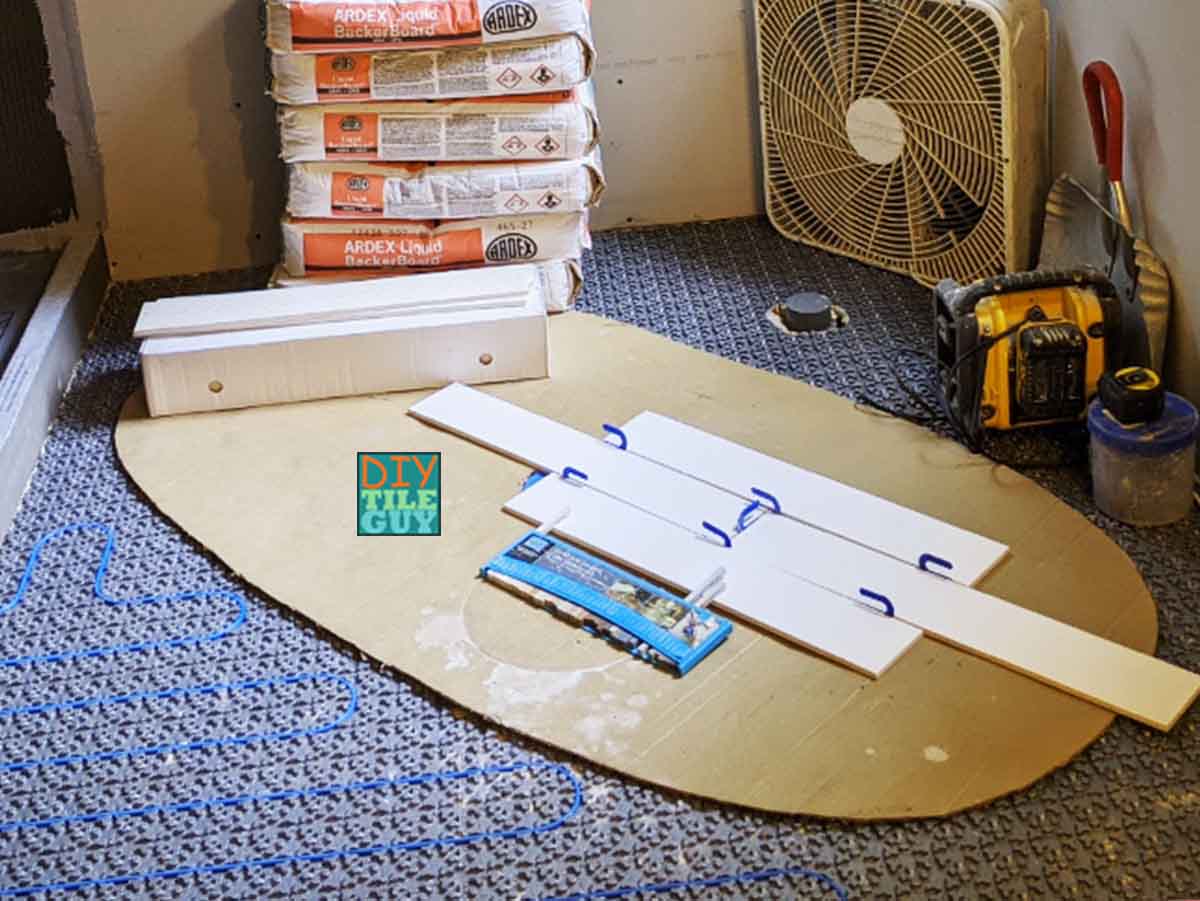
3. Installing electric radiant heat directly over concrete
Just like tile, concrete is a great conductor of heat. However, you want your electric heat to travel up to heat the tile rather than travel down and heat the entire concrete slab.
This is something that I discuss in a different post about concrete floor insulation.
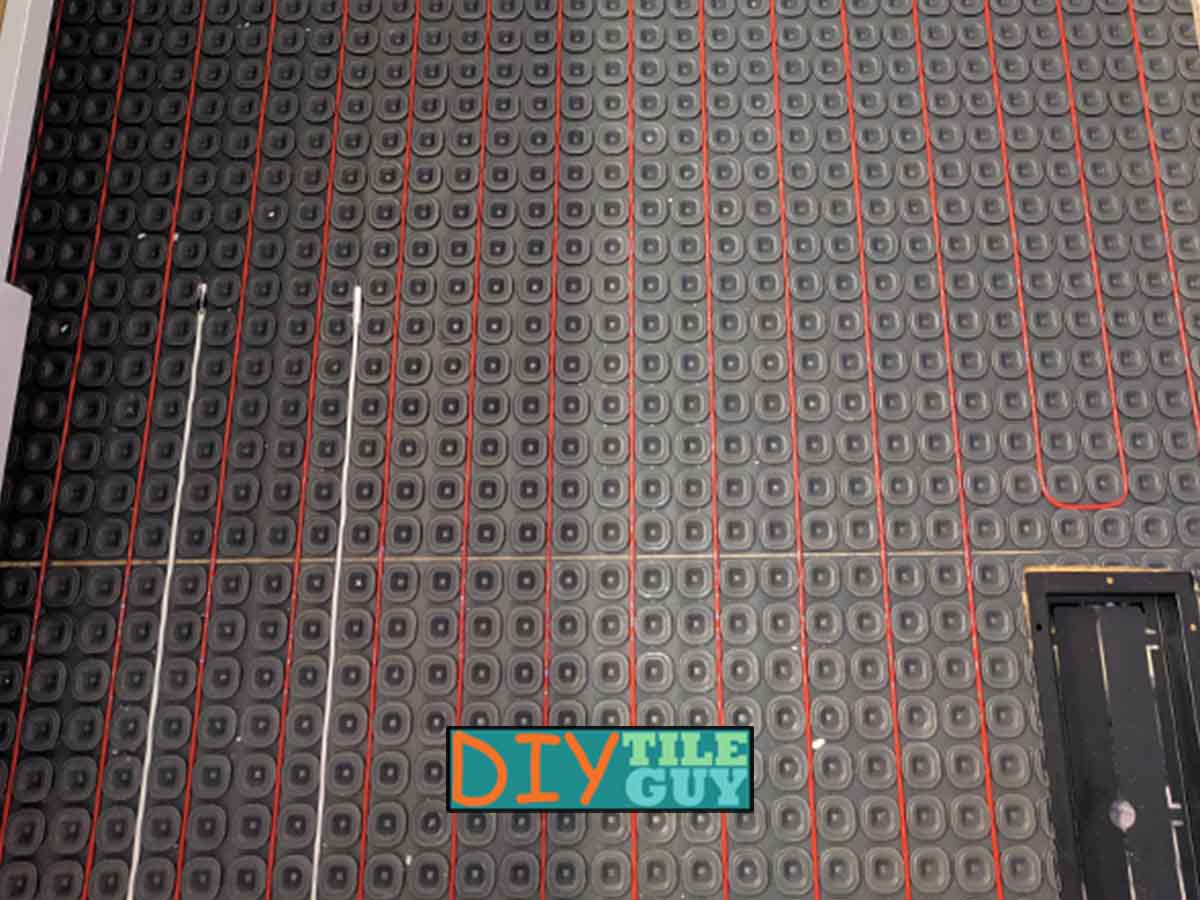
4. Inconsistent Heat Wire Spacing
Years ago, a fellow tile setter that I knew installed an electric floor heat system in a bathroom. As he was running the wire, he realized he wasn’t going to have enough to heat the entire floor.
What he should have done was pull the entire electric wire up and replan the floor. However, he didn’t do this.
Instead, he suddenly switched from two Ditra-Heat pegs to three Ditra-Heat pegs. Consequently, for half the room the wire was spaced 2.5 inches apart. Then, suddenly, it switched to 3.75 inches apart!
Well, the homeowner could feel where it changed and the result was the whole entire floor had to be torn out and reinstalled. Yes, this included the tile, electric heat wire, and underlayment.
It was a costly lesson learned.
Don’t make the same mistake. Keep your wire spacing consistent throughout the floor.
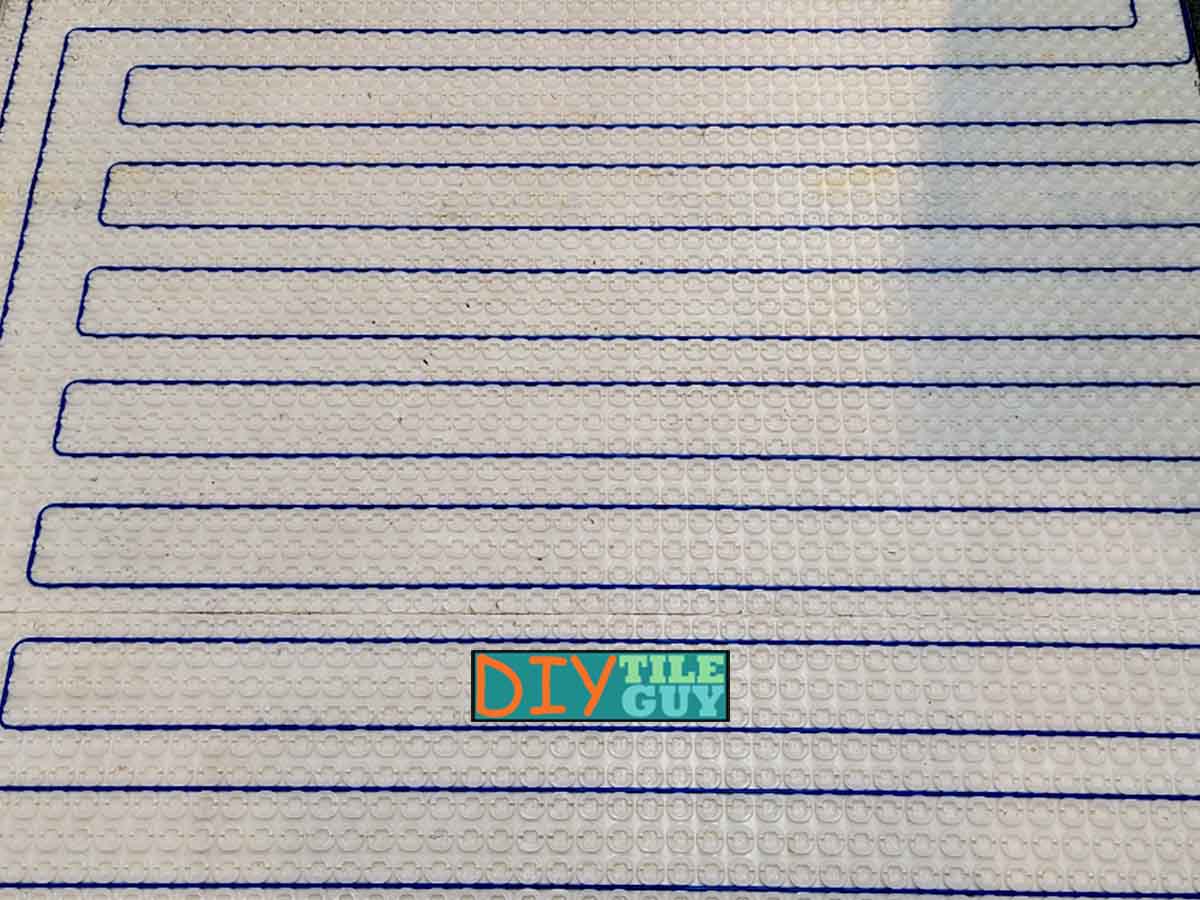
5. Crossing the Heat Wire
When running a heat cable system, you never want to cross the heated portion of the wire. You need to plan the layout so that the wire can run at a consistent spacing throughout the floor. Obviously, this doesn’t apply to every type of electric floor heat system out there.
Never cross your wires.
6. Sensors
Another rookie mistake is not installing the sensor in the floor.
The heat wire that you purchase will heat the floor just fine once it’s attached to a power source. But how hot does it need to heat up? When can it shut off? That’s where the sensor comes into play.
The sensor tells the thermostat what the temperature of the floor is. Then the thermostat knows when to heat things up and when to shut the heat off.
However, if you don’t install the sensor then the floor will constantly heat and never shut off.
Two sensors are better than one.
FYI, most floor heat companies recommend installing two sensors in the floor but only hooking one up at a time.
The thinking is that if one fails then there is another ready to hook up without tearing out any tile.
That being said, some companies provide two sensors and others require you to purchase a second. The sensors are not expensive so DIYTileGuy recommends you install two in your floors.
7. Match the Voltage
Electrically heated floors typically come in one of two types:
- 120 volt
- 240 volt
It’s important that you get the proper type for your house. So, if the electrician runs a 240V circuit, then you want to install a 240V heat system in the floor.
You definitely don’t want to purchase a 240V heat wire and find out your circuit is 120V. So make sure that you communicate with the electrician and understand exactly which electric floor heat system you need for your floor.
8. Cutting Wires
You definitely don’t want to cut the heat wire. Now, when I say heat wire, I’m talking about the portion that gets buried in the floor.
If you run your wire and find that you have too much, you can’t, simply, cut the wire and shorten its length.
Rather, you need to carefully figure out the length that you need and run the entire heated portion of the wire in the floor.
Trimming your floor heat wire
However, you can cut any excess length off the cold portion of the wire after it’s been run up the wall. Any wire that won’t fit into the thermostat’s electrical box can be trimmed.
Typically, it would be a licensed electrician that would handle any trimming of the wire.
9. Installing your electrically heated floor under things
Floor heat only needs to be installed where you walk. In fact, electrically heated floors should not be installed in places that have permanent fixtures, such as vanities.
So, make sure to map out where bathtubs, vanities, toilets, and other permanent fixtures are so you don’t run the heated wires under those areas.
Can underfloor heating go under a toilet?
You want to keep your electric radiant heat wires at least 4-inches away from the toilet flange to avoid melting the wax ring.
However, this requirement can differ slightly from manufacturer to manufacturer so be sure to consult the instruction manual for whichever floor heat system that you purchase.
10. Not taking photos
Finally, taking extensive photos of where the heat wires run can be invaluable,
For example, maybe you order a toilet that needs to be drilled into the tile? Do you know, for sure, that your wires aren’t in the way?
What about installing that door stop that you forgot about?
I can’t stress this enough. Take photos of where your electrically heated floor runs. It costs nothing and can save you tons of stress down the road.
Electrically Heated Floors Conclusion
Those are the 10 violations that you do not want to commit with electrically heated floors.
Is there anything that I missed?
FAQ about Electrically Heated Floors
Most manufacturers of electrically heated floors recommend that the floor heat be run on its own dedicated circuit.
Electric floor heat should not be run underneath permanent fixtures such as a vanity or bathtub. Further, you don’t want to place items on top of it with flat bottoms that can trap heat.
Furniture with legs would most likely be OK to place over the top of in-floor heating.
It is possible for dog beds to cause the underfloor heating to overheat so you’ll want to be careful and watch for potential issues if this is the case with your heated floor.
