A wet saw is a nice thing to have when you are installing tile.
But one of the problems is the water getting all over. Especially if you have it set up in a house or a sensitive area.
Also, if you are installing tile in the winter and you live in a cold climate you may want your saw inside where it’s warm. All of these reasons are why they’ve invented wet saw tents for tile saws.
Estimated reading time: 5 minutes
DIY Wet Saw Tent

This post contains affiliate links. The site owner may earn a commission should you click on an affiliate link and make a purchase. Read more
A lot of pros use these frequently and both Barwalt and MK make a version of the wet tile saw shack.
However, if you aren’t going to use it very frequently you might find that you’d rather keep the $350 in your pocket.
That’s where the DIY version of the wet saw tent comes into play. There’s more than one way to make these.
Here’s how I made mine.
The Parts
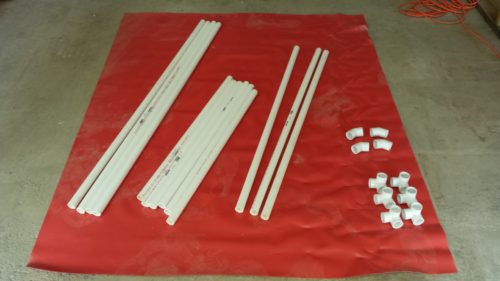
Here’s a list of the parts needed for the saw shack that I made:
The amazon links for the pipe are size specific. It’s much cheaper to go to your local hardware store and buy 10ft lengths and cut them to size.
- 4- 60-inch poles
- 3- 48-inch poles
- 6- 35-inch poles
- 4- 45-degree elbows
- 6- side outlet elbows (the corner pieces)
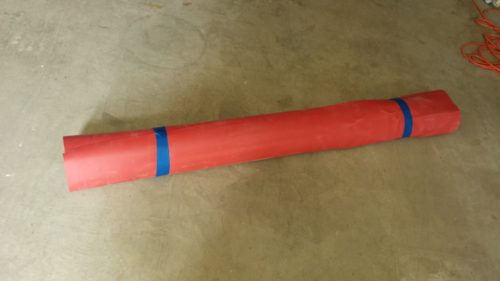
- 1- 6ft x 5ft 40 mil pvc shower pan liner (red above; not necessary for infrequent use. Just use the plastic at the bottom of the list)
- Several plastic clamps (duct tape would probably work or ?)
- 1- roll 4 mil clear plastic
The pipe is all 1-inch PVC pipe. I bought six pieces of 10 ft lengths and cut the poles to size accordingly. These types of shears work well to cut the pipe.
The shower pan liner is a very durable product but it is pricey. Probably around $35. To save money, you could instead use a plastic tarp or even double or quadruple up the plastic that you will use for the sides.
Assembling Your Wet Saw Tent

The assembly goes pretty easily. None of the parts are glued together. It’s all just friction fit. Two 48’s and two 60’s are all you need for the base along with 4 of the side outlet elbows for the corners.
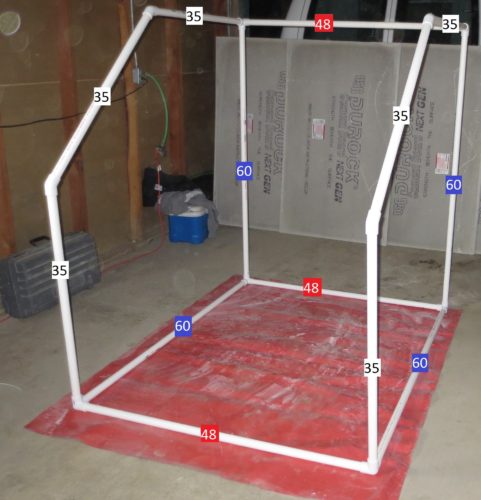
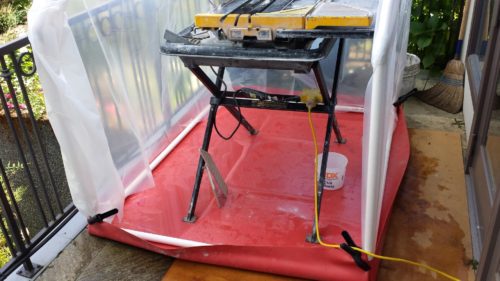
You can then assemble the walls as shown in the photo above.
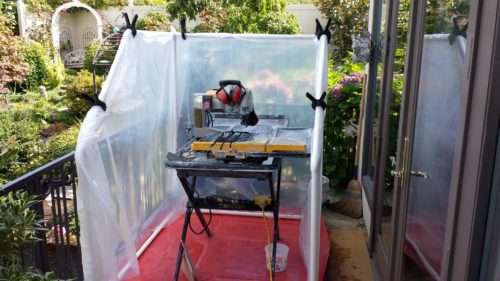
Then drape the clear plastic around the sides of your saw shack. It’s not a bad idea to tuck the plastic under the PVC frame. This should help to keep it from coming loose.
Then fold the corners up on the bottom liner to keep the water from running out. I used the clamps to hold it together.
Next time I set it up I’m going to actually glue the corners together with PVC glue so they are permanently folded up and can’t slip out of the clamps.
Your Finished DIY Tile Saw Shack
A tile wet saw tent is a nice thing to have when you need one. With a bit of creativity, you won’t have to break the bank to buy one.