Through my contact form, I get several questions from people about their projects.
As I was going through them I noticed a good number of them having to do with pebble tiles and porcelain wood tile so I thought I’d put together a post on just these two subjects.
I’ll get to others in a future Q&A. But for now, here are some of the questions- Questions are italicized:
Subject: Fusion Pro grout
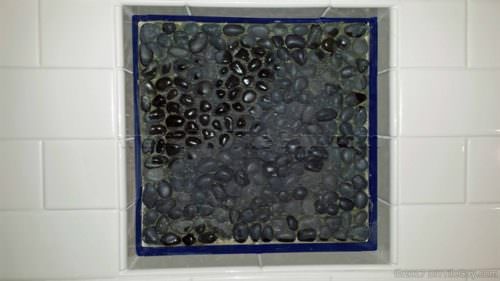
I used fusion pro in a walk-in shower with pebble tiles and it is failing it is coming off when you clean it looks like sand. Could you tell me what type of grout to use? The whole shower was done in pebble tiles I took the tile of the mesh mat and hand-laid each pebble I am in the process of grinding out the grout. Thank you! ~RD
DIYTileGuy: Fusion Pro grout isn’t supposed to be used with pebble tiles. For pebble tiles, the grout that you want to use is:
- Sanded cement grout: the easiest and cheapest but also has the least amount of stain-resistance and the color is most likely to fade over time.
- High-Performance cement grout: a good choice for pebble tiles but still should be sealed. Examples of this grout are Prism, Permacolor, and Ultracolor
- Epoxy grout: the best performer but is the most expensive and the most difficult to install. For epoxy, I like Spectralock Pro Premium.
What kind of Grout do I need for my project?
Stain Proof Grouts: Epoxy, urethane, and single component

Subject: pebble tiles shower floor
I am a general contractor and have been hired to lay pebble tiles on the Shower pan floor. I have done over 300 showers from scratch but have never used pebble-like this before. The product that the homeowner has selected is on 12″ X 12″ sheets. My concern is there is less than paper grout lines between stone how does grout fill area? I see potential mold building up between ungrouted joints? Tile Vendor says they have used them numerous times for pan floors, I have asked him for a letter and references from past jobs, that he has not provided yet, I disagree, What are your thoughts? ~MG
DIYTileGuy: Some pebble tiles are very close together as you say.
The first thing that I would encourage you to do is to get something in writing from the manufacturer of the pebble tile that gives a grout recommendation.
They may not care as a lot of the pebble tiles are imported from who knows where.
If they don’t have anything to say then I would look at using either high-performance cement grout or epoxy grout. The advantage of either one of these is that they can be used in grout joints both thick and thin.
Miserable Pebble Tile Flooring
Subject: Quartz-cut pebble stone tile on shower floor help me
I am desperate . I have the biggest mess. My master bath shower is 6 X 5 . I put the above on floor. It keeps cracking and I have sealed it. Water then gets under the quartz rocks. Then I add more grout. Pre mix sand . I have grouted it so much it is like icing that gets thicker and thicker! Help me ~DC
DIYTileGuy: It’s hard to say what the cause is. If you put in Fusion Pro grout then I would refer you to the first question in this post.
If your shower is leaking then you have bigger problems than your pebble tile shower floor. It sounds like Fusion or Flexcolor CQ grout, though. Neither of which is rated for pebble tile.
Subject: Thank you thank you thank you!
I’ve been dry fitting a pebble tile floor and getting very frustrated, since I could often see the seam, I was wondering if the grout would also reveal it. Thanks for the excellent short on that problem and how to combat it. I was thinking about removing some of the edge pebbles and trying to then bridging them across the seam area. I think I like your idea better, though both would be a pain! Thank you! I’ve bookmarked this for reference as I go along. ~MH
DIYTileGuy: Good! I’m glad someone is reading this blog BEFORE they start in on their pebble tiles project. For reference, this is the post that he is referring to:

Subject: large format tile laying
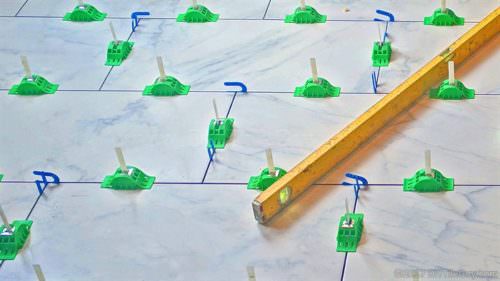
I am new to tiling, but am pretty handy around the house. I am installing large, 8 x 40″, wood-like tile planks. My plan is to offset by 1/3 and use the Progress Pro Leveling System. A few questions:
- do you recommend using 1/8 or 1/16 grout lines?
- what do you think of the Progress Pro system?
- do I need to put 1 leveler on each corner and two in-between, or is 1 enough at the point where the side planks will intersect on the side?
- is there a formula for determining the number of pieces I need to purchase for the leveling system?
- I’m hoping to finish 1/2 of a 300 sq foot room in a day, is that reasonable? I’m hoping to have at least one other person assist. ~MK
DIYTileGuy:
- 1/8 inch grout joints are going to be easier going.
- I haven’t tried the Progress Pro leveling system. I think it’s the one with the blue cylinders that turn? Should be ok.
- Usually, you don’t want to put the levelers on the corners. Keep them in about 3 inches or so. You want thinset under every corner.
- I hate to refer you to a competitor’s site but the Tuscan Leveling system website has a quantity estimator page.
- It’s doable but I doubt it’s reasonable. I’d figure 3-4 days plus a grout day.
Subject: Need best lenghts / widiths or desired sizes for porcelain wood tile? Also problems with popping noises and finding many existing tiles now sounding loose and or hollow?
I need help on 2 questions,
1st is I have 1,100 square feet of flooring to do. I,m looking at and thinking of using a 48 inch long to as much as 72 long porcelain tiles and one width between 6-10 inches wide (no random widths as yet in my thinking unless it is smarter). After reading about the other problem solving is this asking too much of tiles to be installed with a butt joint? What width should I have on the grout joint and is there a certain softer expanding grout (Part of problem #2), on the properly prepared concrete floor?
Delta Cruzer 7-inch Tile Saw vs Dewalt D24000 | Tool Review
2nd and the more serious problem to understand and solve is I’ve had 6 ceramic square 16″ tiles buckle up 3/4 of a inch into each other in a 4 foot wide hallway. We started hearing popping noises 2-3 days earlier, I have since found 20 or so more sounding hollow as if they have lost their full attachment. All together the tiled areas total about 140 tiles.. My new solar panels now allowed us to really use the air conditioning mostly at 73 degrees and during that time the outside temperature was at 100 degrees for hours daily during a week long period.
So I think the A/C being on for so long caused the humidity to be very low inside. The tiles were grouted into the side base boards and had no give. Does any EXPANSION of the foundation CONCRETE VERSUS THE TILES EVER DO THIS? This house and original tile floor has been trouble free for it’s life of 23 years.
PLEASE HELP!! ~PL
DIYTileGuy: The buckling of the floor tiles is caused by a lack of movement. This is exactly why you can’t butt joint the tiles- they have nowhere to go.
Take a look at this post that shows how to allow movement in the tile. But you’re right, the heat was part of the problem.
The Little Known Cause of your Loose Floor Tiles
Subject: Grouting a Stone Pebble Mosaic Tile in a bathroom
We are in the process of installing this pebble tiles in our bathroom. We are ready to clean and then grout the tiles. Do we need to seal the tile before we grout or not? We are using Pro Grout Excel at the tile store’s recommendation. ~LO
DIYTileGuy: First, check with the manufacturer of the pebble tiles. They should have some instructions that answer this very question.
Then make a mock-up with leftover pebbles and grout them and see how they turn out. You might do half and half: half with sealer and a half without. Once satisfied- grout your pebble tiles.

Subject: porcelain tile and “all the way through color”
One of the differences between ceramic tile and porcelain tile, as I understand it, is that the harder porcelain tile has the color all the way through, whereas softer ceramic tile has surface glazed, but once through the surface, it’s that typical “red-dirt” clay color.
- Do I understand correctly.
- Does this mean the “wood-look” porcelain tile has color all the way through it?
Primary concern is what will happen to the final surface finish of the tile 10-20 years later. We’d hate to see the fancy top coat be worn away and leave the ugly substrate visible.~LS
DIYTileGuy: Not quite. The difference between ceramic and porcelain tiles has to do with their absorption rates. Basically, porcelain tiles are just ceramic tiles that have been heated up hotter.
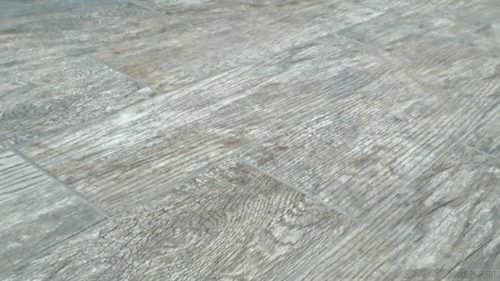
Many of the porcelain tiles are clay-backed and have glazing on the top. In fact, probably every porcelain wood tile is made this way. The printing of porcelain tiles is fantastic nowadays.
As you mentioned, there are also through-body porcelain tiles. Also, called color body, solid body, thru body porcelain.
These have the top color all the way through- they don’t have the glazed coating. So if these tiles chip you still see the same color in the chipped area.
Your porcelain wood tiles, however, are not through-body porcelain tiles. The wood grains don’t go all the way through.
So, yes, the glazing could chip off or the surface wears over time (a long time). The chips in the glazing would expose the tile backing.
But this doesn’t mean that they aren’t durable though. A lot of how durable they are will depend on how they were manufactured which is a case-by-case basis.
But technology in porcelain is more advanced than ever and we just don’t know what’s going to happen 20 years down the road yet.
So that’s all the questions for this post. I’ll answer some more questions in a future Q&A. Cheers!